01-Qwen3.5-4B vLLM 部署调用
vLLM 简介
vLLM 框架是一个高效的大语言模型推理和部署服务系统,具备以下特性:
高效的内存管理:通过 PagedAttention 算法,vLLM 实现了对 KV 缓存的高效管理,减少了内存浪费,优化了模型的运行效率。
高吞吐量:vLLM 支持异步处理和连续批处理请求,显著提高了模型推理的吞吐量,加速了文本生成和处理速度。
易用性:vLLM 与 HuggingFace 模型无缝集成,支持多种流行的大型语言模型,简化了模型部署和推理的过程。兼容 OpenAI 的 API 服务器。
多模态:vLLM 同时支持文本与多模态(图像/视频)推理,Qwen3.5-4B 作为统一视觉-语言底座,可在 vLLM 中直接提供图文服务。
Qwen3.5官方明确说明模型权重同时兼容Hugging Face Transformers、vLLM、SGLang、KTransformers等推理框架。本教程使用vLLM进行部署,文中的启动日志与接口返回均为实测真实输出。
关于 Qwen3.5-4B 架构
Qwen3.5-4B 采用高效的混合架构:将 Gated Delta Network(门控增量网络,一种线性注意力) 与传统全注意力(Full Attention)层交错堆叠(每 4 层中 3 层线性注意力 + 1 层全注意力),在保持强大能力的同时大幅降低长序列的推理显存与延迟。同时它默认开启思维链(Thinking)模式,在最终回答前生成 ... 推理过程。
由于该架构较新,请确保安装较新版本的
vLLM(本教程实测vLLM 0.23.0)与transformers>=4.57,以保证对qwen3_5模型类型的支持。vLLM 启动时会自动识别并选用Triton/FLA GDN线性注意力算子。
环境准备
本文实测基础环境如下:
----------------
ubuntu 22.04
python 3.12
NVIDIA 驱动 580.105.08(支持 CUDA 13.0)
GPU: RTX 4090 D (24G)
torch 2.11.0+cu128
vllm 0.23.0
----------------本文默认学习者已配置好
Pytorch (cuda)环境,如未配置请先自行安装。
首先 pip 换源加速下载并安装依赖包:
python -m pip install --upgrade pip
pip config set global.index-url https://pypi.tuna.tsinghua.edu.cn/simple

pip install modelscope
pip install "transformers>=4.57"
pip install openai安装 vLLM。vLLM 0.23.0 是基于 CUDA 13 编译的版本,其编译扩展 vllm._C 依赖 libcudart.so.13;而默认从镜像源安装的 torch 是 CPU 版本,无法使用 GPU。因此需要先从 PyTorch 官方源安装带 CUDA 的 torch 2.11.0:
# 先装带 CUDA 的 torch(vLLM 0.23 需要 torch==2.11.0)
pip install torch==2.11.0 torchvision==0.26.0 torchaudio==2.11.0 \
    --index-url https://download.pytorch.org/whl/cu128

# 再装 vLLM(会自动拉取 flashinfer、cutlass-dsl、humming-kernels 等依赖)
pip install "vllm==0.23.0"重要:设置 CUDA 库搜索路径。由于
vLLM 0.23.0是 CUDA 13 构建,而上面装的是torch+cu128,启动时会报ImportError: libcudart.so.13: cannot open shared object file。vLLM的依赖已经把 CUDA 13 运行库装到了site-packages/nvidia/下,只需把这些路径加入LD_LIBRARY_PATH即可:bash # 写入 ~/.bashrc 永久生效 NVLIB=$(find /root/miniconda3/lib/python3.12/site-packages/nvidia -type d -name lib | tr '\n' ':') echo "export LD_LIBRARY_PATH=\${NVLIB}\${LD_LIBRARY_PATH:-}" >> ~/.bashrc source ~/.bashrc # 验证 vLLM 可正常导入 python -c "import vllm; print(vllm.__version__)"若你的显卡驱动支持 CUDA 13(如本文 580.105.08),也可以直接安装torch+cu130(--index-url https://download.pytorch.org/whl/cu130),与vLLM 0.23.0完全匹配,则无需上述LD_LIBRARY_PATH设置。
考虑到部分同学配置环境可能会遇到一些问题,我们在 AutoDL 平台准备了 Qwen3 的环境镜像,点击下方链接并直接创建 Autodl 示例即可。 https://www.codewithgpu.com/i/datawhalechina/self-llm/Qwen3
模型下载
使用 modelscope 中的 snapshot_download 函数下载模型,第一个参数为模型名称,参数 cache_dir 为模型的下载路径。
新建 model_download.py 文件并在其中输入以下内容,粘贴代码后记得保存文件。
# model_download.py
from modelscope import snapshot_download

model_dir = snapshot_download('Qwen/Qwen3.5-4B', cache_dir='/root/autodl-tmp')
print(f"模型下载完成,保存路径为:{model_dir}")然后在终端中输入 python model_download.py 执行下载,这里需要耐心等待一段时间直到模型下载完成。
注意:记得修改
cache_dir为你的模型下载路径哦~
创建兼容 OpenAI API 接口的服务器
Qwen3.5-4B 兼容 OpenAI API 协议,我们可以直接使用 vLLM 创建 OpenAI API 服务器。默认会在 http://localhost:8000 启动服务器,实现模型列表、completions 和 chat completions 端口。
常用启动参数:
--host / --port:指定地址与端口
--model:模型路径
--served-model-name:服务对外的模型名称
--max-model-len:模型最大上下文长度(4B 模型在 24G 显存上建议 4096,显存富余可调大)
--gpu-memory-utilization:GPU 显存占用比例(默认 0.9,显存紧张可调低)
--trust-remote-code:信任远程代码
复制以下命令到终端,即可启动 Qwen3.5-4B 的 API 服务:
vllm serve /root/autodl-tmp/Qwen/Qwen3.5-4B \
    --served-model-name Qwen3.5-4B \
    --max-model-len 4096 \
    --gpu-memory-utilization 0.9 \
    --trust-remote-code \
--host 0.0.0.0 --port 8000启动过程中会打印大量日志,关键的实测启动日志如下(vLLM 识别出 Qwen3_5ForConditionalGeneration 架构,并为线性注意力层选用 GDN 算子):
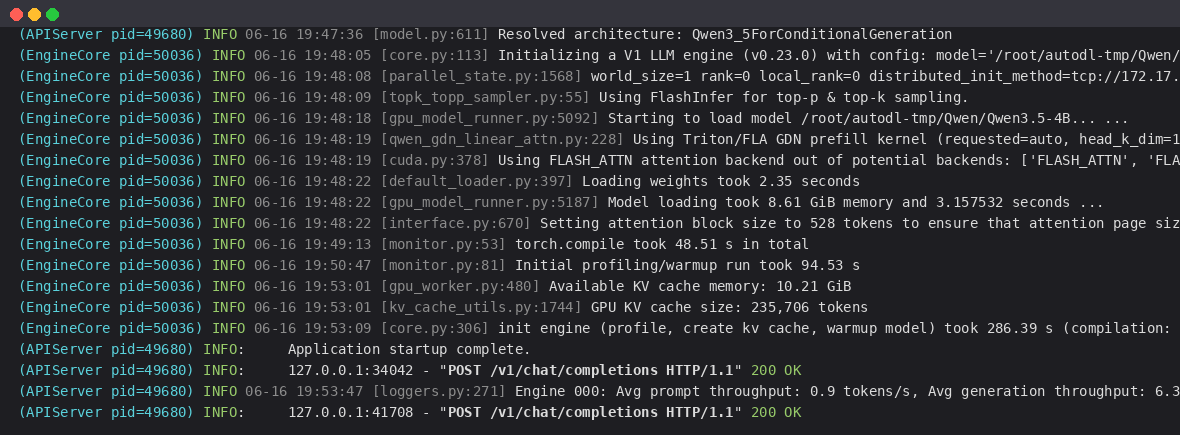
对应的关键日志行(已去除颜色码):
(APIServer) INFO [model.py:611] Resolved architecture: Qwen3_5ForConditionalGeneration
(APIServer) INFO [model.py:1745] Using max model len 4096
(EngineCore) INFO [core.py:113] Initializing a V1 LLM engine (v0.23.0) ...
(EngineCore) INFO [topk_topp_sampler.py:55] Using FlashInfer for top-p & top-k sampling.
(EngineCore) INFO [gpu_model_runner.py:5092] Starting to load model /root/autodl-tmp/Qwen/Qwen3.5-4B...
(EngineCore) INFO [qwen_gdn_linear_attn.py:228] Using Triton/FLA GDN prefill kernel (requested=auto, head_k_dim=128).
(EngineCore) INFO [cuda.py:378] Using FLASH_ATTN attention backend out of potential backends: ['FLASH_ATTN', 'FLASHINFER', 'TRITON_ATTN', 'FLEX_ATTENTION'].
(EngineCore) INFO [default_loader.py:397] Loading weights took 2.35 seconds
(EngineCore) INFO [gpu_model_runner.py:5187] Model loading took 8.61 GiB memory and 3.16 seconds
(EngineCore) INFO [monitor.py:53] torch.compile took 48.51 s in total
(EngineCore) INFO [gpu_worker.py:480] Available KV cache memory: 10.21 GiB
(EngineCore) INFO [kv_cache_utils.py:1744] GPU KV cache size: 235,706 tokens
(EngineCore) INFO [core.py:306] init engine (profile, create kv cache, warmup model) took 286.39 s (compilation: 48.51 s)
(APIServer) INFO: Application startup complete.说明:首次启动会触发
torch.compile编译与 profiling warmup(实测初始化耗时约 286s),编译结果会缓存到~/.cache/vllm/,后续启动会明显加快。出现Application startup complete.即说明服务成功启动。
通过 curl 命令查看当前的模型列表
curl http://localhost:8000/v1/models实测返回值如下所示:
{
  "object": "list",
  "data": [
    {
      "id": "Qwen3.5-4B",
      "object": "model",
      "created": 1781610820,
      "owned_by": "vllm",
      "root": "/root/autodl-tmp/Qwen/Qwen3.5-4B",
      "parent": null,
      "max_model_len": 4096
    }
  ]
}思考模式与非思考模式
Qwen3.5 默认开启思考模式。在 chat/completions 接口中,可通过 chat_template_kwargs.enable_thinking 按请求级别控制:
默认(思考模式):模型先输出 ... 推理过程,再给出最终答案
非思考模式:传入 enable_thinking=false,模型不输出 `` 标签
用 curl 测试 Chat Completions(思考模式)
curl http://localhost:8000/v1/chat/completions \
    -H "Content-Type: application/json" \
    -d '{
        "model": "Qwen3.5-4B",
        "messages": [
            {"role": "user", "content": "5的阶乘是多少?"}
        ],
        "temperature": 1.0,
        "top_p": 0.95,
        "max_tokens": 768,
        "extra_body": {"chat_template_kwargs": {"enable_thinking": true}}
}'实测返回值如下所示(content 中先是 ... 思考过程,其后是最终答案,finish_reason 为 stop 表示正常结束):
{
  "id": "chatcmpl-984a75743a984720",
  "object": "chat.completion",
  "model": "Qwen3.5-4B",
  "choices": [
    {
      "index": 0,
      "message": {
        "role": "assistant",
        "content": "Here's a thinking process that leads to the answer:\n\n1. **Analyze the Request:** 用户问的是 5 的阶乘 ...\n2. **Define Factorial:** n! = n × (n-1) × ... × 1\n3. **Calculate 5!:** 5 × 4 = 20, 20 × 3 = 60, 60 × 2 = 120, 120 × 1 = 120\n...\n</think>\n\n5 的阶乘(记作 5!)是 **120**。\n\n计算过程如下:\n$$5! = 5 \\times 4 \\times 3 \\times 2 \\times 1 = 120$$"
      },
      "finish_reason": "stop"
    }
  ],
  "usage": {
    "prompt_tokens": 16,
    "completion_tokens": 590,
    "total_tokens": 606
  }
}可以看到,开启思考模式时,模型先在 ... 中给出推理过程,再输出最终答案 5 的阶乘是 120。
用 Python 脚本请求(非思考模式)
# vllm_openai_chat_completions.py
from openai import OpenAI

client = OpenAI(
    api_key="sk-xxx",                       # 随便填写,只是为了通过接口参数校验
    base_url="http://localhost:8000/v1",
)

# 非思考模式:传入 enable_thinking=false
chat_outputs = client.chat.completions.create(
    model="Qwen3.5-4B",
    messages=[{"role": "user", "content": "用一句话介绍深度学习。"}],
    extra_body={"chat_template_kwargs": {"enable_thinking": False}},
)
print(chat_outputs.choices[0].message.content)python vllm_openai_chat_completions.py实测发现:
Qwen3.5-4B即使在非思考模式下,也可能在content开头先输出一段简短的「思考过程」文字(不再用` 标签包裹),随后才给出最终回答,且小模型容易在max_tokens较小时被截断(finish_reason: length)。如需直接、简短的回答,可适当调大max_tokens` 或换用更大的型号。
运行时日志
在请求处理过程中,API 后端会持续打印对应的日志与统计信息(吞吐、显存占用等),便于观测服务状态。实测的运行时日志如下:

(EngineCore) INFO [core.py:306] init engine (profile, create kv cache, warmup model) took 286.39 s (compilation: 48.51 s)
(APIServer) INFO [base.py:227] Multi-modal warmup completed in 25.118s
(APIServer) INFO:     Application startup complete.
(APIServer) INFO:     127.0.0.1:34042 - "POST /v1/chat/completions HTTP/1.1" 200 OK
(APIServer) INFO [loggers.py:271] Engine 000: Avg prompt throughput: 0.9 tokens/s, Avg generation throughput: 6.3 tokens/s, Running: 1 reqs, Waiting: 0 reqs, GPU KV cache usage: 0.6%
(APIServer) INFO: 127.0.0.1:41708 - "POST /v1/chat/completions HTTP/1.1" 200 OK多模态(图文)调用示例
由于 Qwen3.5-4B 自带视觉编码器,vLLM 部署后也支持图像输入:
# vllm_multimodal.py
from openai import OpenAI

client = OpenAI(api_key="sk-xxx", base_url="http://localhost:8000/v1")

response = client.chat.completions.create(
    model="Qwen3.5-4B",
    messages=[{
        "role": "user",
        "content": [
            {"type": "image_url", "image_url": {"url": "https://example.com/image.jpg"}},
            {"type": "text", "text": "请描述这张图片的内容。"},
        ],
    }],
)
print(response.choices[0].message.content)提示:多模态请求需要 vLLM 加载模型的视觉部分。若只需文本服务、希望进一步节省显存,可使用
--limit-mm-per-prompt '{"image": 0}'关闭图像输入。
离线推理(可选)
除启动服务外,也可以直接用 vLLM 的 LLM 引擎做离线推理:
# vllm_model.py
from vllm import LLM, SamplingParams
from transformers import AutoTokenizer

model = '/root/autodl-tmp/Qwen/Qwen3.5-4B'
tokenizer = AutoTokenizer.from_pretrained(model, use_fast=False)

messages = [{"role": "user", "content": "你是谁?"}]
text = tokenizer.apply_chat_template(
    messages, tokenize=False, add_generation_prompt=True,
    enable_thinking=False,   # 关闭思考模式
)

# 官方推荐非思考模式参数:temperature=0.7, top_p=0.8, top_k=20, presence_penalty=1.5
sampling_params = SamplingParams(temperature=0.7, top_p=0.8, top_k=20,
                                 max_tokens=512, presence_penalty=1.5)
llm = LLM(model=model, max_model_len=4096, trust_remote_code=True)
outputs = llm.generate([text], sampling_params)
print(outputs[0].outputs[0].text)采样参数建议(来自 Qwen 官方): - 思考模式(通用任务):
temperature=1.0, top_p=0.95, top_k=20, presence_penalty=1.5- 思考模式(精确编码):temperature=0.6, top_p=0.95, top_k=20, presence_penalty=0.0- 非思考模式(通用任务):temperature=0.7, top_p=0.8, top_k=20, presence_penalty=1.5注意:不同推理框架对采样参数的支持情况略有差异,请以实际为准。
02-Qwen3.5-4B SGLang 部署调用
SGLang 简介
SGLang 是一款专为大语言模型(LLM)/多模态模型设计的高性能推理与服务框架。它在提升大模型在复杂任务编排、长上下文处理及高并发请求下的执行效率方面表现出色,是连接底层硬件算力与上层 AI 应用的高效桥梁。对开发者而言,SGLang 极大简化了部署流程:
后端一键启动:无需复杂的配置文件,一条命令即可完成环境适配与服务发布。
前端无缝对接:直接沿用现有的 OpenAI SDK 或标准 HTTP 调用,无需额外的学习与适配成本。
高性能:支持 RadixAttention(前缀复用)、连续批处理、CUDA Graph 等加速技术。
多模态:原生支持视觉-语言模型,Qwen3.5-4B 可在其中提供图文服务。
Qwen3.5官方明确说明模型权重同时兼容Hugging Face Transformers、vLLM、SGLang、KTransformers等推理框架。本教程使用SGLang进行部署,文中的启动日志与接口返回均为实测真实输出。
关于 Qwen3.5-4B 架构
Qwen3.5-4B 采用高效的混合架构:将 Gated Delta Network(门控增量网络,一种线性注意力) 与传统全注意力(Full Attention)层交错堆叠(每 4 层中 3 层线性注意力 + 1 层全注意力)。SGLang 启动时会自动识别该混合架构,并为其选用 Triton GDN 算子(TritonGDNKernel),无需手动配置。
环境准备
本文实测基础环境如下:
----------------
ubuntu 22.04
python 3.12
NVIDIA 驱动 580.105.08(支持 CUDA 13.0)
GPU: RTX 4090 D (24G, sm89)
torch 2.11.0+cu128
sglang 0.5.13.post1
----------------本文默认学习者已配置好
Pytorch (cuda)环境,如未配置请先自行安装。
首先 pip 换源加速下载并安装依赖包:
python -m pip install --upgrade pip
pip config set global.index-url https://pypi.tuna.tsinghua.edu.cn/simple

pip install modelscope
pip install "transformers>=4.57"
pip install openai安装 SGLang。SGLang 0.5.13 依赖 torch==2.11.0、flashinfer==0.6.12 等较重的栈,建议先装好带 CUDA 的 torch,再装 sglang:
# 1. 先装带 CUDA 的 torch(sglang 需要 torch==2.11.0)
pip install torch==2.11.0 torchvision==0.26.0 torchaudio==2.11.0 \
    --index-url https://download.pytorch.org/whl/cu128

# 2. 安装 sglang(会自动拉取 flashinfer、cutlass-dsl、humming-kernels 等依赖)
pip install "sglang[all]==0.5.13.post1"关键:为 RTX 4090(sm89)安装匹配的 sglang-kernel。默认从 PyPI 装的
sglang-kernel是 CUDA 13 / sm90+(Hopper/Blackwell)构建,在 4090(sm89)上会报Could not load any common_ops library! Expected variant: SM89。需要从 SGLang 官方的cu129索引安装 sm89 兼容版本:bash pip install sglang-kernel==0.4.3 --index-url https://docs.sglang.ai/whl/cu129/若上述官方源下载较慢(GitHub releases),可借助代理镜像下载对应 wheel 后本地安装。
设置 CUDA 库搜索路径。
SGLang的部分算子依赖 CUDA 运行库,需要把nvidia与torch的库目录加入LD_LIBRARY_PATH:bash NVLIB=$(find /root/miniconda3/lib/python3.12/site-packages/nvidia -type d -name lib | tr '\n' ':') TLIB=/root/miniconda3/lib/python3.12/site-packages/torch/lib echo "export LD_LIBRARY_PATH=\${NVLIB}\${TLIB}:\${LD_LIBRARY_PATH:-}" >> ~/.bashrc source ~/.bashrc
考虑到部分同学配置环境可能会遇到一些问题,我们在 AutoDL 平台准备了运行的环境镜像,点击下方链接并直接创建 Autodl 示例即可。 https://www.autodl.art/i/datawhalechina/self-llm/Qwen3
模型下载
使用 modelscope 中的 snapshot_download 函数下载模型,第一个参数为模型名称,参数 cache_dir 为模型的下载路径。
新建 model_download.py 文件并在其中输入以下内容,粘贴代码后记得保存文件。
# model_download.py
from modelscope import snapshot_download

model_dir = snapshot_download('Qwen/Qwen3.5-4B', cache_dir='/root/autodl-tmp')
print(f"模型下载完成,保存路径为:{model_dir}")然后在终端中输入 python model_download.py 执行下载,这里需要耐心等待一段时间直到模型下载完成。
注意:记得修改
cache_dir为你的模型下载路径哦~
启动 SGLang 服务
Qwen3.5-4B 为 4B 模型,单张 24G 显卡(如 RTX 4090)即可部署,无需张量并行。
命令行直接启动
python3 -m sglang.launch_server \
  --model-path /root/autodl-tmp/Qwen/Qwen3.5-4B \
  --served-model-name Qwen3.5-4B \
  --host 0.0.0.0 \
  --port 8000 \
  --mem-fraction-static 0.85 \
  --context-length 4096 \
--trust-remote-code新版 SGLang 推荐使用
sglang serve ...入口(与python -m sglang.launch_server等价)。
常用参数说明:
--model-path:模型路径
--served-model-name:服务对外的模型名称
--mem-fraction-static:静态显存占用比例(默认 0.88,显存紧张可调低,如 0.8)
--context-length:最大上下文长度(4B 模型在 24G 显存上建议 4096,显存富余可调大)
--tp-size:张量并行数,单卡部署无需设置;多卡可设为 GPU 数量
--trust-remote-code:信任远程代码
启动过程中会打印大量日志,关键的实测启动日志如下(SGLang 识别出 Qwen3_5ForConditionalGeneration,并为混合架构的线性注意力层选用 Triton GDN 算子):
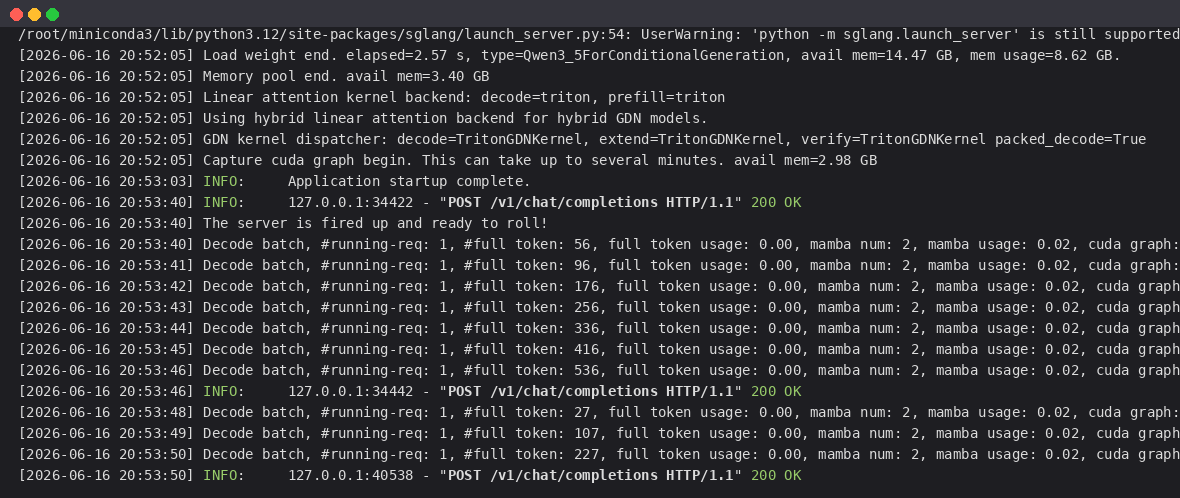
对应的关键日志行(已去除颜色码):
[20:52:05] Load weight end. elapsed=2.57 s, type=Qwen3_5ForConditionalGeneration, avail mem=14.47 GB, mem usage=8.62 GB.
[20:52:05] Memory pool end. avail mem=3.40 GB
[20:52:05] Linear attention kernel backend: decode=triton, prefill=triton
[20:52:05] Using hybrid linear attention backend for hybrid GDN models.
[20:52:05] GDN kernel dispatcher: decode=TritonGDNKernel, extend=TritonGDNKernel, verify=TritonGDNKernel packed_decode=True
[20:52:05] Capture cuda graph begin. This can take up to several minutes. avail mem=2.98 GB
[20:53:03] INFO:     Application startup complete.
[20:53:40] The server is fired up and ready to roll!说明:首次启动会进行 CUDA graph 捕获(约 1 分钟),完成后出现
The server is fired up and ready to roll!即说明服务成功启动。
Python 启动脚本
也可用脚本启动,便于固定参数。新建 start_server.py:
# start_server.py
from sglang.utils import launch_server_cmd, wait_for_server

cmd = (
    "python3 -m sglang.launch_server "
    "--model-path /root/autodl-tmp/Qwen/Qwen3.5-4B "
    "--served-model-name Qwen3.5-4B "
    "--host 0.0.0.0 --port 8000 "
    "--mem-fraction-static 0.85 "
    "--context-length 4096 "
    "--trust-remote-code"
)

server_process, port = launch_server_cmd(cmd, port=8000)
wait_for_server(f"http://127.0.0.1:{port}")
print(f"SGLang Server started: http://127.0.0.1:{port}")python start_server.py调用示例
以下示例均使用 OpenAI 官方 Python SDK 调用 SGLang 的 OpenAI 兼容接口。
查看模型列表
curl http://localhost:8000/v1/models实测返回值如下所示(owned_by 为 sglang):
{
  "object": "list",
  "data": [
    {
      "id": "Qwen3.5-4B",
      "object": "model",
      "created": 1781614385,
      "owned_by": "sglang",
      "root": "Qwen3.5-4B",
      "parent": null,
      "max_model_len": 4096
    }
  ]
}聊天对话(思考模式)
Qwen3.5 默认开启思考模式。在请求中通过 chat_template_kwargs.enable_thinking 控制:默认为 True(思考),设为 False 则不输出 `` 标签。
# test_chat.py
from openai import OpenAI

client = OpenAI(api_key="EMPTY", base_url="http://localhost:8000/v1")

# 思考模式(默认):会先输出 <think> ... </think> 推理过程,再给出答案
response = client.chat.completions.create(
    model="Qwen3.5-4B",
    messages=[{"role": "user", "content": "5的阶乘是多少?"}],
    temperature=1.0,
    top_p=0.95,
    max_tokens=768,
    extra_body={"chat_template_kwargs": {"enable_thinking": True}},
)
print(response.choices[0].message.content)python test_chat.py实测输出包含 ... 思考过程与最终答案:
Here's a thinking process that leads to the answer:

1. **Analyze the Request:** 用户问的是 5 的阶乘 ...
2. **Define Factorial:** n! = n × (n-1) × ... × 1
3. **Calculate 5!:** 5 × 4 = 20, 20 × 3 = 60, 60 × 2 = 120, 120 × 1 = 120
...
</think>

5 的阶乘(记作 5!)是 **120**。

计算过程如下:
$$5! = 5 \times 4 \times 3 \times 2 \times 1 = 120$$非思考模式
response = client.chat.completions.create(
    model="Qwen3.5-4B",
    messages=[{"role": "user", "content": "用一句话介绍深度学习。"}],
    extra_body={"chat_template_kwargs": {"enable_thinking": False}},
)
print(response.choices[0].message.content)实测发现:
Qwen3.5-4B即使在非思考模式下,也可能在content开头先输出一段简短的「思考过程」文字(不再用` 标签包裹),随后才给出最终回答,且max_tokens较小时容易被截断(finish_reason: length)。如需直接、简短的回答,可适当调大max_tokens` 或换用更大的型号。
运行时日志
在请求处理过程中,SGLang 后端会持续打印解码批次的统计信息(运行请求数、token 用量、生成吞吐等)。实测运行时日志如下:

[20:53:40] INFO:     127.0.0.1:34422 - "POST /v1/chat/completions HTTP/1.1" 200 OK
[20:53:40] The server is fired up and ready to roll!
[20:53:41] Decode batch, #running-req: 1, #full token: 96, full token usage: 0.00, mamba num: 2, mamba usage: 0.02, cuda graph: True, gen throughput (token/s): 87.62, #queue-req: 0
[20:53:43] Decode batch, #running-req: 1, #full token: 256, ..., gen throughput (token/s): 86.93, #queue-req: 0
[20:53:46] INFO: 127.0.0.1:34442 - "POST /v1/chat/completions HTTP/1.1" 200 OK日志中的
mamba num: 2反映了混合架构中线性注意力(GDN/Mamba 式)状态的使用情况;gen throughput (token/s): 87.62为实测单请求解码吞吐。
流式输出(Streaming)
# test_streaming.py
from openai import OpenAI

client = OpenAI(api_key="EMPTY", base_url="http://localhost:8000/v1")

stream = client.chat.completions.create(
    model="Qwen3.5-4B",
    messages=[{"role": "user", "content": "请用三句话介绍量子计算。"}],
    stream=True,
    temperature=1.0,
    top_p=0.95,
    max_tokens=2048,
    extra_body={"chat_template_kwargs": {"enable_thinking": True}},
)

for chunk in stream:
    delta = chunk.choices[0].delta
    if delta and delta.content:
print(delta.content, end="", flush=True)python test_streaming.py多模态(图文)调用示例
Qwen3.5-4B 自带视觉编码器,SGLang 部署后可直接接收图像输入:
# test_multimodal.py
from openai import OpenAI

client = OpenAI(api_key="EMPTY", base_url="http://localhost:8000/v1")

response = client.chat.completions.create(
    model="Qwen3.5-4B",
    messages=[{
        "role": "user",
        "content": [
            {"type": "image_url", "image_url": {"url": "https://example.com/image.jpg"}},
            {"type": "text", "text": "请描述这张图片的内容。"},
        ],
    }],
)
print(response.choices[0].message.content)提示:若只需文本服务、希望进一步节省显存,可在启动时通过
--limit-mm-per-prompt关闭图像输入。
小结
| 推理框架 | 适用场景 | 特点 |
| vLLM | 高吞吐文本/多模态服务 | PagedAttention、生态成熟、OpenAI 兼容 |
| SGLang | 复杂编排、长上下文、高并发 | RadixAttention 前缀复用、CUDA Graph、结构化输出 |
Qwen3.5-4B 作为高效的混合架构模型,在 vLLM 与 SGLang 中均可一键部署。两者都能自动识别其 GDN 线性注意力层(vLLM 用 Triton/FLA GDN,SGLang 用 TritonGDNKernel),并结合其默认的思维链能力与多模态底座,支撑对话、推理与图文理解等多种应用场景。
Qwen3.5-4B-LoRA 及 SwanLab 可视化记录
Qwen3.5-4B 简介
Qwen3.5-4B 是通义千问团队推出的新一代基础模型,具备以下核心特点:
高效的混合架构:将 Gated Delta Network(门控增量网络,一种线性注意力) 与传统全注意力(Full Attention)层交错堆叠——每 4 层中前 3 层为线性注意力、第 4 层为全注意力。线性注意力大幅降低了长序列的推理成本与显存占用。
统一的多模态底座:模型内置视觉编码器(Vision Encoder),在文本能力与 Qwen3 持平的同时,兼顾视觉理解。
思维链(Thinking)能力:默认开启思考模式,在最终回答前生成 ... 包裹的推理过程;也可通过 enable_thinking=False 关闭,直接给出回答。
长上下文:支持最长 262144(256K)上下文。
由于其架构特殊性,加载与微调 Qwen3.5-4B 需要 transformers>=4.57。本教程使用官方推荐的纯 transformers + peft 方案完成 LoRA 微调,并使用 SwanLab 进行训练过程可视化。
环境配置
# 换清华镜像源
pip config set global.index-url https://pypi.tuna.tsinghua.edu.cn/simple

# 核心依赖(Qwen3.5 需要 transformers>=4.57)
pip install "transformers>=4.57"
pip install accelerate datasets peft swanlab modelscope强烈建议:为线性注意力(Gated Delta Network)安装加速算子
Qwen3.5-4B 的 32 层中有 24 层是 GDN 线性注意力。不装加速算子时这些层会回退到纯 PyTorch 实现,训练明显偏慢(实测 3729 条数据跑 3 个 epoch 约 80 分钟)。装上 flash-linear-attention(fla)后可走 Triton/tilelang 加速路径,显著提速。
# 1) fla —— Triton 实现,直接 pip 安装即可,无需编译
pip install flash-linear-attention

# 2) causal-conv1d —— 线性注意力里的 conv1d 算子,需要 nvcc 编译(首次几分钟)
#    先确认系统有 CUDA toolkit(nvcc),AutoDL 上一般在 /usr/local/cuda-12.8
export CUDA_HOME=/usr/local/cuda-12.8          # 按你的实际 cuda 路径修改
export PATH=$CUDA_HOME/bin:$PATH
pip install causal-conv1d运行训练前同样要设好
CUDA_HOME(建议写进~/.bashrc永久生效):bash echo 'export CUDA_HOME=/usr/local/cuda-12.8' >> ~/.bashrc echo 'export PATH=$CUDA_HOME/bin:$PATH' >> ~/.bashrc source ~/.bashrc否则 fla 底层的 tilelang 可能调用错误的 nvcc(报CUDA compiler and CUDA toolkit headers are incompatible),导致训练卡住。 若你的环境里同时装了 vLLM / SGLang(会带入 CUDA 13 的 nvidia 包),fla 的 tilelang JIT 可能因 cu12/cu13 冲突出错——建议 LoRA 微调单独用一个干净环境(只装 torch/transformers/peft/fla 等),不要和 vLLM/SGLang 混装。 想进一步缩短训练时间,也可把num_train_epochs从 3 降到 1~2,或先用部分数据跑通。
考虑到部分同学配置环境可能会遇到一些问题,我们在 AutoDL 平台准备了 Qwen3 的环境镜像,点击下方链接并直接创建 Autodl 示例即可。 https://www.codewithgpu.com/i/datawhalechina/self-llm/Qwen3
模型下载
使用 modelscope 中的 snapshot_download 函数下载模型,第一个参数为模型名称,参数 cache_dir 为模型的下载路径。
新建 model_download.py 文件并在其中输入以下内容,粘贴代码后记得保存文件。
# model_download.py
from modelscope import snapshot_download

model_dir = snapshot_download('Qwen/Qwen3.5-4B', cache_dir='/root/autodl-tmp')
print(f"模型下载完成,保存路径为:{model_dir}")然后在终端中输入 python model_download.py 执行下载,这里需要耐心等待一段时间直到模型下载完成。
注意:记得修改
cache_dir为你的模型下载路径哦~
数据集构建
对大语言模型进行 supervised-finetuning(sft,有监督微调)的数据格式如下:
{
  "instruction": "回答以下用户问题,仅输出答案。",
  "input": "1+1等于几?",
  "output": "2"
}其中,instruction 是用户指令,告知模型其需要完成的任务;input 是用户输入,是完成用户指令所必须的输入内容;output 是模型应该给出的输出。
有监督微调的目标是让模型具备理解并遵循用户指令的能力。因此,在构建数据集时,我们应针对目标任务,针对性构建数据。比如,我们的目标是通过大量人物的对话数据微调得到一个能够 role-play 甄嬛对话风格的模型,因此在该场景下的数据示例如下:
{
  "instruction": "你父亲是谁?",
  "input": "",
  "output": "家父是大理寺少卿甄远道。"
}本教程使用的甄嬛对话示例微调数据集位于 /dataset/huanhuan.json(共 3729 条),数据格式为 instruction / input / output 的 Alpaca 格式。
数据准备
LoRA(Low-Rank Adaptation)训练的数据需要经过格式化、编码之后再输入给模型进行训练的,我们需要先将输入文本编码为 input_ids,将输出文本编码为 labels。这里我们直接使用 tokenizer 自带的 apply_chat_template 方法构造对话模板,避免手写特殊 token 出错。
认识 Qwen3.5 的 Chat Template
Qwen3.5 默认开启思考模式(enable_thinking=True),会在回答前生成 \n ... \n\n 推理过程;对于「角色扮演」这类任务,我们通常关闭思考模式(enable_thinking=False),让模型直接给出符合角色设定的回答。
from transformers import AutoTokenizer

model_id = '/root/autodl-tmp/Qwen/Qwen3.5-4B'
tokenizer = AutoTokenizer.from_pretrained(model_id)

messages = [
    {"role": "system", "content": "现在你要扮演皇帝身边的女人--甄嬛"},
    {"role": "user", "content": "你父亲是谁?"},
    {"role": "assistant", "content": "家父是大理寺少卿甄远道。"},
]

# 关闭思考模式
text = tokenizer.apply_chat_template(
    messages, tokenize=False, add_generation_prompt=False, enable_thinking=False
)
print(text)输出如下:
<|im_start|>system
现在你要扮演皇帝身边的女人--甄嬛<|im_end|>
<|im_start|>user
你父亲是谁?<|im_end|>
<|im_start|>assistant
<think>

</think>

家父是大理寺少卿甄远道。<|im_end|>可以看到,关闭思考模式后,模板会自动插入一个空的 \n\n\n\n 占位,模型据此直接输出最终回答。
构造处理函数
我们定义一个预处理函数 process_func:对每条样本,分别对「前缀(system + user,带 generation prompt)」和「完整对话」进行 tokenize,再通过token 级别的切片精确切出 response 部分——这样 labels 中只有回答部分参与 loss 计算,system 与 user 部分(以及 ` 占位)被置为-100` 屏蔽。
def process_func(example):
    MAX_LENGTH = 1024  # 最大序列长度
    SYS = "现在你要扮演皇帝身边的女人--甄嬛"

    messages = [
        {"role": "system", "content": SYS},
        {"role": "user", "content": example["instruction"] + example["input"]},
        {"role": "assistant", "content": example["output"]},
    ]
    # 前缀部分(system + user,带 generation prompt),不计算 loss
    prompt_ids = tokenizer.apply_chat_template(
        messages[:2], tokenize=True, add_generation_prompt=True,
        enable_thinking=False, return_dict=False,
    )
    # 完整对话(含 assistant 回答)
    full_ids = tokenizer.apply_chat_template(
        messages, tokenize=True, add_generation_prompt=False,
        enable_thinking=False, return_dict=False,
    )
    # token 级别切片得到 response
    response_ids = full_ids[len(prompt_ids):]

    input_ids = prompt_ids + response_ids
    labels = [-100] * len(prompt_ids) + response_ids
    attention_mask = [1] * len(input_ids)

    if len(input_ids) > MAX_LENGTH:  # 超长截断
        input_ids = input_ids[:MAX_LENGTH]
        attention_mask = attention_mask[:MAX_LENGTH]
        labels = labels[:MAX_LENGTH]

    return {
        "input_ids": input_ids,
        "attention_mask": attention_mask,
        "labels": labels,
}说明:
transformers新版本中apply_chat_template(tokenize=True)默认返回BatchEncoding,传入return_dict=False可直接得到 token id 列表,便于做 token 级切片。
读入数据集并应用处理函数:
import json
from datasets import Dataset

with open("/root/autodl-tmp/huanhuan.json", "r", encoding="utf-8") as f:
    data = json.load(f)

ds = Dataset.from_list(data)
tokenized_id = ds.map(process_func, remove_columns=ds.column_names)
tokenized_id可以解码查看处理后的样本,确认格式正确:
# 查看完整输入
print(tokenizer.decode(tokenized_id[0]["input_ids"]))
# 查看 labels(过滤掉 -100 后即为模型需要学习的回答)
print(tokenizer.decode(list(filter(lambda x: x != -100, tokenized_id[0]["labels"]))))<|im_start|>system
现在你要扮演皇帝身边的女人--甄嬛<|im_end|>
<|im_start|>user
小姐,别的秀女都在求中选,唯有咱们小姐想被撂牌子,菩萨一定记得真真儿的——<|im_end|>
<|im_start|>assistant
<think>
</think>
嘘——都说许愿说破是不灵的。<|im_end|>加载模型和 tokenizer
由于 Qwen3.5-4B 是多模态模型(Qwen3_5ForConditionalGeneration),当我们只需要文本能力时,使用 AutoModelForCausalLM 加载会自动得到文本语言模型 Qwen3_5ForCausalLM(不加载视觉塔,显存更省)。
import torch
from transformers import AutoModelForCausalLM

model = AutoModelForCausalLM.from_pretrained(
    '/root/autodl-tmp/Qwen/Qwen3.5-4B',
    dtype=torch.bfloat16,
    device_map="auto",
)

# 开启梯度检查点时需要调用该方法
model.enable_input_require_grads()
model.dtype # torch.bfloat16LoRA Config
LoraConfig 中比较重要的参数如下:
task_type:模型类型,绝大部分 decoder-only 的模型都是因果语言模型 CAUSAL_LM
target_modules:需要训练的层名
r:LoRA 的秩,决定低秩矩阵的维度,较小的 r 意味着更少的参数
lora_alpha:缩放参数,与 r 一起决定 LoRA 更新的强度,实际缩放比例为 lora_alpha/r
lora_dropout:应用于 LoRA 层的 dropout rate,用于防止过拟合
关于 Qwen3.5 的混合架构:模型的 32 层中,每 4 层有 3 层是线性注意力(
linear_attn),1 层是全注意力(self_attn)。 - 全注意力层包含q_proj / k_proj / v_proj / o_proj- 线性注意力层包含in_proj_qkv / in_proj_z / in_proj_a / in_proj_b / out_proj- 每一层都包含 MLP:gate_proj / up_proj / down_proj下面我们采用与 Qwen3 一致的目标模块["q_proj", "k_proj", "v_proj", "o_proj", "gate_proj", "up_proj", "down_proj"]——它们覆盖了所有全注意力层和每一层的 MLP,已经能让每一层都参与到 LoRA 训练中。如果你想更充分地适配线性注意力层,也可以把in_proj_qkv、in_proj_z、out_proj加入target_modules。
from peft import LoraConfig, TaskType, get_peft_model

config = LoraConfig(
    task_type=TaskType.CAUSAL_LM,
    target_modules=["q_proj", "k_proj", "v_proj", "o_proj", "gate_proj", "up_proj", "down_proj"],
    inference_mode=False,   # 训练模式
    r=8,                    # Lora 秩
    lora_alpha=32,          # Lora alpha,缩放系数 = 32/8 = 4
    lora_dropout=0.1,       # Dropout 比例
)

model = get_peft_model(model, config)
model.print_trainable_parameters()输出(仅训练约 0.25% 的参数):
trainable params: 10,616,832 || all params: 4,216,368,128 || trainable%: 0.2518Training Arguments
output_dir:模型输出路径
per_device_train_batch_size:每张卡上的 batch_size
gradient_accumulation_steps:梯度累计步数
num_train_epochs:训练轮数
from transformers import TrainingArguments, Trainer, DataCollatorForSeq2Seq

args = TrainingArguments(
    output_dir="./output/Qwen3_5_4B_LoRA",
    per_device_train_batch_size=4,
    gradient_accumulation_steps=4,
    logging_steps=10,
    num_train_epochs=3,
    save_steps=100,
    learning_rate=1e-4,
    save_on_each_node=True,
    gradient_checkpointing=True,
    report_to="none",
)SwanLab 简介
(该图片在源文档中已缺失或失效)
SwanLab 是一个开源的模型训练记录工具,面向 AI 研究者,提供了训练可视化、自动日志记录、超参数记录、实验对比、多人协同等功能。在 SwanLab 上,研究者能基于直观的可视化图表发现训练问题,对比多个实验找到研究灵感,并通过在线链接的分享与基于组织的多人协同训练,打破团队沟通的壁垒。
为什么要记录训练
相较于软件开发,模型训练更像一门实验科学。一个品质优秀的模型背后,往往是成千上万次实验。研究者需要不断尝试、记录、对比,积累经验,才能找到最佳的模型结构、超参数与数据配比。在这之中,如何高效进行记录与对比,对于研究效率的提升至关重要。
实例化 SwanLabCallback
import swanlab
from swanlab.integration.transformers import SwanLabCallback

# 首次使用会提示登录,输入你在 SwanLab 官网获取的 API Key
swanlab_callback = SwanLabCallback(
    project="Qwen3.5-Lora",
    experiment_name="Qwen3.5-4B-LoRA",
)使用 Trainer 训练
trainer = Trainer(
    model=model,
    args=args,
    train_dataset=tokenized_id,
    data_collator=DataCollatorForSeq2Seq(tokenizer=tokenizer, padding=True),
    callbacks=[swanlab_callback],
)

trainer.train()训练完成后,打开 SwanLab 即可查看训练过程中记录的参数与 loss 曲线:
(该图片在源文档中已缺失或失效)
加载 LoRA 权重推理
得到 checkpoint 之后,加载基础模型并挂载 LoRA 权重进行推理:
from transformers import AutoModelForCausalLM, AutoTokenizer
import torch
from peft import PeftModel

model_id = '/root/autodl-tmp/Qwen/Qwen3.5-4B'                     # 基础模型路径
lora_path = './output/Qwen3_5_4B_LoRA/checkpoint-XXX'             # 训练得到的 LoRA 权重路径,按实际填写

tokenizer = AutoTokenizer.from_pretrained(model_id)

# 加载基础模型
model = AutoModelForCausalLM.from_pretrained(model_id, dtype=torch.bfloat16, device_map="auto")

# 挂载 LoRA 权重
model = PeftModel.from_pretrained(model, model_id=lora_path)
model.eval()

# 构造对话
messages = [
    {"role": "system", "content": "现在你要扮演皇帝身边的女人--甄嬛"},
    {"role": "user", "content": "你是谁?"},
]
inputs = tokenizer.apply_chat_template(
    messages,
    add_generation_prompt=True,
    enable_thinking=False,          # 关闭思考模式,直接输出角色回答
    tokenize=True,
    return_dict=True,
    return_tensors="pt",
).to(model.device)

gen_kwargs = {"max_new_tokens": 128, "do_sample": True, "top_p": 0.8, "temperature": 0.7}
with torch.no_grad():
    outputs = model.generate(**inputs, **gen_kwargs)
outputs = outputs[:, inputs["input_ids"].shape[1]:]
print(tokenizer.decode(outputs[0], skip_special_tokens=True))输出示例:
我是甄嬛,家父是大理寺少卿甄远道。可以看到,经过 LoRA 微调后,模型已经学会了甄嬛的说话风格与人物设定。