Qwen2-VL-2B-Instruct FastApi 部署调用
环境准备
基础环境:
----------------
ubuntu 22.04
python 3.12
cuda 12.1
pytorch 2.3.0
----------------本文默认学习者已安装好以上 PyTorch (cuda) 环境,如未安装请自行安装。
首先 pip 换源加速下载并安装依赖包
pip config set global.index-url https://pypi.tuna.tsinghua.edu.cn/simple

pip install modelscope==1.20.0
pip install fastapi==0.115.4
pip install uvicorn==0.32.0
pip install transformers==4.46.2
pip install accelerate==1.1.1
pip install torchvision==0.19.0
pip install av==13.1.0考虑到部分同学配置环境可能会遇到一些问题,我们在AutoDL平台准备了Qwen2-VL的环境镜像,点击下方链接并直接创建Autodl示例即可。 https://www.codewithgpu.com/i/datawhalechina/self-llm/qwen2-vl
模型下载
使用 modelscope 中的 snapshot_download 函数下载模型,第一个参数为模型名称,参数 cache_dir 为模型的下载路径。
新建 model_download.py 文件输入以下代码,并运行 python model_download.py 执行下载。
此处使用 modelscope 提供的 snapshot_download 函数进行下载,该方法对国内的用户十分友好。
# model_download.py
from modelscope import snapshot_download
model_dir = snapshot_download('Qwen/Qwen2-VL-2B-Instruct', cache_dir='/root/autodl-tmp', revision='master')注意:请记得修改
cache_dir为你自己的模型下载路径 ~
代码准备
新建 api_image.py 文件并在其中输入以下内容,粘贴代码后请记得及时保存文件。
# api_server_image.py
from transformers import Qwen2VLForConditionalGeneration, AutoProcessor
from qwen_vl_utils.vision_process import process_vision_info
from fastapi import FastAPI, Request
import uvicorn
from pydantic import BaseModel
from typing import List, Dict, Union

# 创建FastAPI应用
app = FastAPI()

# 下载好的模型本地路径
model_name_or_path = '/root/autodl-tmp/Qwen/Qwen2-VL-2B-Instruct'

# 初始化模型和处理器
model = Qwen2VLForConditionalGeneration.from_pretrained(
    model_name_or_path, torch_dtype="auto", device_map="auto"
)
processor = AutoProcessor.from_pretrained(model_name_or_path)

# 定义请求体模型
class MessageContent(BaseModel):
    type: str
    text: str = None
    image: str = None

class ChatMessage(BaseModel):
    messages: List[Dict[str, Union[str, List[Dict[str, str]]]]]

# 处理POST请求的端点
@app.post("/generate")
async def generate_response(chat_message: ChatMessage):
    # 直接使用请求中的 messages
    text = processor.apply_chat_template(
        chat_message.messages,
        tokenize=False,
        add_generation_prompt=True
    )

    # 预先写好的辅助函数,位于参考代码中
    image_inputs, video_inputs = process_vision_info(chat_message.messages)
    inputs = processor(
        text=[text],
        images=image_inputs,
        videos=video_inputs,
        padding=True,
        return_tensors="pt",
    )
    inputs = inputs.to("cuda")

    # 生成输出
    generated_ids = model.generate(**inputs, max_new_tokens=1024)
    generated_ids_trimmed = [
        out_ids[len(in_ids):] for in_ids, out_ids in zip(inputs.input_ids, generated_ids)
    ]
    output_text = processor.batch_decode(
        generated_ids_trimmed,
        skip_special_tokens=True,
        clean_up_tokenization_spaces=False
    )

    return {"response": output_text[0]}

if __name__ == "__main__":
    # 启动FastAPI应用,端口为8000
uvicorn.run(app, host="0.0.0.0", port=8000)注意:同样记得修改
model_name_or_path为你自己的模型下载路径 ~
图像问答 API 服务启动
在终端输入以下命令启动 api 服务:
python api_server_image.py加载完毕后出现如下信息说明成功。

我们可以使用 Python 中的 requests 库对api服务的端口进行请求从而调用 Qwen2-VL-2B-Instruct 的多模态图片理解能力来生成回复,示例代码如下——
# fastapi_request_image.py
import requests

url = "http://localhost:8000/generate"
payload = {
    "messages": [
        {
            "role": "user",
            "content": [
                {
                    "type": "image",
                    "image": "https://qianwen-res.oss-cn-beijing.aliyuncs.com/Qwen-VL/assets/demo.jpeg"
                },
                {
                    "type": "text",
                    "text": "Describe this image."
                }
            ]
        }
    ]
}
response = requests.post(url, json=payload)
print(response.json())python fastapi_request_image.py执行后得到的返回结果如下所示:
{'response': "The image depicts a serene beach scene with a woman and a dog. The woman is sitting on the sand, wearing a plaid shirt and black pants, and appears to be smiling. She is holding the dog's paw in a high-five gesture. The dog, which is a large breed, is sitting on the sand with its front paws raised, possibly in response to the woman's gesture. The background shows the ocean with gentle waves, and the sky is clear with a soft light, suggesting it might be either sunrise or sunset. The overall atmosphere is peaceful and joyful."}
我们再回过头来检查以下示例代码中的 demo.jpeg ,可以观察到模型的回复质量还是非常高的,正确且完整地叙述了图片。

进阶实践
由于 Qwen2-VL-2B-Instruct 具备强大的多模态能力,其除了对图片进行问答之外,同样也支持视频形式的交互。
我们需要对原先的 api_image.py 的代码做一些修改来使我们的 FastApi 服务支持视频流推理。新建 api_server_image_and_video.py ,复制如下代码——
# api_server_image_and_video.py
from transformers import Qwen2VLForConditionalGeneration, AutoProcessor
from qwen_vl_utils.vision_process import process_vision_info
from fastapi import FastAPI, Request
import uvicorn
from pydantic import BaseModel
from typing import List, Dict, Union

app = FastAPI()

model_name_or_path = '/root/autodl-tmp/Qwen/Qwen2-VL-2B-Instruct'
model = Qwen2VLForConditionalGeneration.from_pretrained(
    model_name_or_path, torch_dtype="auto", device_map="auto"
)
processor = AutoProcessor.from_pretrained(model_name_or_path)

# 定义请求体模型
class MessageContent(BaseModel):
    type: str
    text: str = None
    image: str = None
    video: str = None # 添加对video的支持

class ChatMessage(BaseModel):
    messages: List[Dict[str, Union[str, List[Dict[str, str]]]]]

@app.post("/generate")
async def generate_response(chat_message: ChatMessage):
    # 直接使用请求中的 messages
    text = processor.apply_chat_template(
        chat_message.messages,
        tokenize=False,
        add_generation_prompt=True
    )

    image_inputs, video_inputs = process_vision_info(chat_message.messages)
    inputs = processor(
        text=[text],
        images=image_inputs,
        videos=video_inputs,
        padding=True,
        return_tensors="pt",
    )
    inputs = inputs.to("cuda")

    # 生成输出
    generated_ids = model.generate(**inputs, max_new_tokens=1024)
    generated_ids_trimmed = [
        out_ids[len(in_ids):] for in_ids, out_ids in zip(inputs.input_ids, generated_ids)
    ]
    output_text = processor.batch_decode(
        generated_ids_trimmed,
        skip_special_tokens=True,
        clean_up_tokenization_spaces=False
    )

    return {"response": output_text[0]}

if __name__ == "__main__":
uvicorn.run(app, host="0.0.0.0", port=8000)视频问答 API 服务启动
在终端输入以下命令启动 api 服务:
python api_server_image_and_video.py加载完毕后出现如下信息说明成功。

同样的,我们使用 Python 中的 requests 库对服务的端口进行请求从而调用 Qwen2-VL-2B-Instruct 的多模态能力来生成回复,示例代码如下——
import requests

url = "http://localhost:8000/generate"
payload = {
    "messages": [
        {
            "role": "user",
            "content": [
                {
                    "type": "video",
                    "video": "./space_woaudio.mp4"
                },
                {
                    "type": "text",
                    "text": "Describe this video."
                }
            ]
        }
    ]
}

response = requests.post(url, json=payload)
print(response.json())上述代码中,我们在 messages.content 中添加了一个视频,预览如下:

python fastapi_request_video.py此时得到的模型的返回结果如下:
{'response': "The video shows a man standing in a Mission Control Center, speaking to the camera. The center is equipped with various monitors and control panels, and there are several large screens displaying maps and data. The man appears to be giving a presentation or explaining something related to the center's operations."}
参考代码及其使用
本次教程涉及到的代码文件较多,因此额外提供了参考代码供读者参考,但依然建议初学者在理解的基础上妥善使用。
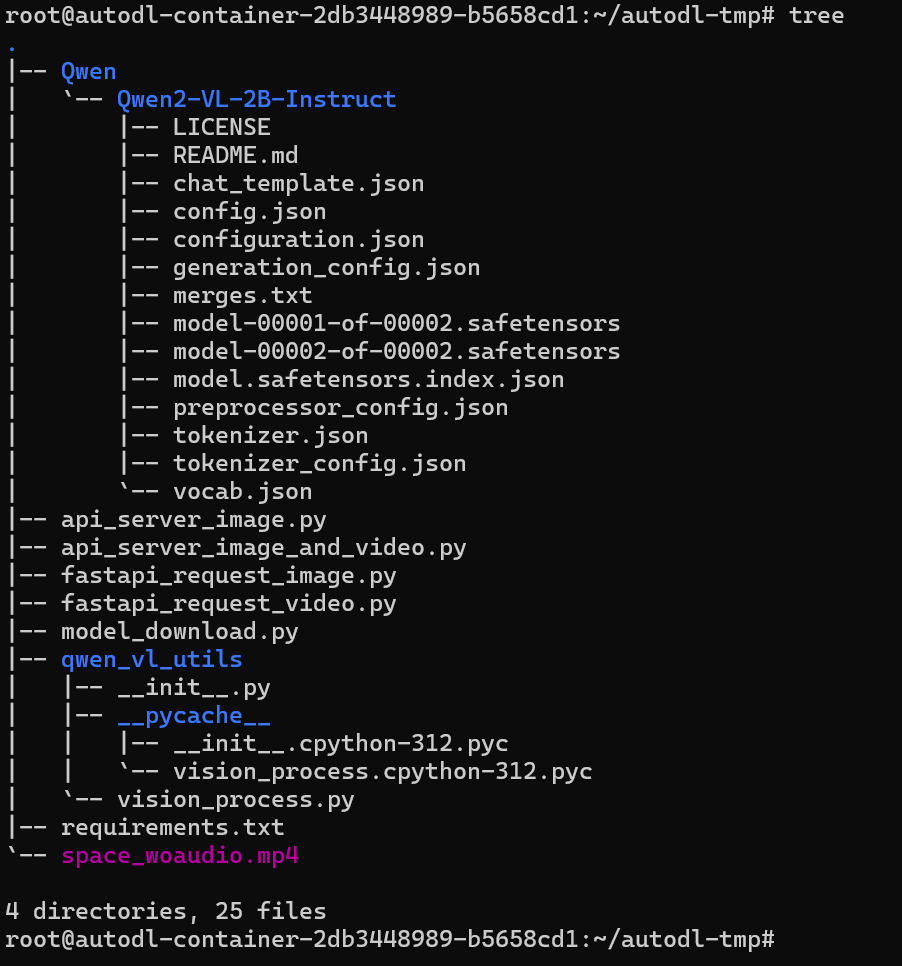
完成上述所有教程后的目录结构应该与下图类似,关于文件路径还请读者根据自己的实际存放情况进行修正。
Qwen2-VL-2B-Instruct WebDemo 部署
----------------
ubuntu 22.04
python 3.10
cuda 11.8
pytorch 2.3.0
----------------# 换源
python -m pip install --upgrade pip
pip config set global.index-url https://mirrors.tuna.tsinghua.edu.cn/pypi/web/simple
# 需要安装的库
# torchvision需要安装匹配对应torch的版本
pip install qwen_vl_utils==0.0.8 transformers==4.46.2 accelerate==1.1.0 gradio==5.5.0 torchvision==0.18.0 av==13.1.0
# 如需使用魔搭(国内推荐)下载模型, 需安装这个库
pip install modelscope==1.20.0
# 安装flash-attn(可选)
# 如显卡支持flash-attn,在确认对应python、pytorch、cuda版本后, 下载对应的release版本.
wegt https://github.com/Dao-AILab/flash-attention/releases/download/v2.7.0.post2/flash_attn-2.7.0.post2+cu12torch2.3cxx11abiFALSE-cp312-cp312-linux_x86_64.whl
# 镜像加速链接:
# wget https://github.moeyy.xyz/https://github.com/Dao-AILab/flash-attention/releases/download/v2.7.0.post2/flash_attn-2.7.0.post2+cu12torch2.3cxx11abiFALSE-cp312-cp312-linux_x86_64.whl
pip install flash_attn-2.7.0.post2+cu12torch2.3cxx11abiFALSE-cp312-cp312-linux_x86_64.whl完整的pip列表(包含依赖)请参考02-Qwen2-VL-2B-Instruct Web Demo 参考代码/requirements.txt 考虑到部分同学配置环境可能会遇到一些问题,我们在AutoDL平台准备了Qwen2-VL的环境镜像,点击下方链接并直接创建Autodl示例即可。 https://www.codewithgpu.com/i/datawhalechina/self-llm/qwen2-vl
- 借助 modelscope 下载
使用 modelscope 中的 snapshot_download 函数下载模型,第一个参数为模型名称,参数 cache_dir 为模型的下载路径。
新建 model_download.py 文件输入以下代码,并运行 python model_download.py 执行下载。
此处使用 modelscope 提供的 snapshot_download 函数进行下载,该方法对国内的用户十分友好。
# model_download.py
from modelscope import snapshot_download
model_dir = snapshot_download('Qwen/Qwen2-VL-2B-Instruct', cache_dir='/root/autodl-tmp', revision='master')注意:请记得修改
cache_dir为你自己的模型下载路径 ~
- 借助 git lfs 下载
# 进入autodl-tmp/ 或者你要保存的路径
cd autodl-tmp/

# 首先安装lfs,便于通过git直接下载模型。
curl -s https://packagecloud.io/install/repositories/github/git-lfs/script.deb.sh | sudo bash
sudo apt-get install git-lfs

# 需要下载的模型
MODEL=Qwen2-VL-2B-Instruct
# MODEL=Qwen2-VL-7B-Instruct
# MODEL=Qwen2-VL-72B-Instruct

# # huggingface 下载
# URL="https://huggingface.co/Qwen/"
# git clone "${URL}/${MODEL}"

# 魔搭下载(国内推荐)
URL="https://www.modelscope.cn/Qwen"
git clone "${URL}/${MODEL}.git"

# 返回根目录
cd ..# 可以使用 python mm_qwen2vl.py -h 或查看代码来查看命令帮助
# Ampere/Ada/Hopper架构显卡可以启用flash attn2加速推理,autodl要通过6006端口对外访问。(没安装flash-attn库的忽略)
# python mm_qwen2vl.py --flash-attn2 --model-path ./autodl-tmp/Qwen2-VL-2B-Instruct --host 0.0.0.0 --port 6006
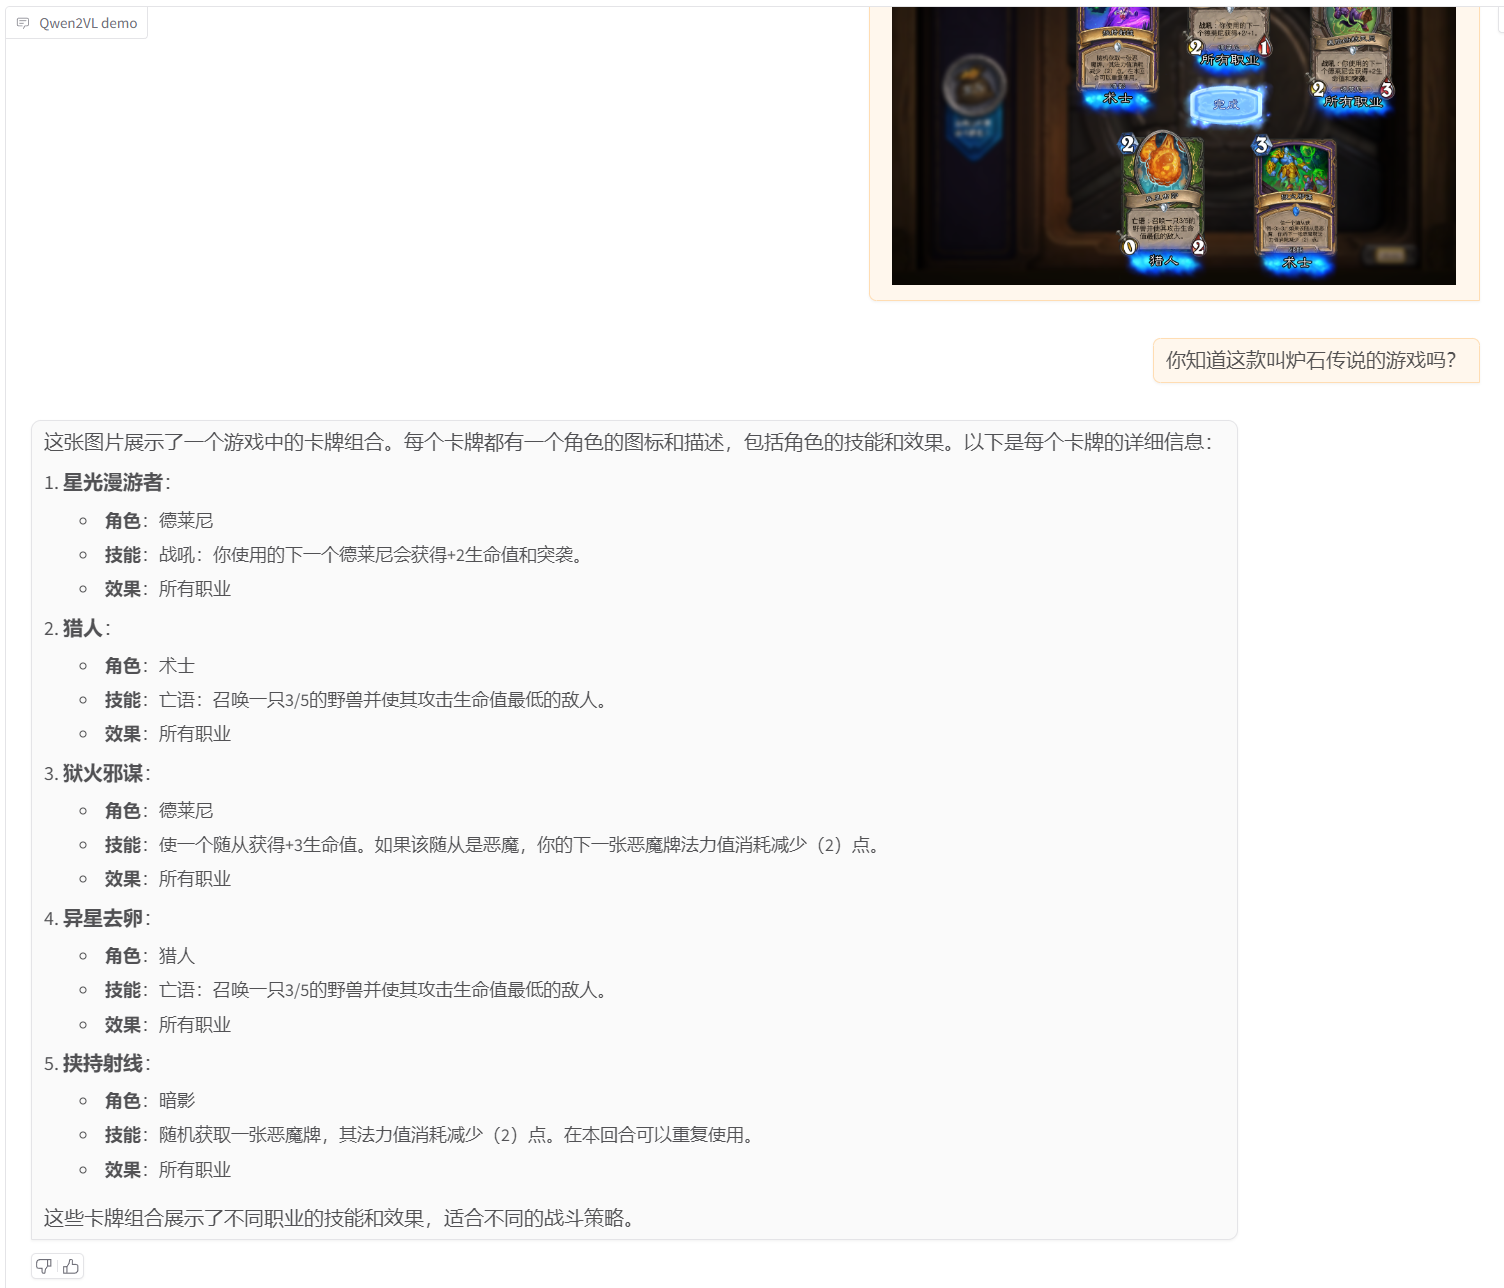
python mm_qwen2vl.py --model-path ./autodl-tmp/Qwen2-VL-2B-Instruct --host 0.0.0.0 --port 6006图片
视频

如果觉得2B理解能力较差, 建议用7B以上模型.
03-Qwen2-vl-2B vLLM 部署调用
vLLM 框架是一个高效的大语言模型推理和部署服务系统,具备以下特性:
高效的内存管理:通过 PagedAttention 算法,vLLM 实现了对 KV 缓存的高效管理,减少了内存浪费,优化了模型的运行效率。
高吞吐量:vLLM 支持异步处理和连续批处理请求,显著提高了模型推理的吞吐量,加速了文本生成和处理速度。
易用性:vLLM 与 HuggingFace 模型无缝集成,支持多种流行的大型语言模型,简化了模型部署和推理的过程。兼容 OpenAI 的 API 服务器。
分布式推理:框架支持在多 GPU 环境中进行分布式推理,通过模型并行策略和高效的数据通信,提升了处理大型模型的能力。
开源共享:vLLM 由于其开源的属性,拥有活跃的社区支持,这也便于开发者贡献和改进,共同推动技术发展。
环境准备
本文基础环境如下:
----------------
ubuntu 22.04
python 3.10
cuda 12.1
pytorch 2.4.0
----------------本文默认学习者已配置好以上
Pytorch (cuda)环境,如未配置请先自行安装。
首先 pip 换源加速下载并安装依赖包
python -m pip install --upgrade pip
pip config set global.index-url https://pypi.tuna.tsinghua.edu.cn/simple

pip install modelscope==1.20.0
pip install openai==1.54.4
pip install tqdm==4.67.0
pip install transformers==4.46.2
pip install vllm==0.6.3.post1
pip install wen-vl-utils==0.0.8考虑到部分同学配置环境可能会遇到一些问题,我们在AutoDL平台准备了Qwen2-VL的环境镜像,点击下方链接并直接创建Autodl示例即可。 https://www.codewithgpu.com/i/datawhalechina/self-llm/qwen2-vl
模型下载
使用 modelscope 中的 snapshot_download 函数下载模型,第一个参数为模型名称,参数 cache_dir为模型的下载路径。
先切换到 autodl-tmp 目录,cd /root/autodl-tmp
然后新建名为 model_download.py 的 python 脚本,并在其中输入以下内容并保存
# model_download.py
from modelscope import snapshot_download
model_dir = snapshot_download('Qwen/Qwen2-VL-2B-Instruct', cache_dir='/root/autodl-tmp', revision='master')然后在终端中输入 python model_download.py 执行下载,这里需要耐心等待一段时间直到模型下载完成。
注意:记得修改
cache_dir为你的模型下载路径哦~
代码准备
Python脚本
在 /root/autodl-tmp 路径下新建 vllm_model.py 文件并在其中输入以下内容,粘贴代码后请及时保存文件。下面的代码有很详细的注释,如有不理解的地方,欢迎大家提 issue。
首先从 vLLM 库中导入 LLM 和 SamplingParams 类。LLM 类是使用 vLLM 引擎运行离线推理的主要类。SamplingParams 类指定采样过程的参数,用于控制和调整生成文本的随机性和多样性。
vLLM 提供了非常方便的封装,我们直接传入模型名称或模型路径即可,不必手动初始化模型和分词器。
我们可以通过这个代码示例熟悉下 vLLM 引擎的使用方式。被注释的部分内容可以丰富模型的能力,但不是必要的,大家可以按需选择,自己多多动手尝试 ~
# vllm_model.py
from vllm import LLM, SamplingParams
from transformers import AutoProcessor
import os
import json

# 自动下载模型时,指定使用modelscope; 否则,会从HuggingFace下载
os.environ['VLLM_USE_MODELSCOPE']='True'

def get_completion(prompts, model, tokenizer=None, max_tokens=512, temperature=0.8, top_p=0.95, max_model_len=2048):
    stop_token_ids = [151329, 151336, 151338]
    # 创建采样参数。temperature 控制生成文本的多样性,top_p 控制核心采样的概率
    sampling_params = SamplingParams(temperature=temperature, top_p=top_p, max_tokens=max_tokens, stop_token_ids=stop_token_ids)
    # 初始化 vLLM 推理引擎
    llm = LLM(model=model, tokenizer=tokenizer, max_model_len=max_model_len,trust_remote_code=True)
    outputs = llm.generate(prompts, sampling_params)
    return outputs


if __name__ == "__main__":
    # 初始化 vLLM 推理引擎
    model='/root/autodl-tmp/Qwen/Qwen2-VL-2B-Instruct' # 指定模型路径
    tokenizer = None
    # 加载分词器后传入vLLM 模型,但不是必要的。
    processor = AutoProcessor.from_pretrained(model)


    messages = [
    	{"role": "system", "content": "你是一个有用的助手。"},
    	{"role": "user", "content": [
        {"type": "image_url",
         "image_url": {
           "url": "https://modelscope.oss-cn-beijing.aliyuncs.com/resource/qwen.png"}
        },
        {"type": "text", "text": "插图中的文本是什么?"}
    	]
      }
    ]

    prompt = processor.apply_chat_template(
      messages,
      tokenize=False,
      add_generation_prompt=True,
		)

    outputs = get_completion(prompt, model, tokenizer=tokenizer, max_tokens=512, temperature=1, top_p=1, max_model_len=2048)

    # 输出是一个包含 prompt、生成文本和其他信息的 RequestOutput 对象列表。
    # 打印输出。
    for output in outputs:
        prompt = output.prompt
        generated_text = output.outputs[0].text
print(f"Prompt: {prompt!r}, Generated text: {generated_text!r}")运行代码
cd /root/autodl-tmp && python vllm_model.py结果如下:
Prompt: '<|im_start|>system\n你是一个有用的助手。<|im_end|>\n<|im_start|>user\n<|vision_start|><|image_pad|><|vision_end|>插图中的文本是什么?<|im_end|>\n<|im_start|>assistant\n', Generated text: '插图中是“.YEAR”以及“imestot-value”'
创建兼容 OpenAI API 接口的服务器
Qwen 兼容 OpenAI API 协议,所以我们可以直接使用 vLLM 创建 OpenAI API 服务器。vLLM 部署实现 OpenAI API 协议的服务器非常方便。默认会在 http://localhost:8000 启动服务器。服务器当前一次托管一个模型,并实现列表模型、completions 和 chat completions 端口。
completions:是基本的文本生成任务,模型会在给定的提示后生成一段文本。这种类型的任务通常用于生成文章、故事、邮件等。
chat completions:是面向对话的任务,模型需要理解和生成对话。这种类型的任务通常用于构建聊天机器人或者对话系统。
在创建服务器时,我们可以指定模型名称、模型路径、聊天模板等参数。
--host 和 --port 参数指定地址。
--model 参数指定模型名称。
--chat-template 参数指定聊天模板。
--served-model-name 指定服务模型的名称。
--max-model-len 指定模型的最大长度。
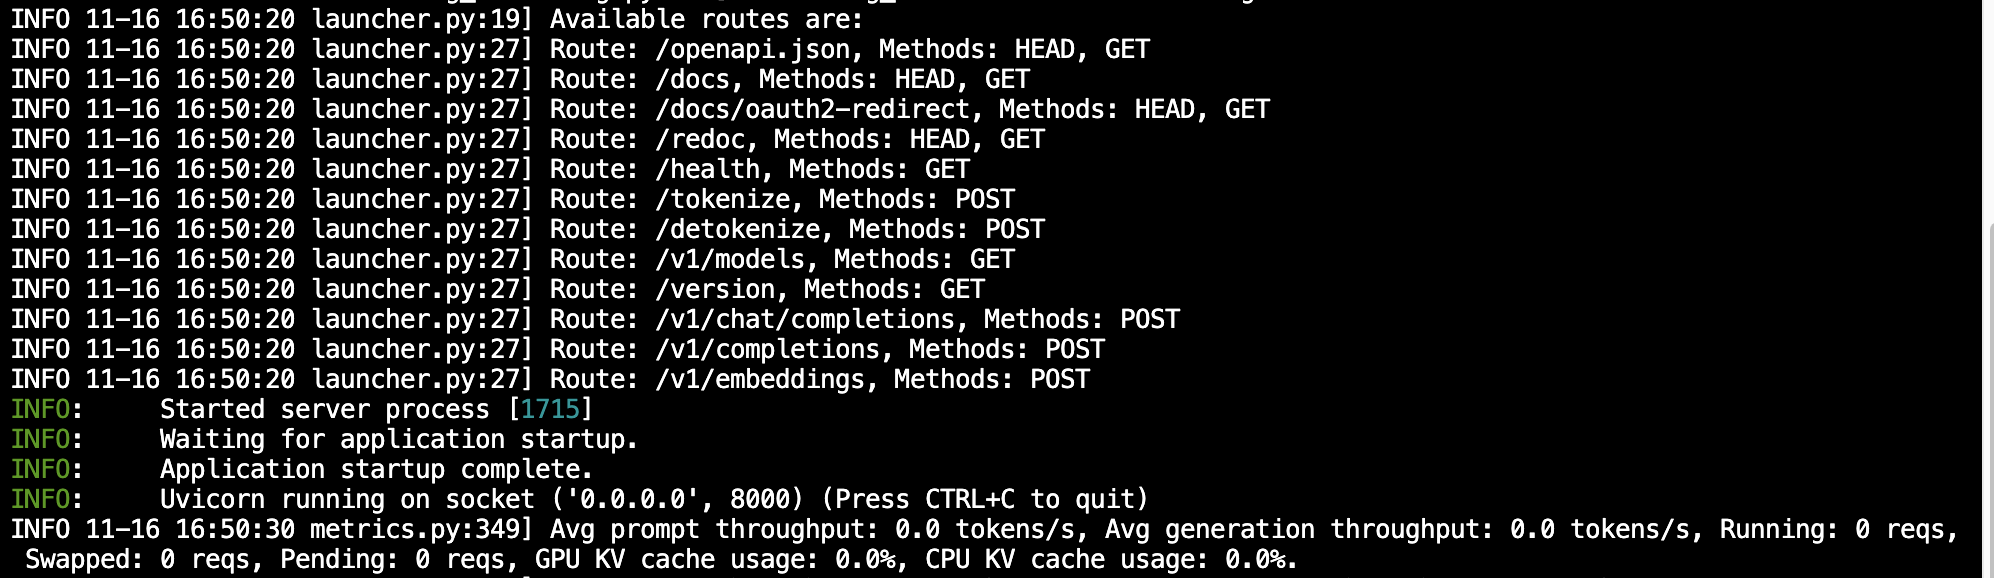
python -m vllm.entrypoints.openai.api_server --model /root/autodl-tmp/Qwen/Qwen2-VL-2B-Instruct --served-model-name Qwen2-VL-2B-Instruct --max-model-len=2048加载完毕后出现如下信息说明服务成功启动
通过 curl 命令查看当前的模型列表
curl http://localhost:8000/v1/models 得到的返回值如下所示
{
  "object":"list",
  "data":[
    {
      "id":"Qwen2-VL-2B-Instruct",
      "object":"model",
      "created":1731747181,
      "owned_by":"vllm",
      "root":"/root/autodl-tmp/Qwen/Qwen2-VL-2B-Instruct",
      "parent":null,
      "max_model_len":2048,
      "permission":[
        {
          "id":"modelperm-aa946b04d0f9463ebac64cec7f9b6313",
          "object":"model_permission",
          "created":1731747181,
          "allow_create_engine":false,
          "allow_sampling":true,
          "allow_logprobs":true,
          "allow_search_indices":false,
          "allow_view":true,
          "allow_fine_tuning":false,
          "organization":"*",
          "group":null,
          "is_blocking":false
        }
      ]
    }
  ]
}使用 curl 命令测试 OpenAI Completions API
curl http://localhost:8000/v1/chat/completions \
    -H "Content-Type: application/json" \
    -d '{
        "model": "Qwen2-VL-2B-Instruct",
        "messages": [
    	{"role": "system", "content": "你是一个有用的助手。"},
    	{"role": "user", "content": [
        {"type": "image_url",
         "image_url": {
           "url": "https://modelscope.oss-cn-beijing.aliyuncs.com/resource/qwen.png"}
        },
        {"type": "text", "text": "插图中的文本是什么?"}
    	 ]
      }
    ]
}' 得到的返回值如下所示
{
  "id":"chat-505f8e3987384ba6b1f7a293217757da",
  "object":"chat.completion",
  "created":1731919906,
  "model":"Qwen2-VL-2B-Instruct",
  "choices":[
    {
      "index":0,
      "message":
      {
        "role":"assistant",
        "content":"插图中的文本是 \"TONGYI Qwen\"。",
        "tool_calls":[]
      },
      "logprobs":null,
      "finish_reason":"stop",
      "stop_reason":null
    }],
  "usage":
  {
    "prompt_tokens":71,
    "total_tokens":86,
    "completion_tokens":15
  },
  "prompt_logprobs":null
}用 Python 脚本请求 OpenAI Completions API
# vllm_openai_completions.py
from openai import OpenAI
client = OpenAI(
    base_url="http://localhost:8000/v1",
    api_key="sk-xxx", # 随便填写,只是为了通过接口参数校验
)

completion = client.chat.completions.create(
  model="Qwen2-VL-2B-Instruct",
  messages = [
    	{"role": "system", "content": "你是一个有用的助手。"},
    	{"role": "user", "content": [
        {"type": "image_url",
         "image_url": {
           "url": "https://modelscope.oss-cn-beijing.aliyuncs.com/resource/qwen.png"}
        },
        {"type": "text", "text": "插图中的文本是什么?"}
    	]
      }
    ]
)

print(completion.choices[0].message)python vllm_openai_completions.py 得到的返回值如下所示
ChatCompletionMessage(content='插图中的文本是“TONGYI Qwen”。', refusal=None, role='assistant', audio=None, function_call=None, tool_calls=[])用 curl 命令测试 OpenAI Chat Completions API
curl http://localhost:8000/v1/chat/completions \
    -H "Content-Type: application/json" \
    -d '{
        "model": "Qwen2-VL-2B-Instruct",
        "messages":[
          {"role": "system", "content": "你是一个有用的助手。"},
          {"role": "user", "content": [
            {"type": "image_url",
             "image_url": {
               "url": "https://modelscope.oss-cn-beijing.aliyuncs.com/resource/qwen.png"}
            },
            {"type": "text", "text": "插图中的文本是什么?"}
          ]
          }
        ]
}'得到的返回值如下所示
{
  "id":"chat-67963afa27e541309cd40798d75bdab8",
  "object":"chat.completion",
  "created":1731920262,
  "model":"Qwen2-VL-2B-Instruct",
  "choices":[
    {
      "index":0,
      "message":
      {
        "role":"assistant",
        "content":"插图中的文本是“TONGYI Qwen”。",
        "tool_calls":[]
      },
      "logprobs":null,
      "finish_reason":"stop",
      "stop_reason":null
    }],
  "usage":
  {
    "prompt_tokens":71,
    "total_tokens":85,
    "completion_tokens":14},
  "prompt_logprobs":null
}用 Python 脚本请求 OpenAI Chat Completions API
# vllm_openai_chat_completions.py
from openai import OpenAI
openai_api_key = "sk-xxx" # 随便填写,只是为了通过接口参数校验
openai_api_base = "http://localhost:8000/v1"

client = OpenAI(
    api_key=openai_api_key,
    base_url=openai_api_base,
)

chat_outputs = client.chat.completions.create(
    model="Qwen2-VL-2B-Instruct",
    messages = [
    	{"role": "system", "content": "你是一个有用的助手。"},
    	{"role": "user", "content": [
        {"type": "image_url",
         "image_url": {
           "url": "https://modelscope.oss-cn-beijing.aliyuncs.com/resource/qwen.png"}
        },
        {"type": "text", "text": "插图中的文本是什么?"}
    	]
      }
    ]
)
print(chat_outputs)python vllm_openai_chat_completions.py得到的返回值如下所示
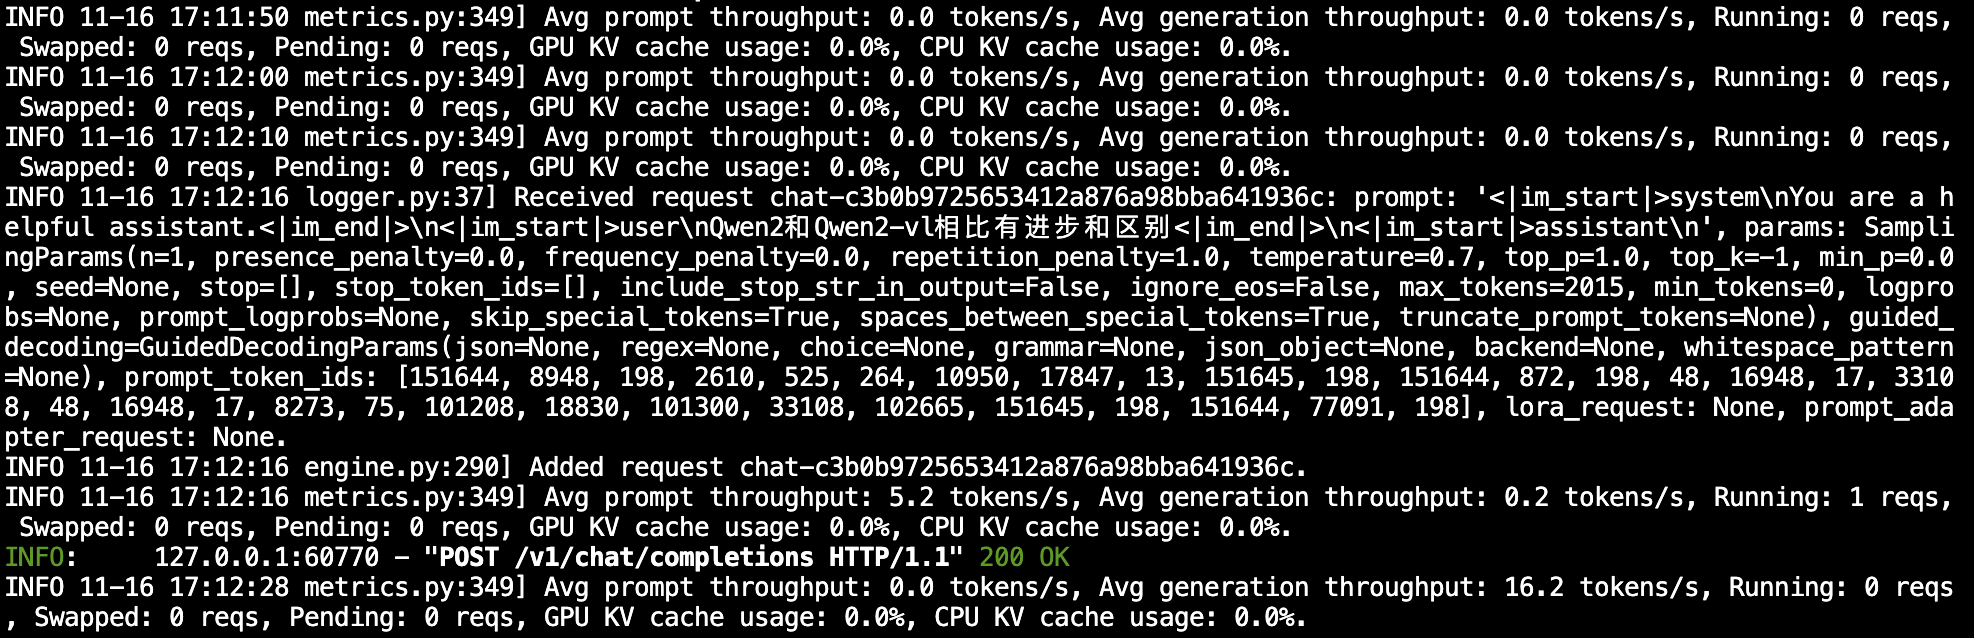
{"id":"chat-67963afa27e541309cd40798d75bdab8","object":"chat.completion","created":1731920262,"model":"Qwen2-VL-2B-Instruct","choices":[{"index":0,"message":{"role":"assistant","content":"插图中的文本是“TONGYI Qwen”。","tool_calls":[]},"logprobs":null,"finish_reason":"stop","stop_reason":null}],"usage":{"prompt_tokens":71,"total_tokens":85,"completion_tokens":14},"prompt_logpropython vllm_openai_chat_completions.py3d8-8d39a0b2:~/autodl-tChatCompletion(id='chat-13bb084e02d94d449f441c2c39ea4b00', choices=[Choice(finish_reason='stop', index=0, logprobs=None, message=ChatCompletionMessage(content='插图中的文本是“TONGYI Qwen”。', refusal=None, role='assistant', audio=None, function_call=None, tool_calls=[]), stop_reason=None)], created=1731920356, model='Qwen2-VL-2B-Instruct', object='chat.completion', service_tier=None, system_fingerprint=None, usage=CompletionUsage(completion_tokens=14, prompt_tokens=71, total_tokens=85, completion_tokens_details=None, prompt_tokens_details=None), prompt_logprobs=None)另外,在以上所有的在请求处理过程中, API 后端都会打印相对应的日志和统计信息😊
Qwen2-VL-2B-Instruct Lora 微调
本节我们将简要介绍如何基于 transformers 和 peft 等框架,使用 Qwen2-VL-2B-Instruct 模型在 COCO2014图像描述 任务上进行 Lora 微调训练。Lora 是一种高效的微调方法,若需深入了解 Lora 的工作原理,可参考博客:知乎|深入浅出 Lora。
🌍 环境配置
python -m pip install --upgrade pip
# 更换 pypi 源加速库的安装
pip config set global.index-url https://pypi.tuna.tsinghua.edu.cn/simple

pip install modelscope==1.18.0
pip install transformers==4.46.2
pip install sentencepiece==0.2.0
pip install accelerate==1.1.1
pip install datasets==2.18.0
pip install peft==0.13.2
pip install qwen-vl-utils==0.0.8考虑到部分同学配置环境可能会遇到一些问题,我们在AutoDL平台准备了Qwen2-VL的环境镜像,点击下方链接并直接创建Autodl示例即可。 https://www.codewithgpu.com/i/datawhalechina/self-llm/qwen2-vl
📚 准备数据集
数据集介绍:COCO 2014 Caption数据集是Microsoft Common Objects in Context (COCO)数据集的一部分,主要用于图像描述任务。该数据集包含了大约40万张图像,每张图像都有至少1个人工生成的英文描述语句。这些描述语句旨在帮助计算机理解图像内容,并为图像自动生成描述提供训练数据。
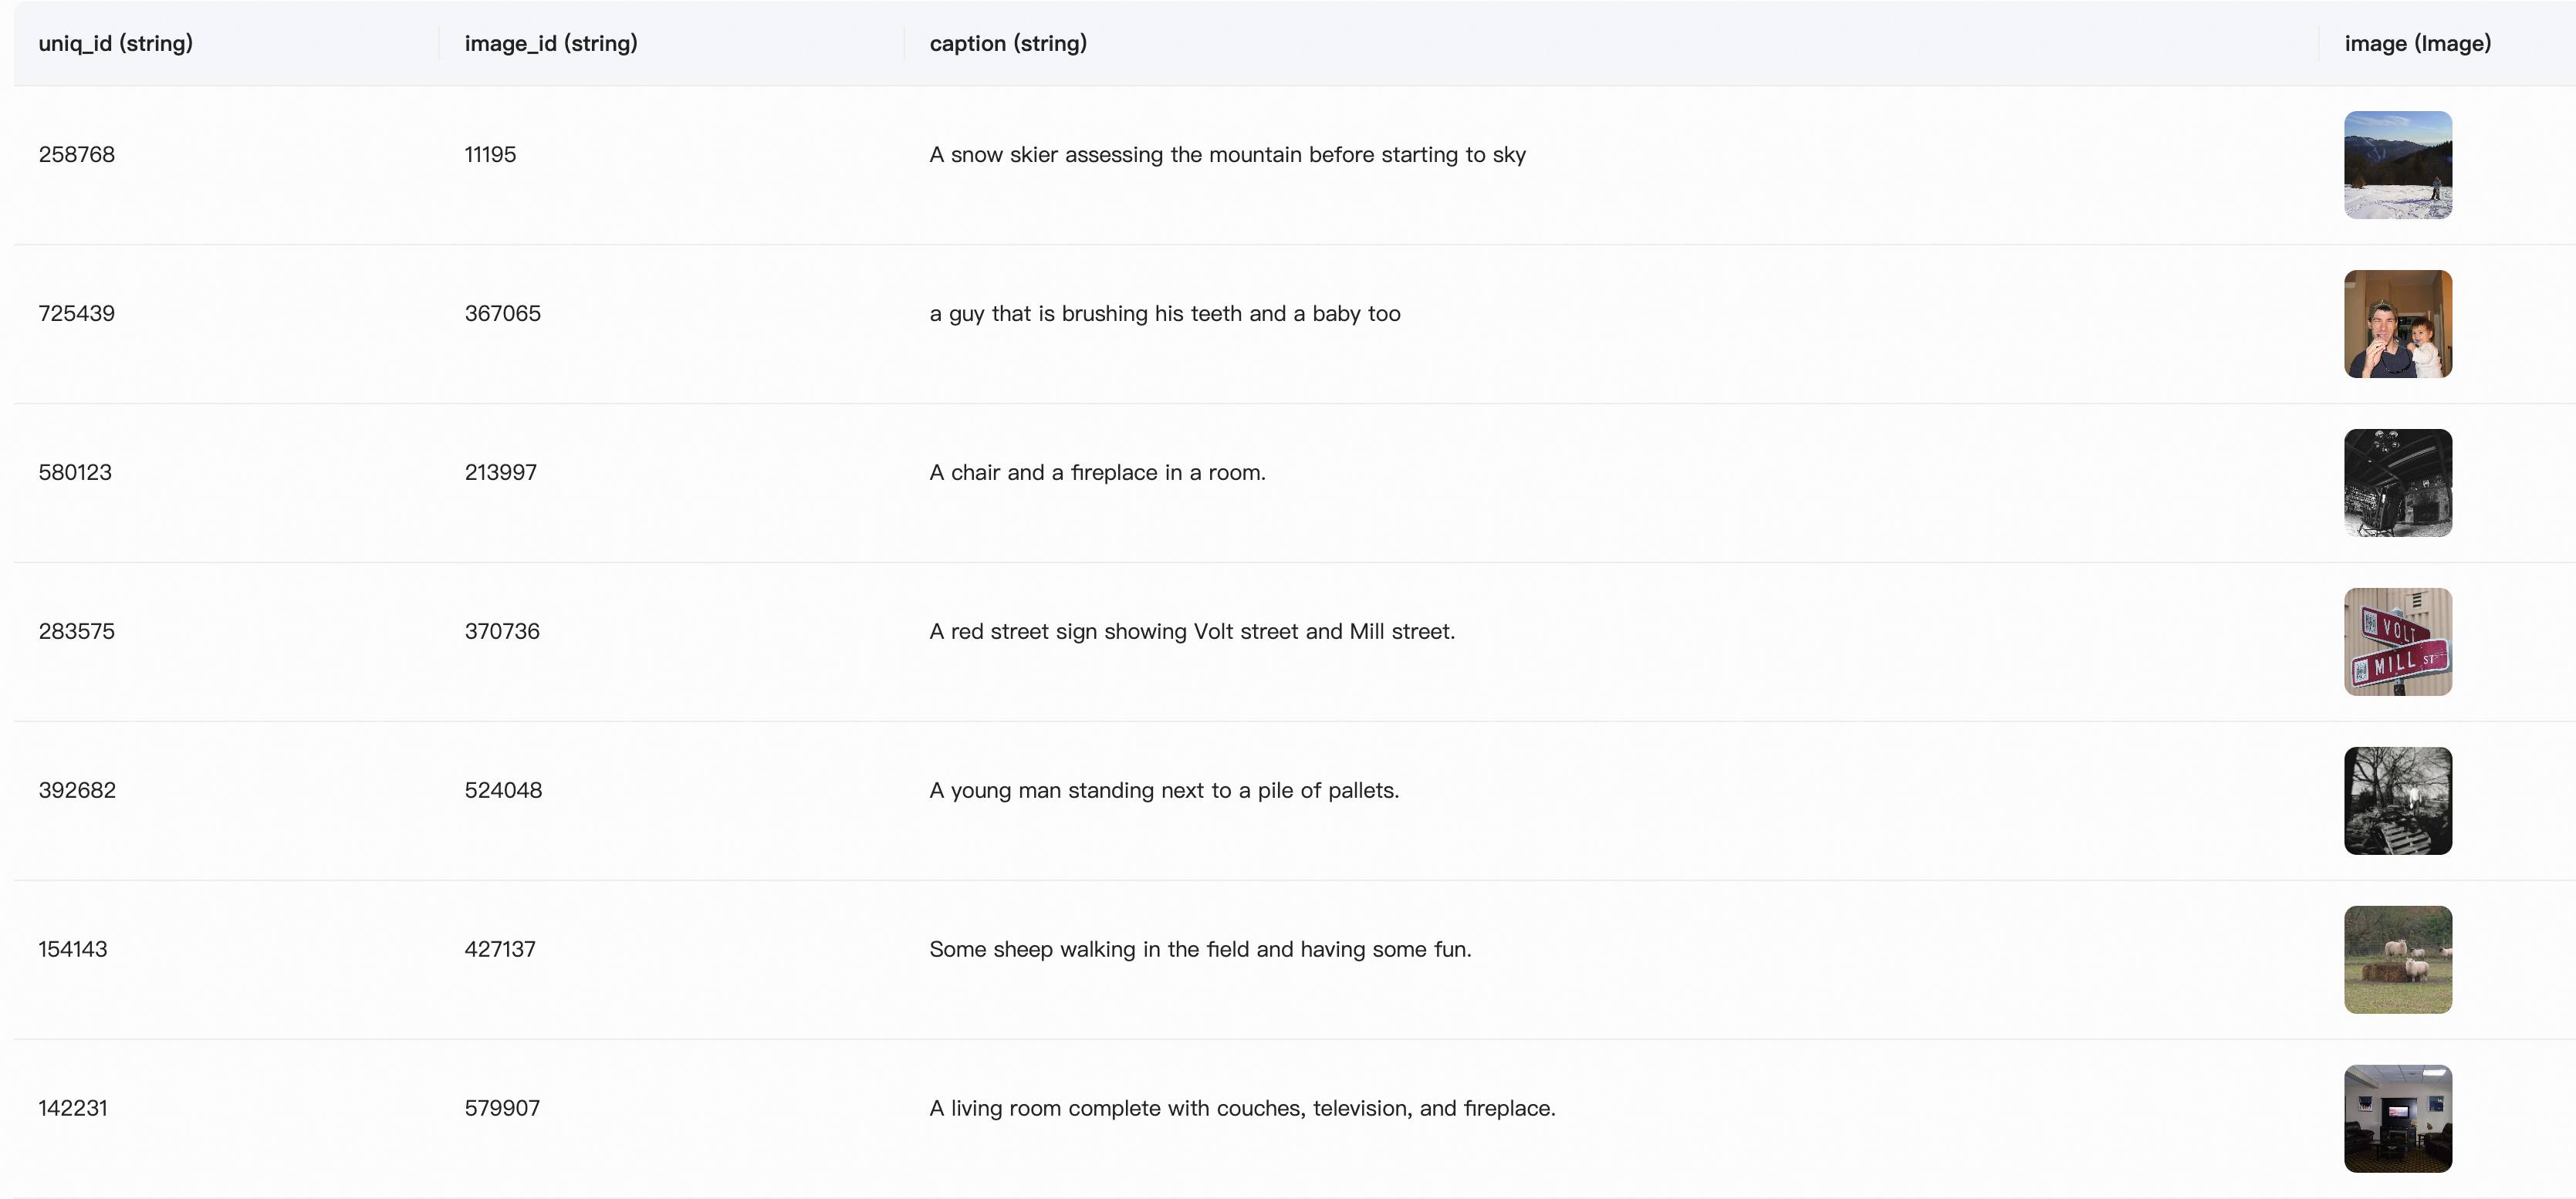
在本节的任务中,我们主要使用其中的前500张图像,并对它们进行处理和格式调整,目标是组合成如下格式的JSON文件:
数据集下载与处理方式
我们需要做四件事情:
通过Modelscope下载COCO 2014 Caption数据集
加载数据集,将图像保存到本地
将图像路径和描述文本转换为一个CSV文件
将CSV文件转换为JSON文件
# 导入所需的库
from modelscope.msdatasets import MsDataset
import os
import pandas as pd

MAX_DATA_NUMBER = 500

# 检查目录是否已存在
if not os.path.exists('coco_2014_caption'):
    # 从modelscope下载COCO 2014图像描述数据集
    ds =  MsDataset.load('modelscope/coco_2014_caption', subset_name='coco_2014_caption', split='train')
    print(len(ds))
    # 设置处理的图片数量上限
    total = min(MAX_DATA_NUMBER, len(ds))

    # 创建保存图片的目录
    os.makedirs('coco_2014_caption', exist_ok=True)

    # 初始化存储图片路径和描述的列表
    image_paths = []
    captions = []

    for i in range(total):
        # 获取每个样本的信息
        item = ds[i]
        image_id = item['image_id']
        caption = item['caption']
        image = item['image']

        # 保存图片并记录路径
        image_path = os.path.abspath(f'coco_2014_caption/{image_id}.jpg')
        image.save(image_path)

        # 将路径和描述添加到列表中
        image_paths.append(image_path)
        captions.append(caption)

        # 每处理50张图片打印一次进度
        if (i + 1) % 50 == 0:
            print(f'Processing {i+1}/{total} images ({(i+1)/total*100:.1f}%)')

    # 将图片路径和描述保存为CSV文件
    df = pd.DataFrame({
        'image_path': image_paths,
        'caption': captions
    })

    # 将数据保存为CSV文件
    df.to_csv('./coco-2024-dataset.csv', index=False)

    print(f'数据处理完成,共处理了{total}张图片')

else:
print('coco_2014_caption目录已存在,跳过数据处理步骤')使用下面的代码完成从数据下载到生成CSV的过程:
在同一目录下,用以下代码,将csv文件转换为json文件:
import pandas as pd
import json

# 载入CSV文件
df = pd.read_csv('./coco-2024-dataset.csv')
conversations = []

# 添加对话数据
for i in range(len(df)):
    conversations.append({
        "id": f"identity_{i+1}",
        "conversations": [
            {
                "from": "user",
                "value": f"COCO Yes: <|vision_start|>{df.iloc[i]['image_path']}<|vision_end|>"
            },
            {
                "from": "assistant",
                "value": df.iloc[i]['caption']
            }
        ]
    })

# 保存为json
with open('data_vl.json', 'w', encoding='utf-8') as f:
json.dump(conversations, f, ensure_ascii=False, indent=2)此时目录下会多出两个文件:
coco-2024-dataset.csv
data_vl.json
至此,我们完成了数据集的准备。
🤖 模型下载与加载
这里使用 modelscope 提供的 snapshot_download 函数进行下载,该方法对国内的用户十分友好。然后把它加载到Transformers中进行训练:
from modelscope import snapshot_download, AutoTokenizer
from transformers import TrainingArguments, Trainer, DataCollatorForSeq2Seq, Qwen2VLForConditionalGeneration, AutoProcessor
import torch

# 在modelscope上下载Qwen2-VL模型到本地目录下
model_dir = snapshot_download("Qwen/Qwen2-VL-2B-Instruct", cache_dir="./", revision="master")

# 使用Transformers加载模型权重
tokenizer = AutoTokenizer.from_pretrained("./Qwen/Qwen2-VL-2B-Instruct/", use_fast=False, trust_remote_code=True)
# 特别的,Qwen2-VL-2B-Instruct模型需要使用Qwen2VLForConditionalGeneration来加载
model = Qwen2VLForConditionalGeneration.from_pretrained("./Qwen/Qwen2-VL-2B-Instruct/", device_map="auto", torch_dtype=torch.bfloat16, trust_remote_code=True,)
model.enable_input_require_grads() # 开启梯度检查点时,要执行该方法模型大小约 4.5GB,下载模型大概需要 5 - 10 分钟。
🚀 开始微调
本节代码做了以下几件事:
下载并加载 Qwen2-VL-2B-Instruct 模型
加载数据集,取前496条数据参与训练,4条数据进行主观评测
配置Lora,参数为r=64, lora_alpha=16, lora_dropout=0.05
训练2个epoch
完整代码如下:
import torch
from datasets import Dataset
from modelscope import snapshot_download, AutoTokenizer
from qwen_vl_utils import process_vision_info
from peft import LoraConfig, TaskType, get_peft_model, PeftModel
from transformers import (
    TrainingArguments,
    Trainer,
    DataCollatorForSeq2Seq,
    Qwen2VLForConditionalGeneration,
    AutoProcessor,
)
import json

def process_func(example):
    """
    将数据集进行预处理
    """
    MAX_LENGTH = 8192
    input_ids, attention_mask, labels = [], [], []
    conversation = example["conversations"]
    input_content = conversation[0]["value"]
    output_content = conversation[1]["value"]
    file_path = input_content.split("<|vision_start|>")[1].split("<|vision_end|>")[0]  # 获取图像路径
    messages = [
        {
            "role": "user",
            "content": [
                {
                    "type": "image",
                    "image": f"{file_path}",
                    "resized_height": 280,
                    "resized_width": 280,
                },
                {"type": "text", "text": "COCO Yes:"},
            ],
        }
    ]
    text = processor.apply_chat_template(
        messages, tokenize=False, add_generation_prompt=True
    )  # 获取文本
    image_inputs, video_inputs = process_vision_info(messages)  # 获取数据数据(预处理过)
    inputs = processor(
        text=[text],
        images=image_inputs,
        videos=video_inputs,
        padding=True,
        return_tensors="pt",
    )
    inputs = {key: value.tolist() for key, value in inputs.items()} #tensor -> list,为了方便拼接
    instruction = inputs

    response = tokenizer(f"{output_content}", add_special_tokens=False)


    input_ids = (
            instruction["input_ids"][0] + response["input_ids"] + [tokenizer.pad_token_id]
    )

    attention_mask = instruction["attention_mask"][0] + response["attention_mask"] + [1]
    labels = (
            [-100] * len(instruction["input_ids"][0])
            + response["input_ids"]
            + [tokenizer.pad_token_id]
    )
    if len(input_ids) > MAX_LENGTH:  # 做一个截断
        input_ids = input_ids[:MAX_LENGTH]
        attention_mask = attention_mask[:MAX_LENGTH]
        labels = labels[:MAX_LENGTH]

    input_ids = torch.tensor(input_ids)
    attention_mask = torch.tensor(attention_mask)
    labels = torch.tensor(labels)
    inputs['pixel_values'] = torch.tensor(inputs['pixel_values'])
    inputs['image_grid_thw'] = torch.tensor(inputs['image_grid_thw']).squeeze(0)  #由(1,h,w)变换为(h,w)
    return {"input_ids": input_ids, "attention_mask": attention_mask, "labels": labels,
            "pixel_values": inputs['pixel_values'], "image_grid_thw": inputs['image_grid_thw']}

def predict(messages, model):
    # 准备推理
    text = processor.apply_chat_template(messages, tokenize=False, add_generation_prompt=True)
    image_inputs, video_inputs = process_vision_info(messages)
    inputs = processor(
        text=[text],
        images=image_inputs,
        videos=video_inputs,
        padding=True,
        return_tensors="pt",
    )
    inputs = inputs.to("cuda")

    # 生成输出
    generated_ids = model.generate(**inputs, max_new_tokens=128)
    generated_ids_trimmed = [
        out_ids[len(in_ids) :] for in_ids, out_ids in zip(inputs.input_ids, generated_ids)
    ]
    output_text = processor.batch_decode(
        generated_ids_trimmed, skip_special_tokens=True, clean_up_tokenization_spaces=False
    )

    return output_text[0]

# 使用Transformers加载模型权重
tokenizer = AutoTokenizer.from_pretrained("./Qwen/Qwen2-VL-2B-Instruct/", use_fast=False, trust_remote_code=True)
processor = AutoProcessor.from_pretrained("./Qwen/Qwen2-VL-2B-Instruct")

model = Qwen2VLForConditionalGeneration.from_pretrained("./Qwen/Qwen2-VL-2B-Instruct/", device_map="auto", torch_dtype=torch.bfloat16, trust_remote_code=True,)
model.enable_input_require_grads()  # 开启梯度检查点时,要执行该方法

# 处理数据集:读取json文件
# 拆分成训练集和测试集,保存为data_vl_train.json和data_vl_test.json
train_json_path = "data_vl.json"
with open(train_json_path, 'r') as f:
    data = json.load(f)
    train_data = data[:-4]
    test_data = data[-4:]

with open("data_vl_train.json", "w") as f:
    json.dump(train_data, f)

with open("data_vl_test.json", "w") as f:
    json.dump(test_data, f)

train_ds = Dataset.from_json("data_vl_train.json")
train_dataset = train_ds.map(process_func)

# 配置LoRA
config = LoraConfig(
    task_type=TaskType.CAUSAL_LM,
    target_modules=["q_proj", "k_proj", "v_proj", "o_proj", "gate_proj", "up_proj", "down_proj"],
    inference_mode=False,  # 训练模式
    r=64,  # Lora 秩
    lora_alpha=16,  # Lora alaph,具体作用参见 Lora 原理
    lora_dropout=0.05,  # Dropout 比例
    bias="none",
)

# 获取LoRA模型
peft_model = get_peft_model(model, config)

# 配置训练参数
args = TrainingArguments(
    output_dir="./output/Qwen2-VL-2B",
    per_device_train_batch_size=2,
    gradient_accumulation_steps=2,
    logging_steps=10,
    num_train_epochs=2,
    save_steps=100,
    learning_rate=1e-4,
    save_on_each_node=True,
    gradient_checkpointing=True,
    report_to="none",
)

# 配置Trainer
trainer = Trainer(
    model=peft_model,
    args=args,
    train_dataset=train_dataset,
    data_collator=DataCollatorForSeq2Seq(tokenizer=tokenizer, padding=True),
)
# 开启模型训练
trainer.train()

# ===测试模式===
# 配置测试参数
val_config = LoraConfig(
    task_type=TaskType.CAUSAL_LM,
    target_modules=["q_proj", "k_proj", "v_proj", "o_proj", "gate_proj", "up_proj", "down_proj"],
    inference_mode=True,  # 训练模式
    r=64,  # Lora 秩
    lora_alpha=16,  # Lora alaph,具体作用参见 Lora 原理
    lora_dropout=0.05,  # Dropout 比例
    bias="none",
)

# 获取测试模型
val_peft_model = PeftModel.from_pretrained(model, model_id="./output/Qwen2-VL-2B/checkpoint-100", config=val_config)

# 读取测试数据
with open("data_vl_test.json", "r") as f:
    test_dataset = json.load(f)

test_image_list = []
for item in test_dataset:
    input_image_prompt = item["conversations"][0]["value"]
    # 去掉前后的<|vision_start|>和<|vision_end|>
    origin_image_path = input_image_prompt.split("<|vision_start|>")[1].split("<|vision_end|>")[0]

    messages = [{
        "role": "user",
        "content": [
            {
                "type": "image",
                "image": origin_image_path
            },
            {
                "type": "text",
                "text": "COCO Yes:"
            }
        ]}]

    response = predict(messages, val_peft_model)
    messages.append({"role": "assistant", "content": f"{response}"})
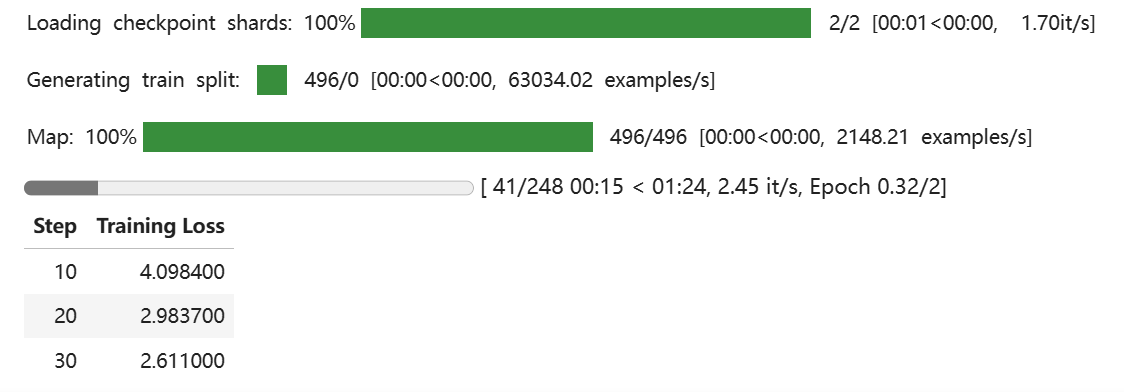
print(messages[-1])看到下面的进度条即代表训练开始:
🧐 推理LoRA微调后的模型
加载LoRA微调后的模型,并进行推理。
完整代码如下:
from transformers import Qwen2VLForConditionalGeneration, AutoProcessor
from qwen_vl_utils import process_vision_info
from peft import PeftModel, LoraConfig, TaskType

config = LoraConfig(
    task_type=TaskType.CAUSAL_LM,
    target_modules=["q_proj", "k_proj", "v_proj", "o_proj", "gate_proj", "up_proj", "down_proj"],
    inference_mode=True,
    r=64,  # Lora 秩
    lora_alpha=16,  # Lora alaph,具体作用参见 Lora 原理
    lora_dropout=0.05,  # Dropout 比例
    bias="none",
)

# default: Load the model on the available device(s)
model = Qwen2VLForConditionalGeneration.from_pretrained(
    "./Qwen/Qwen2-VL-2B-Instruct", torch_dtype="auto", device_map="auto"
)
model = PeftModel.from_pretrained(model, model_id="./output/Qwen2-VL-2B/checkpoint-100", config=config)
processor = AutoProcessor.from_pretrained("./Qwen/Qwen2-VL-2B-Instruct")

messages = [
    {
        "role": "user",
        "content": [
            {
                "type": "image",
                "image": "测试图像路径",
            },
            {"type": "text", "text": "COCO Yes:"},
        ],
    }
]

# Preparation for inference
text = processor.apply_chat_template(
    messages, tokenize=False, add_generation_prompt=True
)
image_inputs, video_inputs = process_vision_info(messages)
inputs = processor(
    text=[text],
    images=image_inputs,
    videos=video_inputs,
    padding=True,
    return_tensors="pt",
)
inputs = inputs.to("cuda")

# Inference: Generation of the output
generated_ids = model.generate(**inputs, max_new_tokens=128)
generated_ids_trimmed = [
    out_ids[len(in_ids) :] for in_ids, out_ids in zip(inputs.input_ids, generated_ids)
]
output_text = processor.batch_decode(
    generated_ids_trimmed, skip_special_tokens=True, clean_up_tokenization_spaces=False
)
print(output_text)注意:将代码中的"测试图像路径"替换为你自己希望测试的图像路径。
Qwen2-VL-2B-Instruct Lora 微调 SwanLab可视化记录版
本节我们简要介绍基于 transformers、peft 等框架,使用 Qwen2-VL-2B-Instruct 模型在COCO2014图像描述 上进行Lora微调训练,同时使用 SwanLab 监控训练过程与评估模型效果。
训练过程:Qwen2-VL-finetune
目录
👋 SwanLab简介
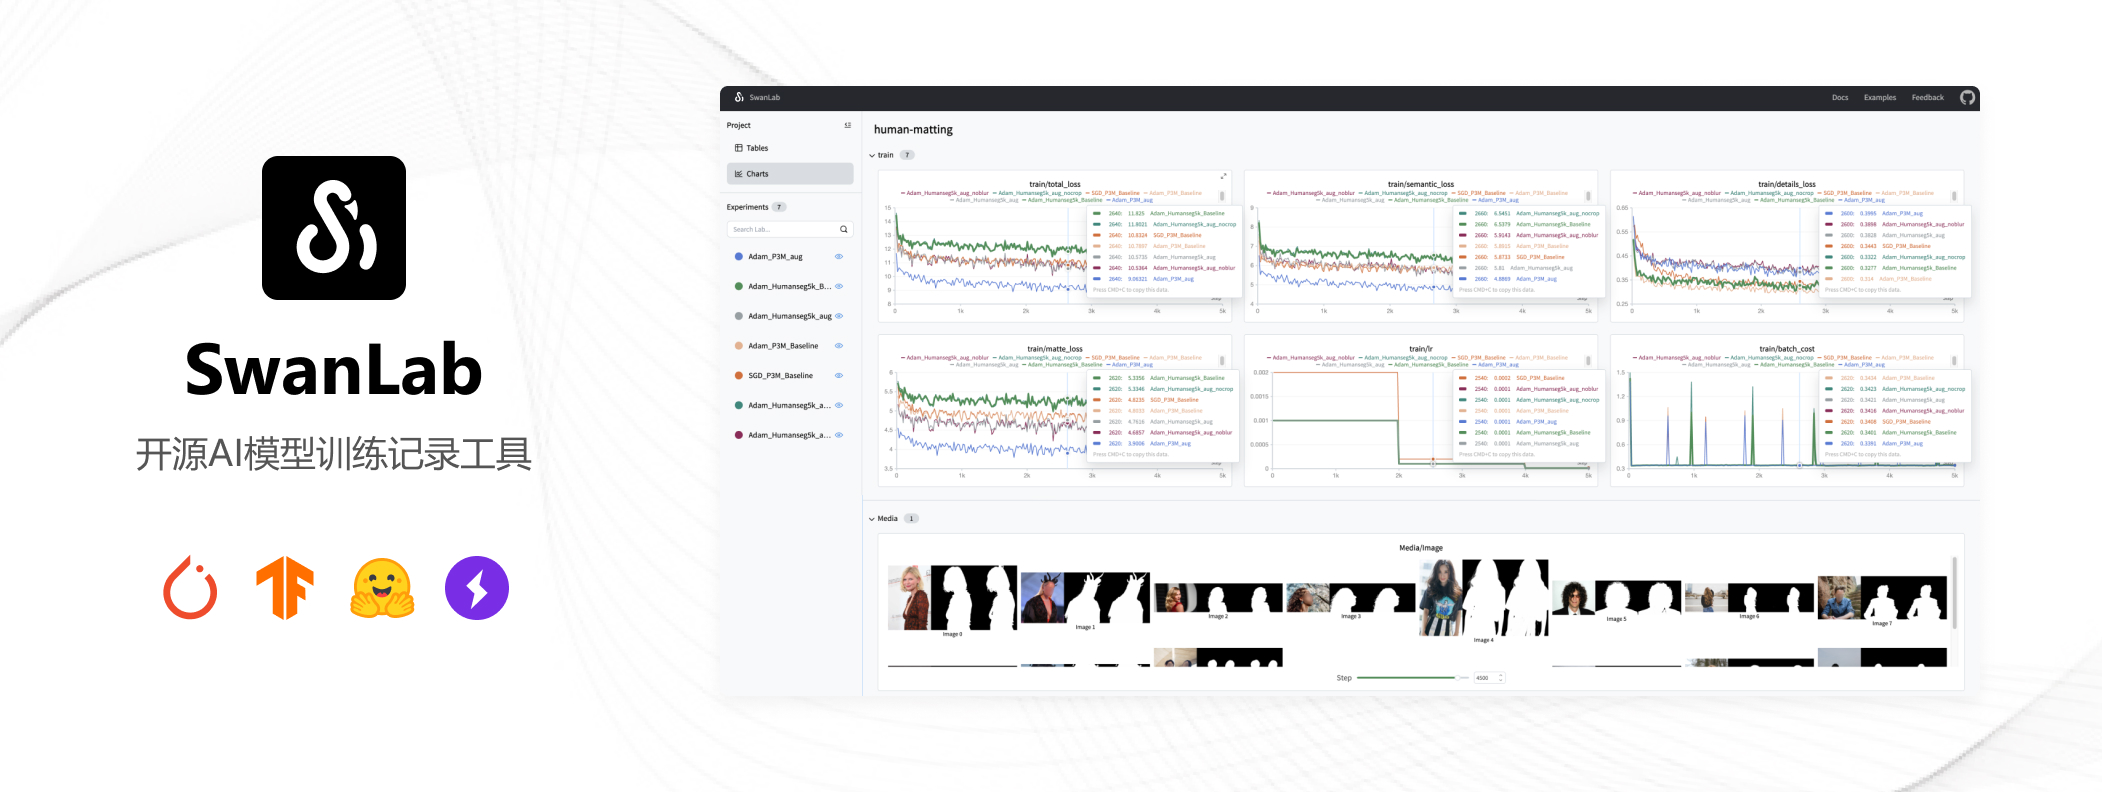
SwanLab 是一个开源的模型训练记录工具,常被称为"中国版 Weights&Biases + Tensorboard"。SwanLab面向AI研究者,提供了训练可视化、自动日志记录、超参数记录、实验对比、多人协同等功能。在SwanLab上,研究者能基于直观的可视化图表发现训练问题,对比多个实验找到研究灵感,并通过在线链接的分享与基于组织的多人协同训练,打破团队沟通的壁垒。
为什么要记录训练?
相较于软件开发,模型训练更像一个实验科学。一个品质优秀的模型背后,往往是成千上万次实验。研究者需要不断尝试、记录、对比,积累经验,才能找到最佳的模型结构、超参数与数据配比。在这之中,如何高效进行记录与对比,对于研究效率的提升至关重要。
可视化的价值在哪里?
机器学习模型训练往往伴随着大量的超参数、指标、日志等数据,很多关键信息往往存在于实验的中间而非结尾,如果不对连续的指标通过图表进行可视化,往往会错失发现问题的最佳时机,甚至错过关键信息。同时不进行可视化,也难以对比多个实验之间的差异。 可视化也为AI研究者提供了良好的交流基础,研究者们可以基于图表进行沟通、分析与优化,而非以往看着枯燥的终端打印。这打破了团队沟通的壁垒,提高了整体的研发效率。
🌍 环境配置
环境配置分为三步:
确保你的电脑上至少有一张英伟达显卡,并已安装好了CUDA环境。
安装Python(版本>=3.8)以及能够调用CUDA加速的PyTorch。
安装Qwen2-VL微调相关的第三方库,可以使用以下命令:
python -m pip install --upgrade pip
# 更换 pypi 源加速库的安装
pip config set global.index-url https://pypi.tuna.tsinghua.edu.cn/simple

pip install modelscope==1.18.0
pip install transformers==4.46.2
pip install sentencepiece==0.2.0
pip install accelerate==1.1.1
pip install datasets==2.18.0
pip install peft==0.13.2
pip install swanlab==0.3.27
pip install qwen-vl-utils==0.0.8📚 准备数据集
数据集介绍:COCO 2014 Caption数据集是Microsoft Common Objects in Context (COCO)数据集的一部分,主要用于图像描述任务。该数据集包含了大约40万张图像,每张图像都有至少1个人工生成的英文描述语句。这些描述语句旨在帮助计算机理解图像内容,并为图像自动生成描述提供训练数据。
在本节的任务中,我们主要使用其中的前500张图像,并对它进行处理和格式调整,目标是组合成如下格式的json文件:
[
{
    "id": "identity_1",
    "conversations": [
      {
        "from": "user",
        "value": "COCO Yes: <|vision_start|>图像文件路径<|vision_end|>"
      },
      {
        "from": "assistant",
        "value": "A snow skier assessing the mountain before starting to sky"
      }
    ]
},
...
]其中,"from"是角色(user代表人类,assistant代表模型),"value"是聊天的内容,其中和是Qwen2-VL模型识别图像的标记,中间可以放图像的文件路径,也可以是URL。
数据集下载与处理方式
我们需要做四件事情:
通过Modelscope下载coco_2014_caption数据集
加载数据集,将图像保存到本地
将图像路径和描述文本转换为一个csv文件
将csv文件转换为json文件
使用下面的代码完成从数据下载到生成csv的过程:
data2csv.py:
# 导入所需的库
from modelscope.msdatasets import MsDataset
import os
import pandas as pd

MAX_DATA_NUMBER = 500

# 检查目录是否已存在
if not os.path.exists('coco_2014_caption'):
    # 从modelscope下载COCO 2014图像描述数据集
    ds =  MsDataset.load('modelscope/coco_2014_caption', subset_name='coco_2014_caption', split='train')
    print(len(ds))
    # 设置处理的图片数量上限
    total = min(MAX_DATA_NUMBER, len(ds))

    # 创建保存图片的目录
    os.makedirs('coco_2014_caption', exist_ok=True)

    # 初始化存储图片路径和描述的列表
    image_paths = []
    captions = []

    for i in range(total):
        # 获取每个样本的信息
        item = ds[i]
        image_id = item['image_id']
        caption = item['caption']
        image = item['image']

        # 保存图片并记录路径
        image_path = os.path.abspath(f'coco_2014_caption/{image_id}.jpg')
        image.save(image_path)

        # 将路径和描述添加到列表中
        image_paths.append(image_path)
        captions.append(caption)

        # 每处理50张图片打印一次进度
        if (i + 1) % 50 == 0:
            print(f'Processing {i+1}/{total} images ({(i+1)/total*100:.1f}%)')

    # 将图片路径和描述保存为CSV文件
    df = pd.DataFrame({
        'image_path': image_paths,
        'caption': captions
    })

    # 将数据保存为CSV文件
    df.to_csv('./coco-2024-dataset.csv', index=False)

    print(f'数据处理完成,共处理了{total}张图片')

else:
print('coco_2014_caption目录已存在,跳过数据处理步骤')3. 在同一目录下,用以下代码,将csv文件转换为json文件:
csv2json.py:
import pandas as pd
import json

# 载入CSV文件
df = pd.read_csv('./coco-2024-dataset.csv')
conversations = []

# 添加对话数据
for i in range(len(df)):
    conversations.append({
        "id": f"identity_{i+1}",
        "conversations": [
            {
                "from": "user",
                "value": f"COCO Yes: <|vision_start|>{df.iloc[i]['image_path']}<|vision_end|>"
            },
            {
                "from": "assistant",
                "value": df.iloc[i]['caption']
            }
        ]
    })

# 保存为Json
with open('data_vl.json', 'w', encoding='utf-8') as f:
json.dump(conversations, f, ensure_ascii=False, indent=2)此时目录下会多出两个文件:
coco-2024-dataset.csv
data_vl.json
至此,我们完成了数据集的准备。
🤖 模型下载与加载
这里我们使用modelscope下载Qwen2-VL-2B-Instruct模型,然后把它加载到Transformers中进行训练:
from modelscope import snapshot_download, AutoTokenizer
from transformers import TrainingArguments, Trainer, DataCollatorForSeq2Seq, Qwen2VLForConditionalGeneration, AutoProcessor
import torch

# 在modelscope上下载Qwen2-VL模型到本地目录下
model_dir = snapshot_download("Qwen/Qwen2-VL-2B-Instruct", cache_dir="./", revision="master")

# 使用Transformers加载模型权重
tokenizer = AutoTokenizer.from_pretrained("./Qwen/Qwen2-VL-2B-Instruct/", use_fast=False, trust_remote_code=True)
# 特别的,Qwen2-VL-2B-Instruct模型需要使用Qwen2VLForConditionalGeneration来加载
model = Qwen2VLForConditionalGeneration.from_pretrained("./Qwen/Qwen2-VL-2B-Instruct/", device_map="auto", torch_dtype=torch.bfloat16, trust_remote_code=True,)
model.enable_input_require_grads() # 开启梯度检查点时,要执行该方法模型大小为 4.5GB,下载模型大概需要 5 分钟。
🐦 集成SwanLab
SwanLab与Transformers已经做好了集成,用法是在Trainer的callbacks参数中添加SwanLabCallback实例,就可以自动记录超参数和训练指标,简化代码如下:
from swanlab.integration.transformers import SwanLabCallback
from transformers import Trainer

swanlab_callback = SwanLabCallback()

trainer = Trainer(
    ...
    callbacks=[swanlab_callback],
)
🚀 开始微调
查看可视化训练过程:Qwen2-VL-finetune
本节代码做了以下几件事:
下载并加载Qwen2-VL-2B-Instruct模型
加载数据集,取前496条数据参与训练,4条数据进行主观评测
配置Lora,参数为r=64, lora_alpha=16, lora_dropout=0.05
使用SwanLab记录训练过程,包括超参数、指标和最终的模型输出结果
训练2个epoch
开始执行代码时的目录结构应该是:
|———— train.py
|———— coco_2014_caption
|———— coco-2024-dataset.csv
|———— data_vl.json
|———— data2csv.py
|———— csv2json.py完整代码如下
train.py:
import torch
from datasets import Dataset
from modelscope import snapshot_download, AutoTokenizer
from swanlab.integration.transformers import SwanLabCallback
from qwen_vl_utils import process_vision_info
from peft import LoraConfig, TaskType, get_peft_model, PeftModel
from transformers import (
    TrainingArguments,
    Trainer,
    DataCollatorForSeq2Seq,
    Qwen2VLForConditionalGeneration,
    AutoProcessor,
)
import swanlab
import json


def process_func(example):
    """
    将数据集进行预处理
    """
    MAX_LENGTH = 8192
    input_ids, attention_mask, labels = [], [], []
    conversation = example["conversations"]
    input_content = conversation[0]["value"]
    output_content = conversation[1]["value"]
    file_path = input_content.split("<|vision_start|>")[1].split("<|vision_end|>")[0]  # 获取图像路径
    messages = [
        {
            "role": "user",
            "content": [
                {
                    "type": "image",
                    "image": f"{file_path}",
                    "resized_height": 280,
                    "resized_width": 280,
                },
                {"type": "text", "text": "COCO Yes:"},
            ],
        }
    ]
    text = processor.apply_chat_template(
        messages, tokenize=False, add_generation_prompt=True
    )  # 获取文本
    image_inputs, video_inputs = process_vision_info(messages)  # 获取数据数据(预处理过)
    inputs = processor(
        text=[text],
        images=image_inputs,
        videos=video_inputs,
        padding=True,
        return_tensors="pt",
    )
    inputs = {key: value.tolist() for key, value in inputs.items()} #tensor -> list,为了方便拼接
    instruction = inputs

    response = tokenizer(f"{output_content}", add_special_tokens=False)


    input_ids = (
            instruction["input_ids"][0] + response["input_ids"] + [tokenizer.pad_token_id]
    )

    attention_mask = instruction["attention_mask"][0] + response["attention_mask"] + [1]
    labels = (
            [-100] * len(instruction["input_ids"][0])
            + response["input_ids"]
            + [tokenizer.pad_token_id]
    )
    if len(input_ids) > MAX_LENGTH:  # 做一个截断
        input_ids = input_ids[:MAX_LENGTH]
        attention_mask = attention_mask[:MAX_LENGTH]
        labels = labels[:MAX_LENGTH]

    input_ids = torch.tensor(input_ids)
    attention_mask = torch.tensor(attention_mask)
    labels = torch.tensor(labels)
    inputs['pixel_values'] = torch.tensor(inputs['pixel_values'])
    inputs['image_grid_thw'] = torch.tensor(inputs['image_grid_thw']).squeeze(0)  #由(1,h,w)变换为(h,w)
    return {"input_ids": input_ids, "attention_mask": attention_mask, "labels": labels,
            "pixel_values": inputs['pixel_values'], "image_grid_thw": inputs['image_grid_thw']}


def predict(messages, model):
    # 准备推理
    text = processor.apply_chat_template(
        messages, tokenize=False, add_generation_prompt=True
    )
    image_inputs, video_inputs = process_vision_info(messages)
    inputs = processor(
        text=[text],
        images=image_inputs,
        videos=video_inputs,
        padding=True,
        return_tensors="pt",
    )
    inputs = inputs.to("cuda")

    # 生成输出
    generated_ids = model.generate(**inputs, max_new_tokens=128)
    generated_ids_trimmed = [
        out_ids[len(in_ids) :] for in_ids, out_ids in zip(inputs.input_ids, generated_ids)
    ]
    output_text = processor.batch_decode(
        generated_ids_trimmed, skip_special_tokens=True, clean_up_tokenization_spaces=False
    )

    return output_text[0]


# 在modelscope上下载Qwen2-VL模型到本地目录下
model_dir = snapshot_download("Qwen/Qwen2-VL-2B-Instruct", cache_dir="./", revision="master")

# 使用Transformers加载模型权重
tokenizer = AutoTokenizer.from_pretrained("./Qwen/Qwen2-VL-2B-Instruct/", use_fast=False, trust_remote_code=True)
processor = AutoProcessor.from_pretrained("./Qwen/Qwen2-VL-2B-Instruct")

model = Qwen2VLForConditionalGeneration.from_pretrained("./Qwen/Qwen2-VL-2B-Instruct/", device_map="auto", torch_dtype=torch.bfloat16, trust_remote_code=True,)
model.enable_input_require_grads()  # 开启梯度检查点时,要执行该方法

# 处理数据集:读取json文件
# 拆分成训练集和测试集,保存为data_vl_train.json和data_vl_test.json
train_json_path = "data_vl.json"
with open(train_json_path, 'r') as f:
    data = json.load(f)
    train_data = data[:-4]
    test_data = data[-4:]

with open("data_vl_train.json", "w") as f:
    json.dump(train_data, f)

with open("data_vl_test.json", "w") as f:
    json.dump(test_data, f)

train_ds = Dataset.from_json("data_vl_train.json")
train_dataset = train_ds.map(process_func)

# 配置LoRA
config = LoraConfig(
    task_type=TaskType.CAUSAL_LM,
    target_modules=["q_proj", "k_proj", "v_proj", "o_proj", "gate_proj", "up_proj", "down_proj"],
    inference_mode=False,  # 训练模式
    r=64,  # Lora 秩
    lora_alpha=16,  # Lora alaph,具体作用参见 Lora 原理
    lora_dropout=0.05,  # Dropout 比例
    bias="none",
)

# 获取LoRA模型
peft_model = get_peft_model(model, config)

# 配置训练参数
args = TrainingArguments(
    output_dir="./output/Qwen2-VL-2B",
    per_device_train_batch_size=4,
    gradient_accumulation_steps=4,
    logging_steps=10,
    logging_first_step=5,
    num_train_epochs=2,
    save_steps=100,
    learning_rate=1e-4,
    save_on_each_node=True,
    gradient_checkpointing=True,
    report_to="none",
)

# 设置SwanLab回调
swanlab_callback = SwanLabCallback(
    project="Qwen2-VL-finetune",
    experiment_name="qwen2-vl-coco2014",
    config={
        "model": "https://modelscope.cn/models/Qwen/Qwen2-VL-2B-Instruct",
        "dataset": "https://modelscope.cn/datasets/modelscope/coco_2014_caption/quickstart",
        "github": "https://github.com/datawhalechina/self-llm",
        "prompt": "COCO Yes: ",
        "train_data_number": len(train_data),
        "lora_rank": 64,
        "lora_alpha": 16,
        "lora_dropout": 0.1,
    },
)

# 配置Trainer
trainer = Trainer(
    model=peft_model,
    args=args,
    train_dataset=train_dataset,
    data_collator=DataCollatorForSeq2Seq(tokenizer=tokenizer, padding=True),
    callbacks=[swanlab_callback],
)

# 开启模型训练
trainer.train()

# ====================测试模式===================
# 配置测试参数
val_config = LoraConfig(
    task_type=TaskType.CAUSAL_LM,
    target_modules=["q_proj", "k_proj", "v_proj", "o_proj", "gate_proj", "up_proj", "down_proj"],
    inference_mode=True,  # 训练模式
    r=64,  # Lora 秩
    lora_alpha=16,  # Lora alaph,具体作用参见 Lora 原理
    lora_dropout=0.05,  # Dropout 比例
    bias="none",
)

# 获取测试模型
val_peft_model = PeftModel.from_pretrained(model, model_id="./output/Qwen2-VL-2B/checkpoint-62", config=val_config)

# 读取测试数据
with open("data_vl_test.json", "r") as f:
    test_dataset = json.load(f)

test_image_list = []
for item in test_dataset:
    input_image_prompt = item["conversations"][0]["value"]
    # 去掉前后的<|vision_start|>和<|vision_end|>
    origin_image_path = input_image_prompt.split("<|vision_start|>")[1].split("<|vision_end|>")[0]

    messages = [{
        "role": "user",
        "content": [
            {
            "type": "image",
            "image": origin_image_path
            },
            {
            "type": "text",
            "text": "COCO Yes:"
            }
        ]}]

    response = predict(messages, val_peft_model)
    messages.append({"role": "assistant", "content": f"{response}"})
    print(messages[-1])

    test_image_list.append(swanlab.Image(origin_image_path, caption=response))

swanlab.log({"Prediction": test_image_list})

# 在Jupyter Notebook中运行时要停止SwanLab记录,需要调用swanlab.finish()
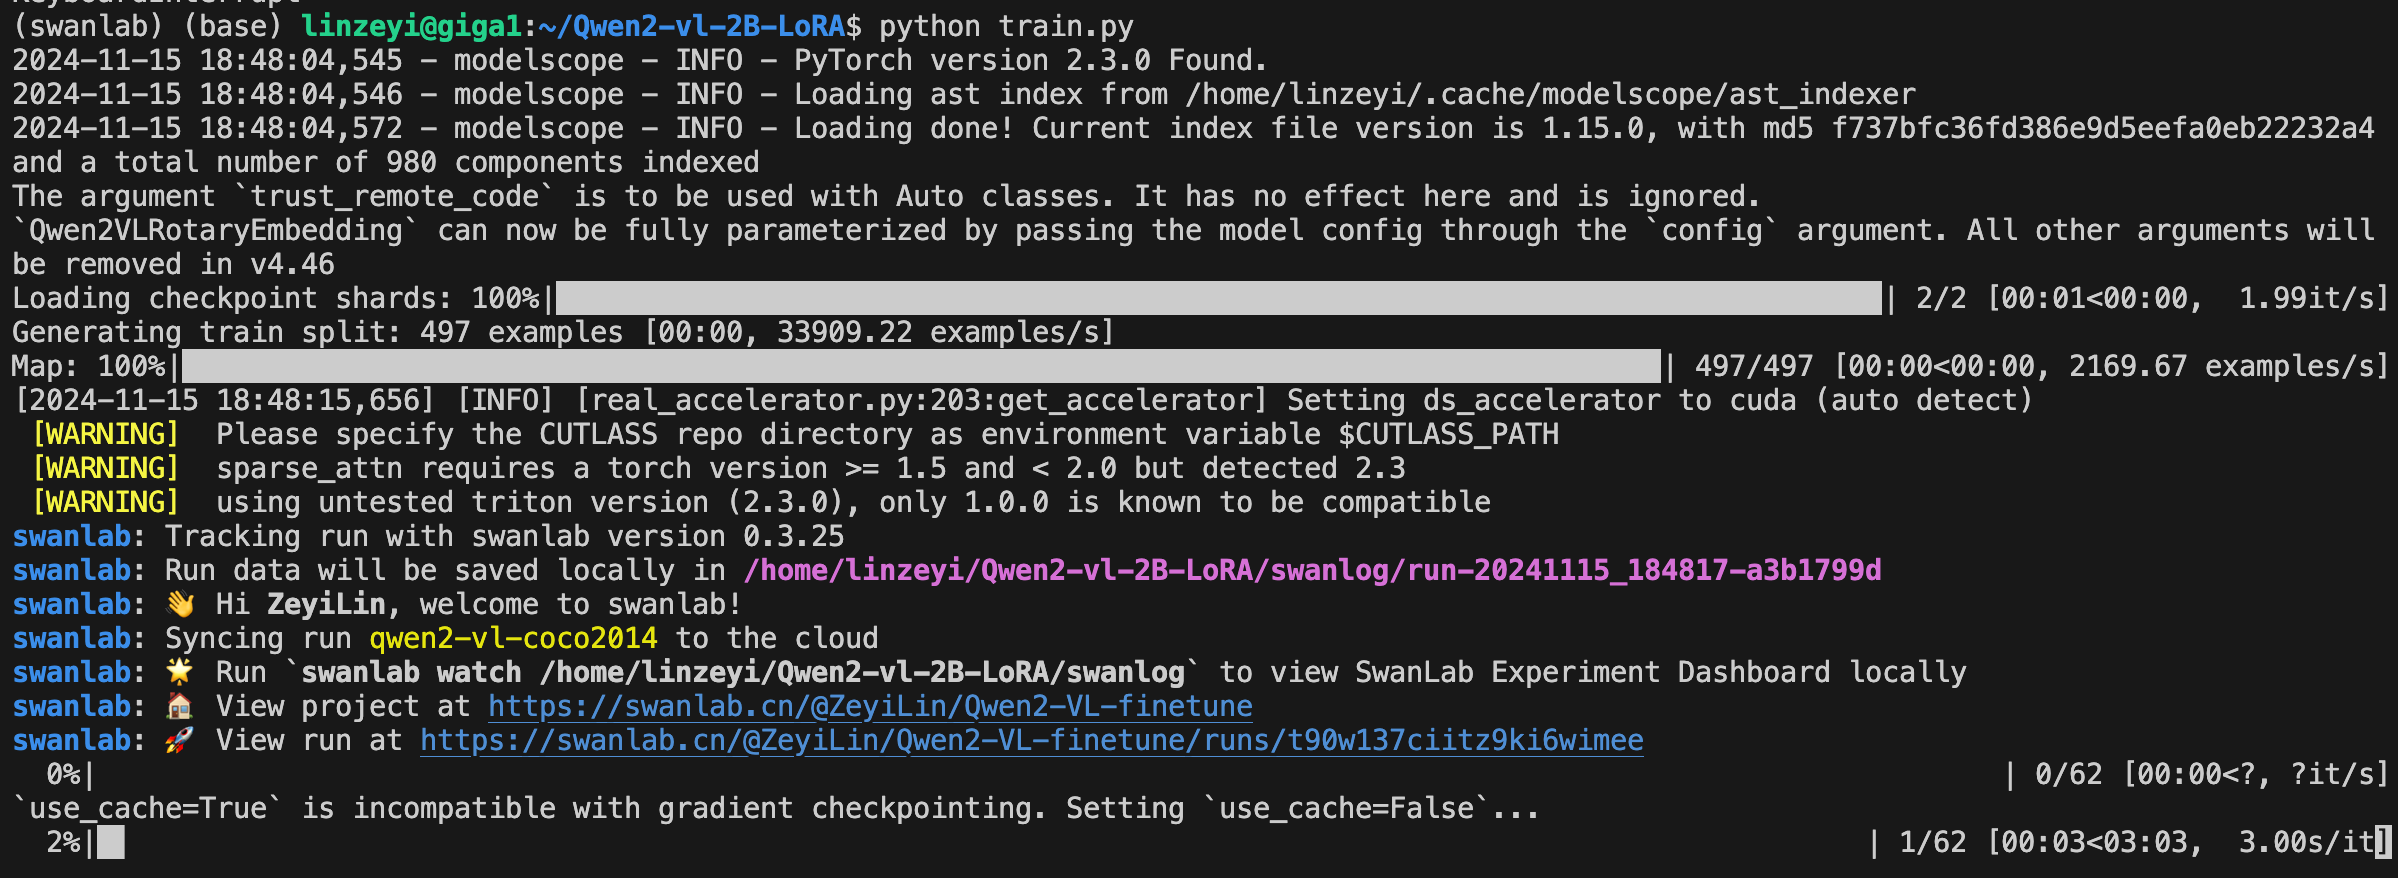
swanlab.finish()看到下面的进度条即代表训练开始:
💻 训练结果演示
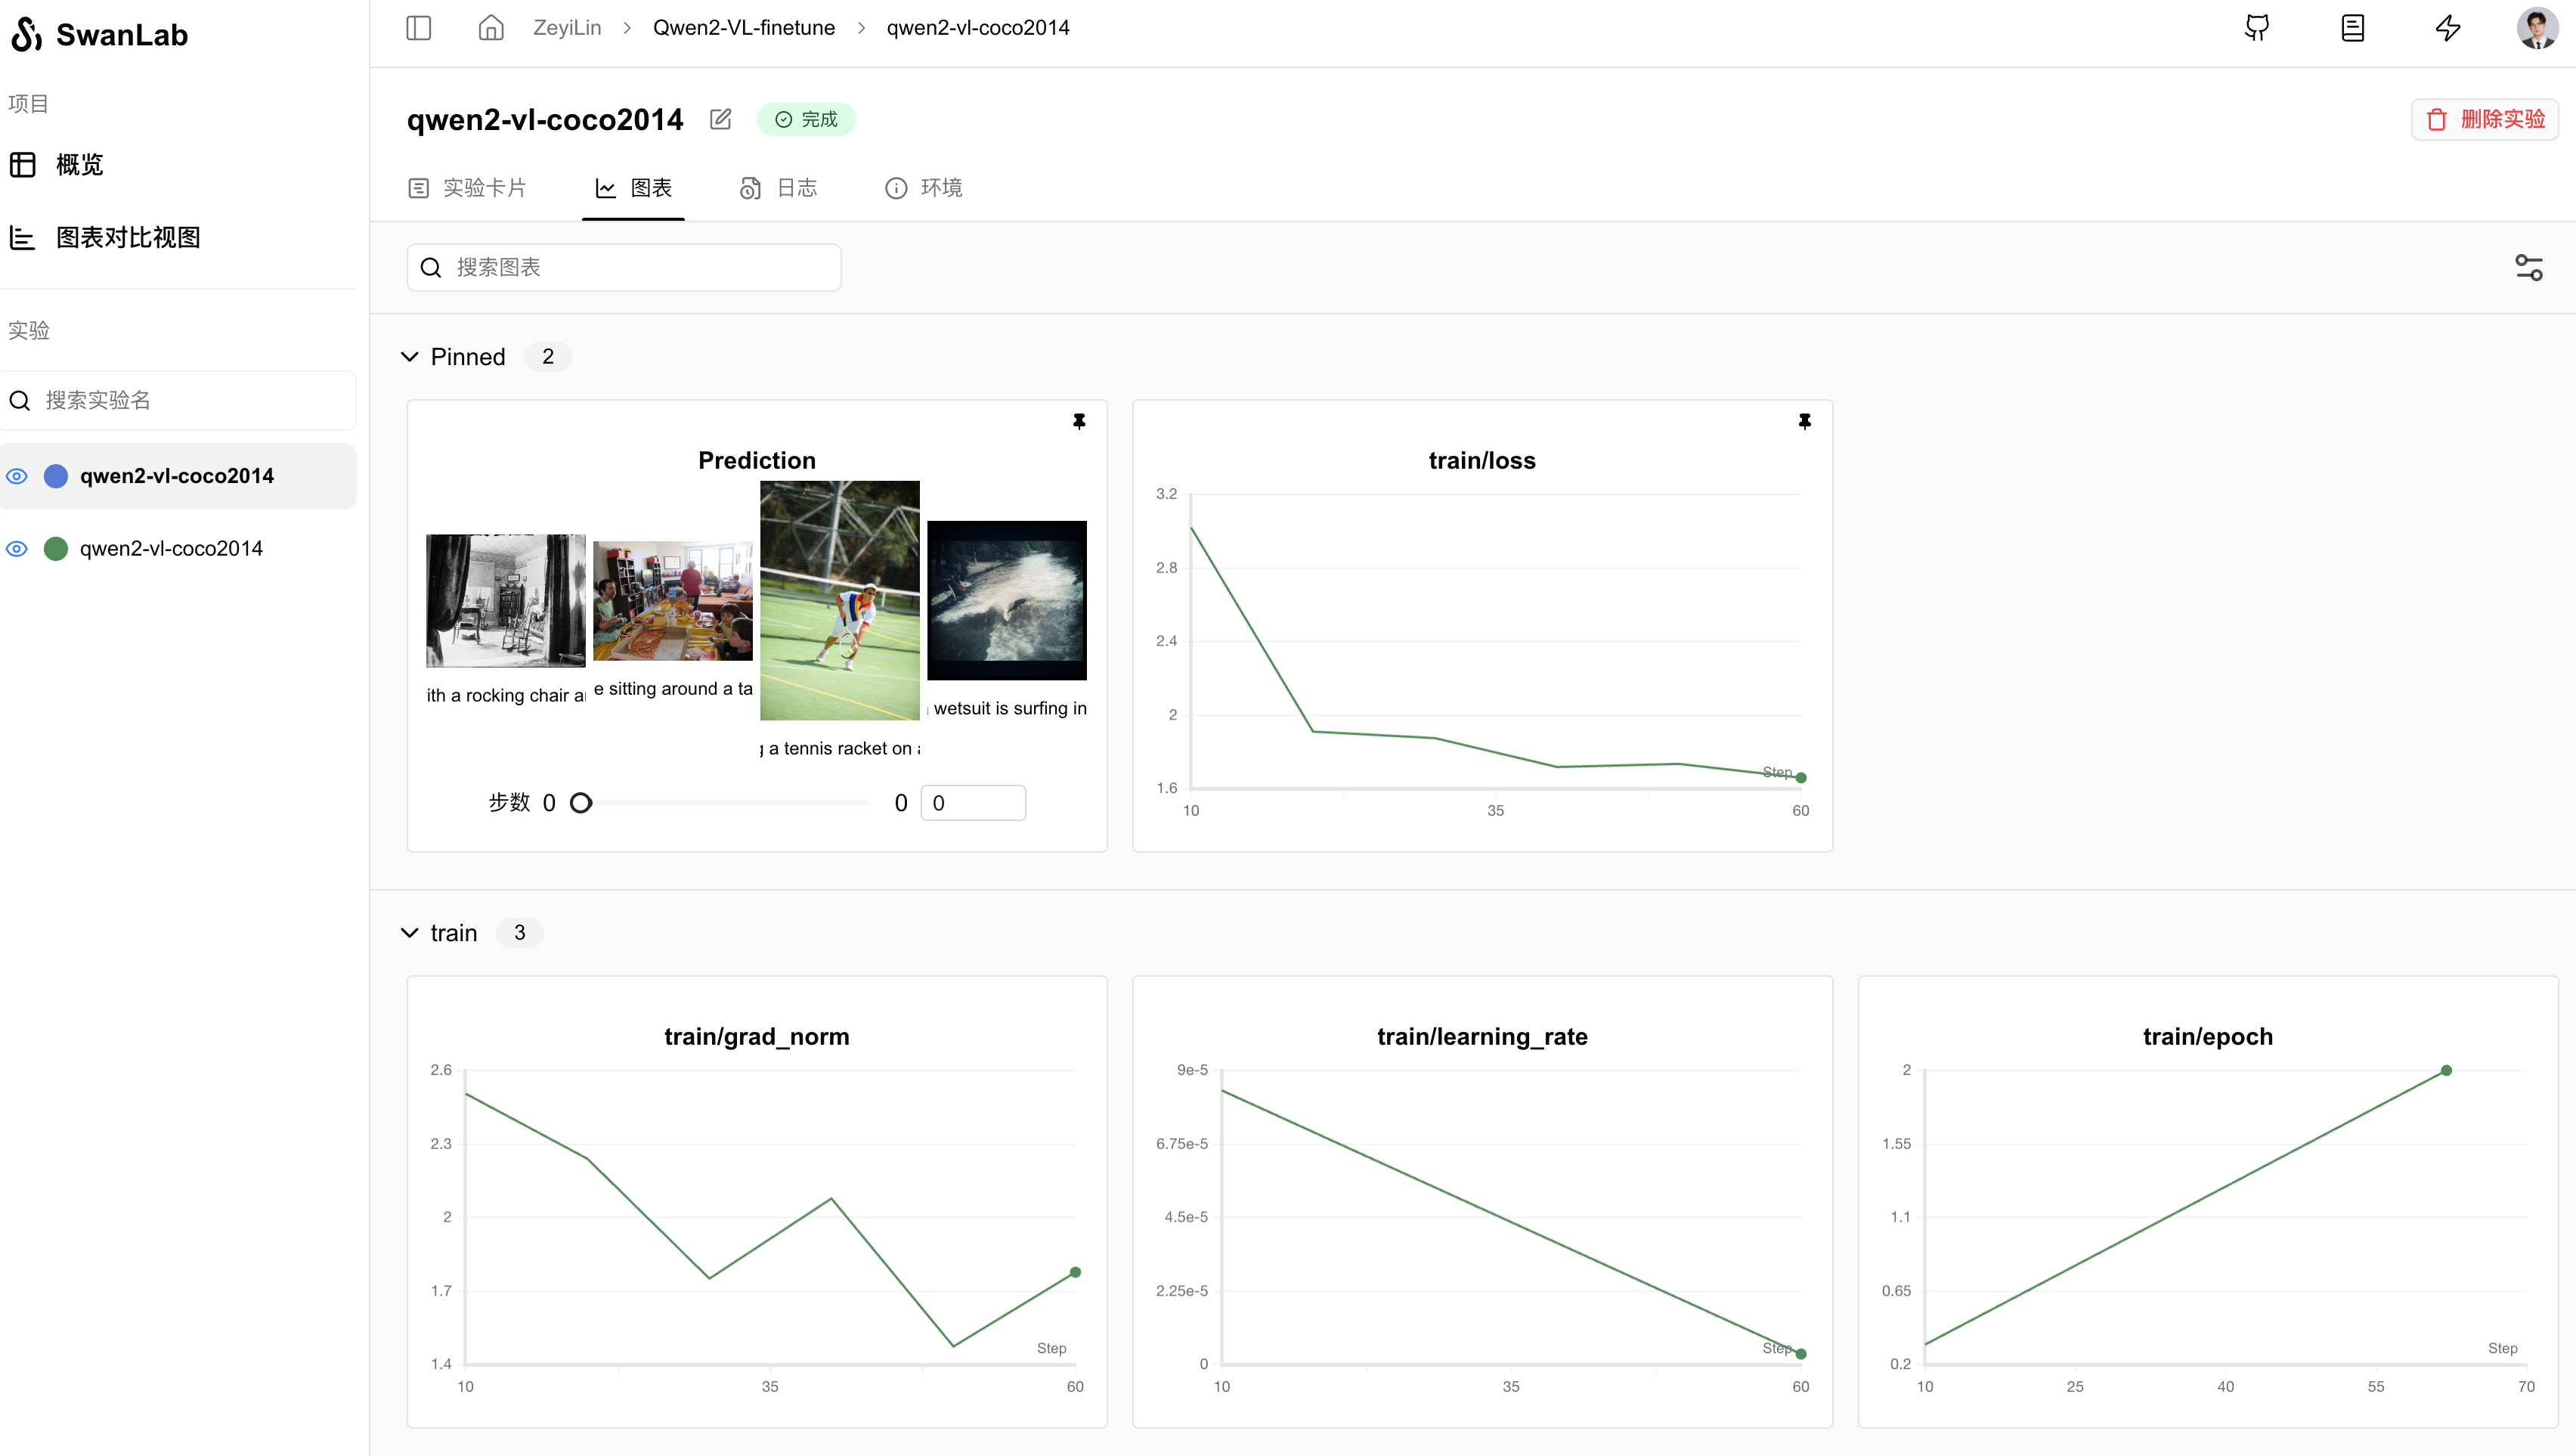
从SwanLab图表中我们可以看到,lr的下降策略是线性下降,loss随epoch呈现下降趋势,而grad_norm则在上升。这种形态往往反映了模型有过拟合的风险,训练不要超过2个epoch。
在Prediction图表中记录着模型最终的输出结果,可以看到模型在回答的风格上是用的COCO数据集的简短英文风格进行的描述:

而同样的图像,没有被微调的模型输出结果如下:
1-没有微调:The image depicts a cozy living room with a rocking chair in the center, a bookshelf filled with books, and a table with a vase and a few other items. The walls are decorated with wallpaper, and there are curtains on the windows. The room appears to be well-lit, with sunlight streaming in from the windows.
1-微调后:A living room with a rocking chair, a bookshelf, and a table with a vase and a bowl.

2-没有微调:It looks like a family gathering or a party in a living room. There are several people sitting around a dining table, eating pizza. The room has a cozy and warm atmosphere.
2-微调后:A group of people sitting around a dining table eating pizza.可以明显看到微调后风格的变化。
🧐 推理LoRA微调后的模型
加载lora微调后的模型,并进行推理:
from transformers import Qwen2VLForConditionalGeneration, AutoProcessor
from qwen_vl_utils import process_vision_info
from peft import PeftModel, LoraConfig, TaskType

config = LoraConfig(
    task_type=TaskType.CAUSAL_LM,
    target_modules=["q_proj", "k_proj", "v_proj", "o_proj", "gate_proj", "up_proj", "down_proj"],
    inference_mode=True,
    r=64,  # Lora 秩
    lora_alpha=16,  # Lora alaph,具体作用参见 Lora 原理
    lora_dropout=0.05,  # Dropout 比例
    bias="none",
)

# default: Load the model on the available device(s)
model = Qwen2VLForConditionalGeneration.from_pretrained(
    "./Qwen/Qwen2-VL-2B-Instruct", torch_dtype="auto", device_map="auto"
)
model = PeftModel.from_pretrained(model, model_id="./output/Qwen2-VL-2B/checkpoint-62", config=config)
processor = AutoProcessor.from_pretrained("./Qwen/Qwen2-VL-2B-Instruct")

messages = [
    {
        "role": "user",
        "content": [
            {
                "type": "image",
                "image": "测试图像路径",
            },
            {"type": "text", "text": "COCO Yes:"},
        ],
    }
]

# Preparation for inference
text = processor.apply_chat_template(
    messages, tokenize=False, add_generation_prompt=True
)
image_inputs, video_inputs = process_vision_info(messages)
inputs = processor(
    text=[text],
    images=image_inputs,
    videos=video_inputs,
    padding=True,
    return_tensors="pt",
)
inputs = inputs.to("cuda")

# Inference: Generation of the output
generated_ids = model.generate(**inputs, max_new_tokens=128)
generated_ids_trimmed = [
    out_ids[len(in_ids) :] for in_ids, out_ids in zip(inputs.input_ids, generated_ids)
]
output_text = processor.batch_decode(
    generated_ids_trimmed, skip_special_tokens=True, clean_up_tokenization_spaces=False
)
print(output_text)补充
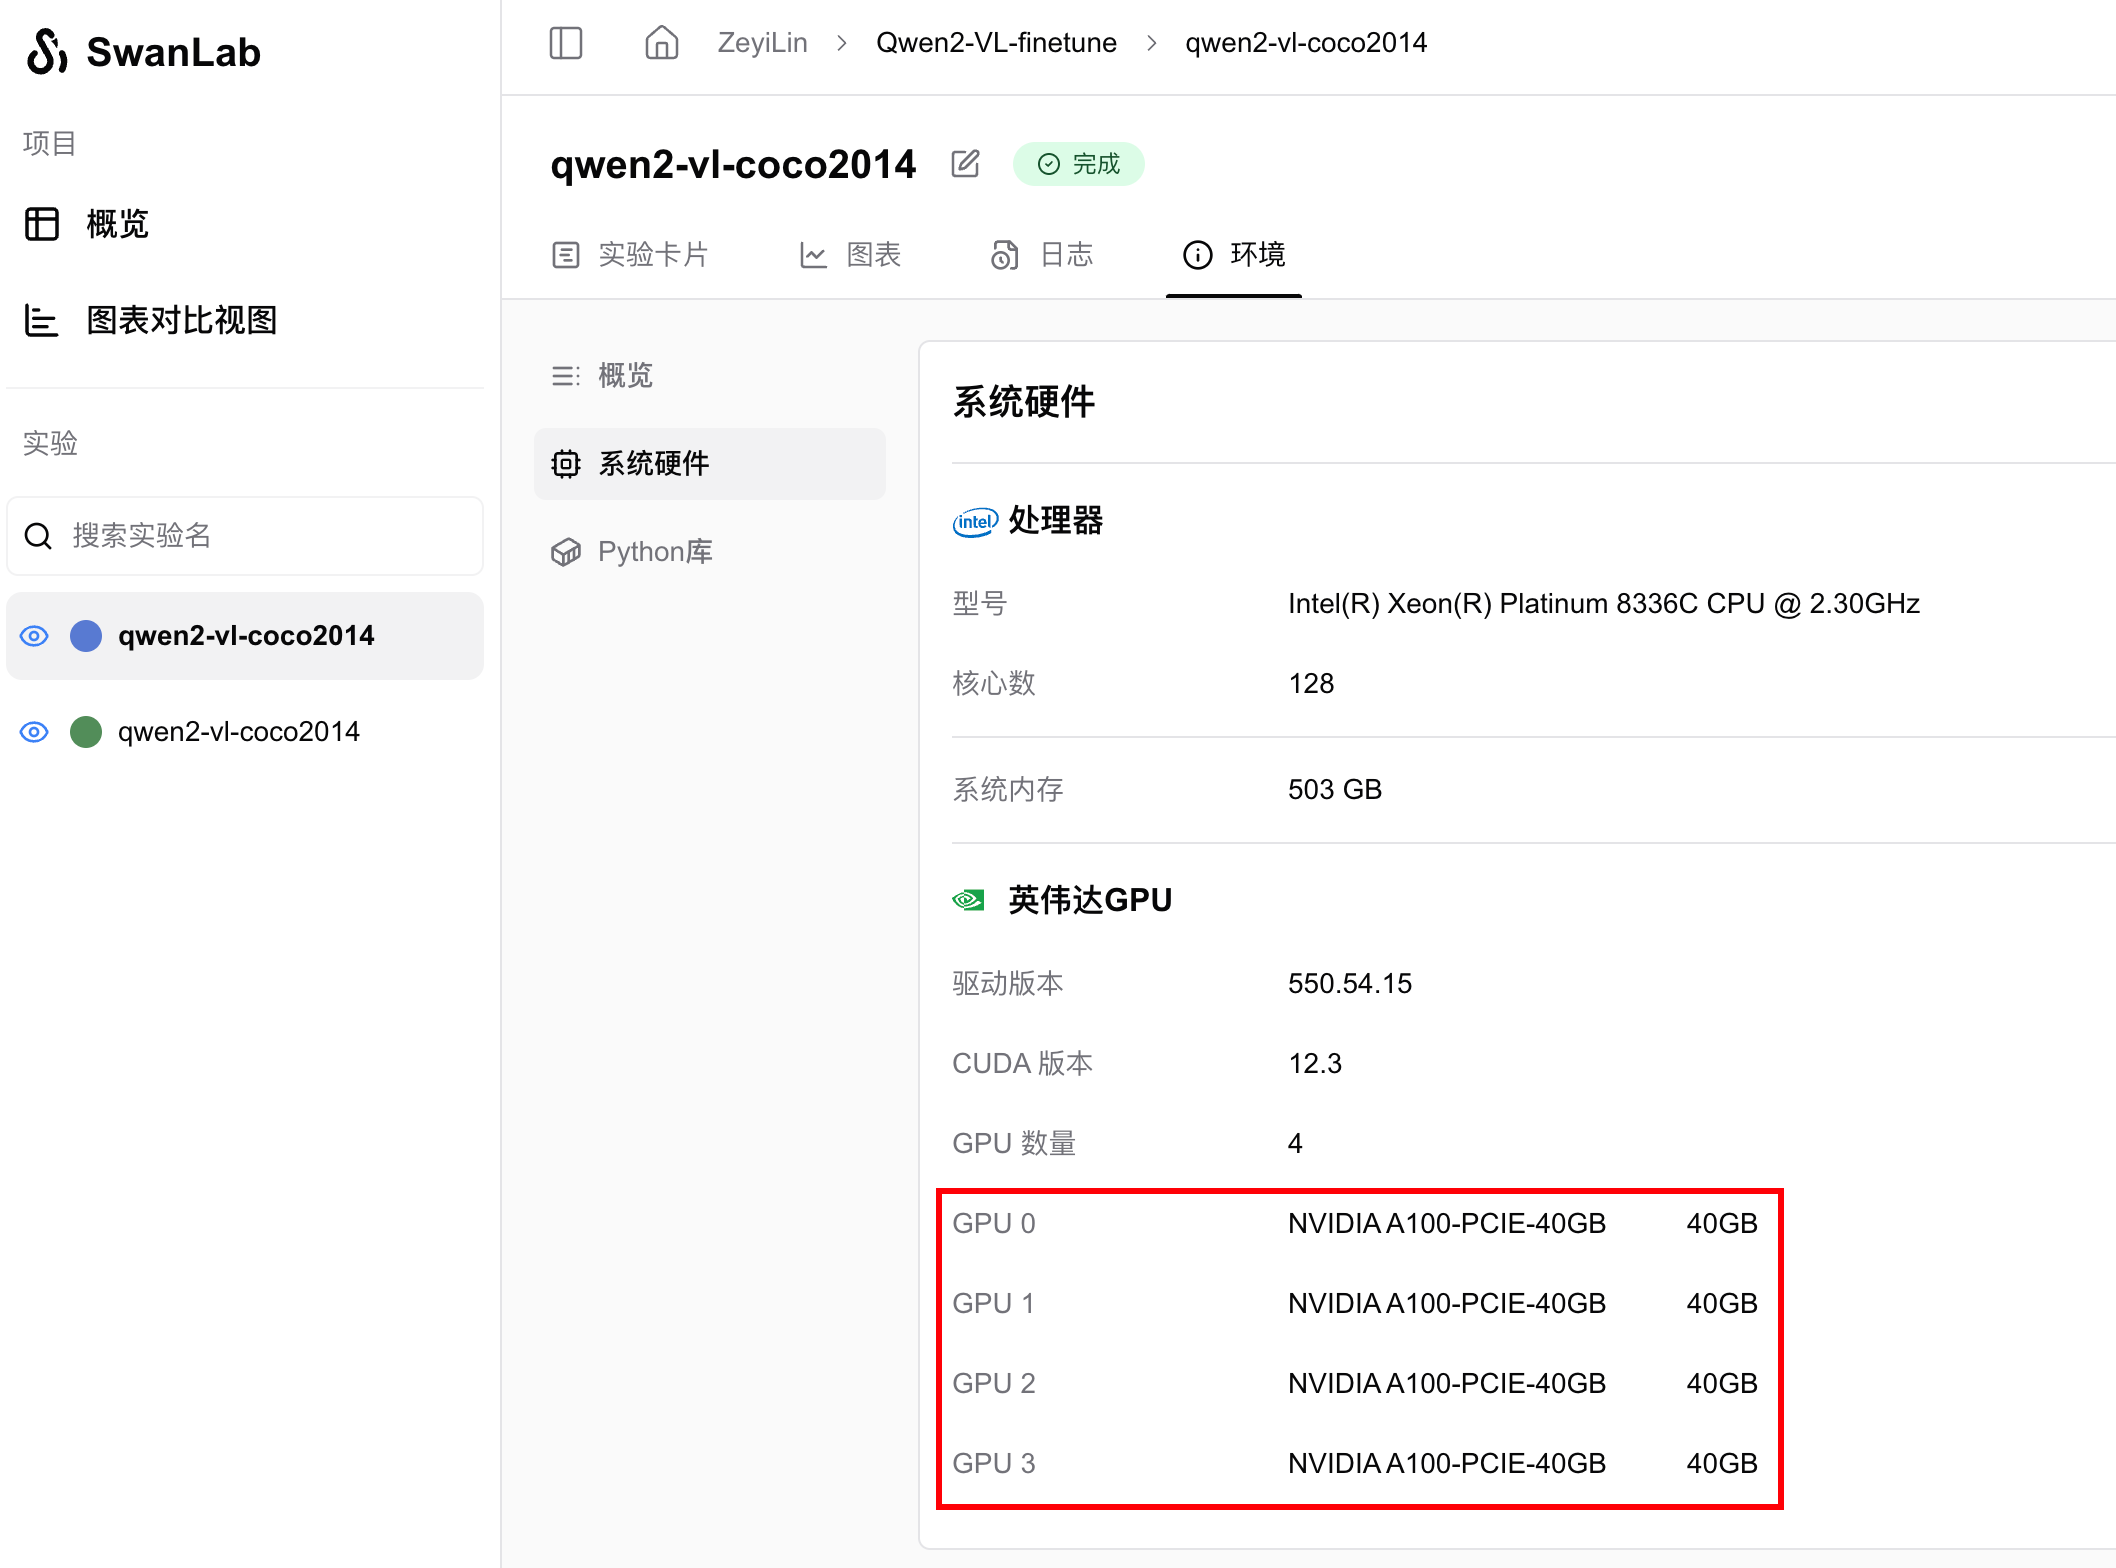
详细硬件配置和参数说明
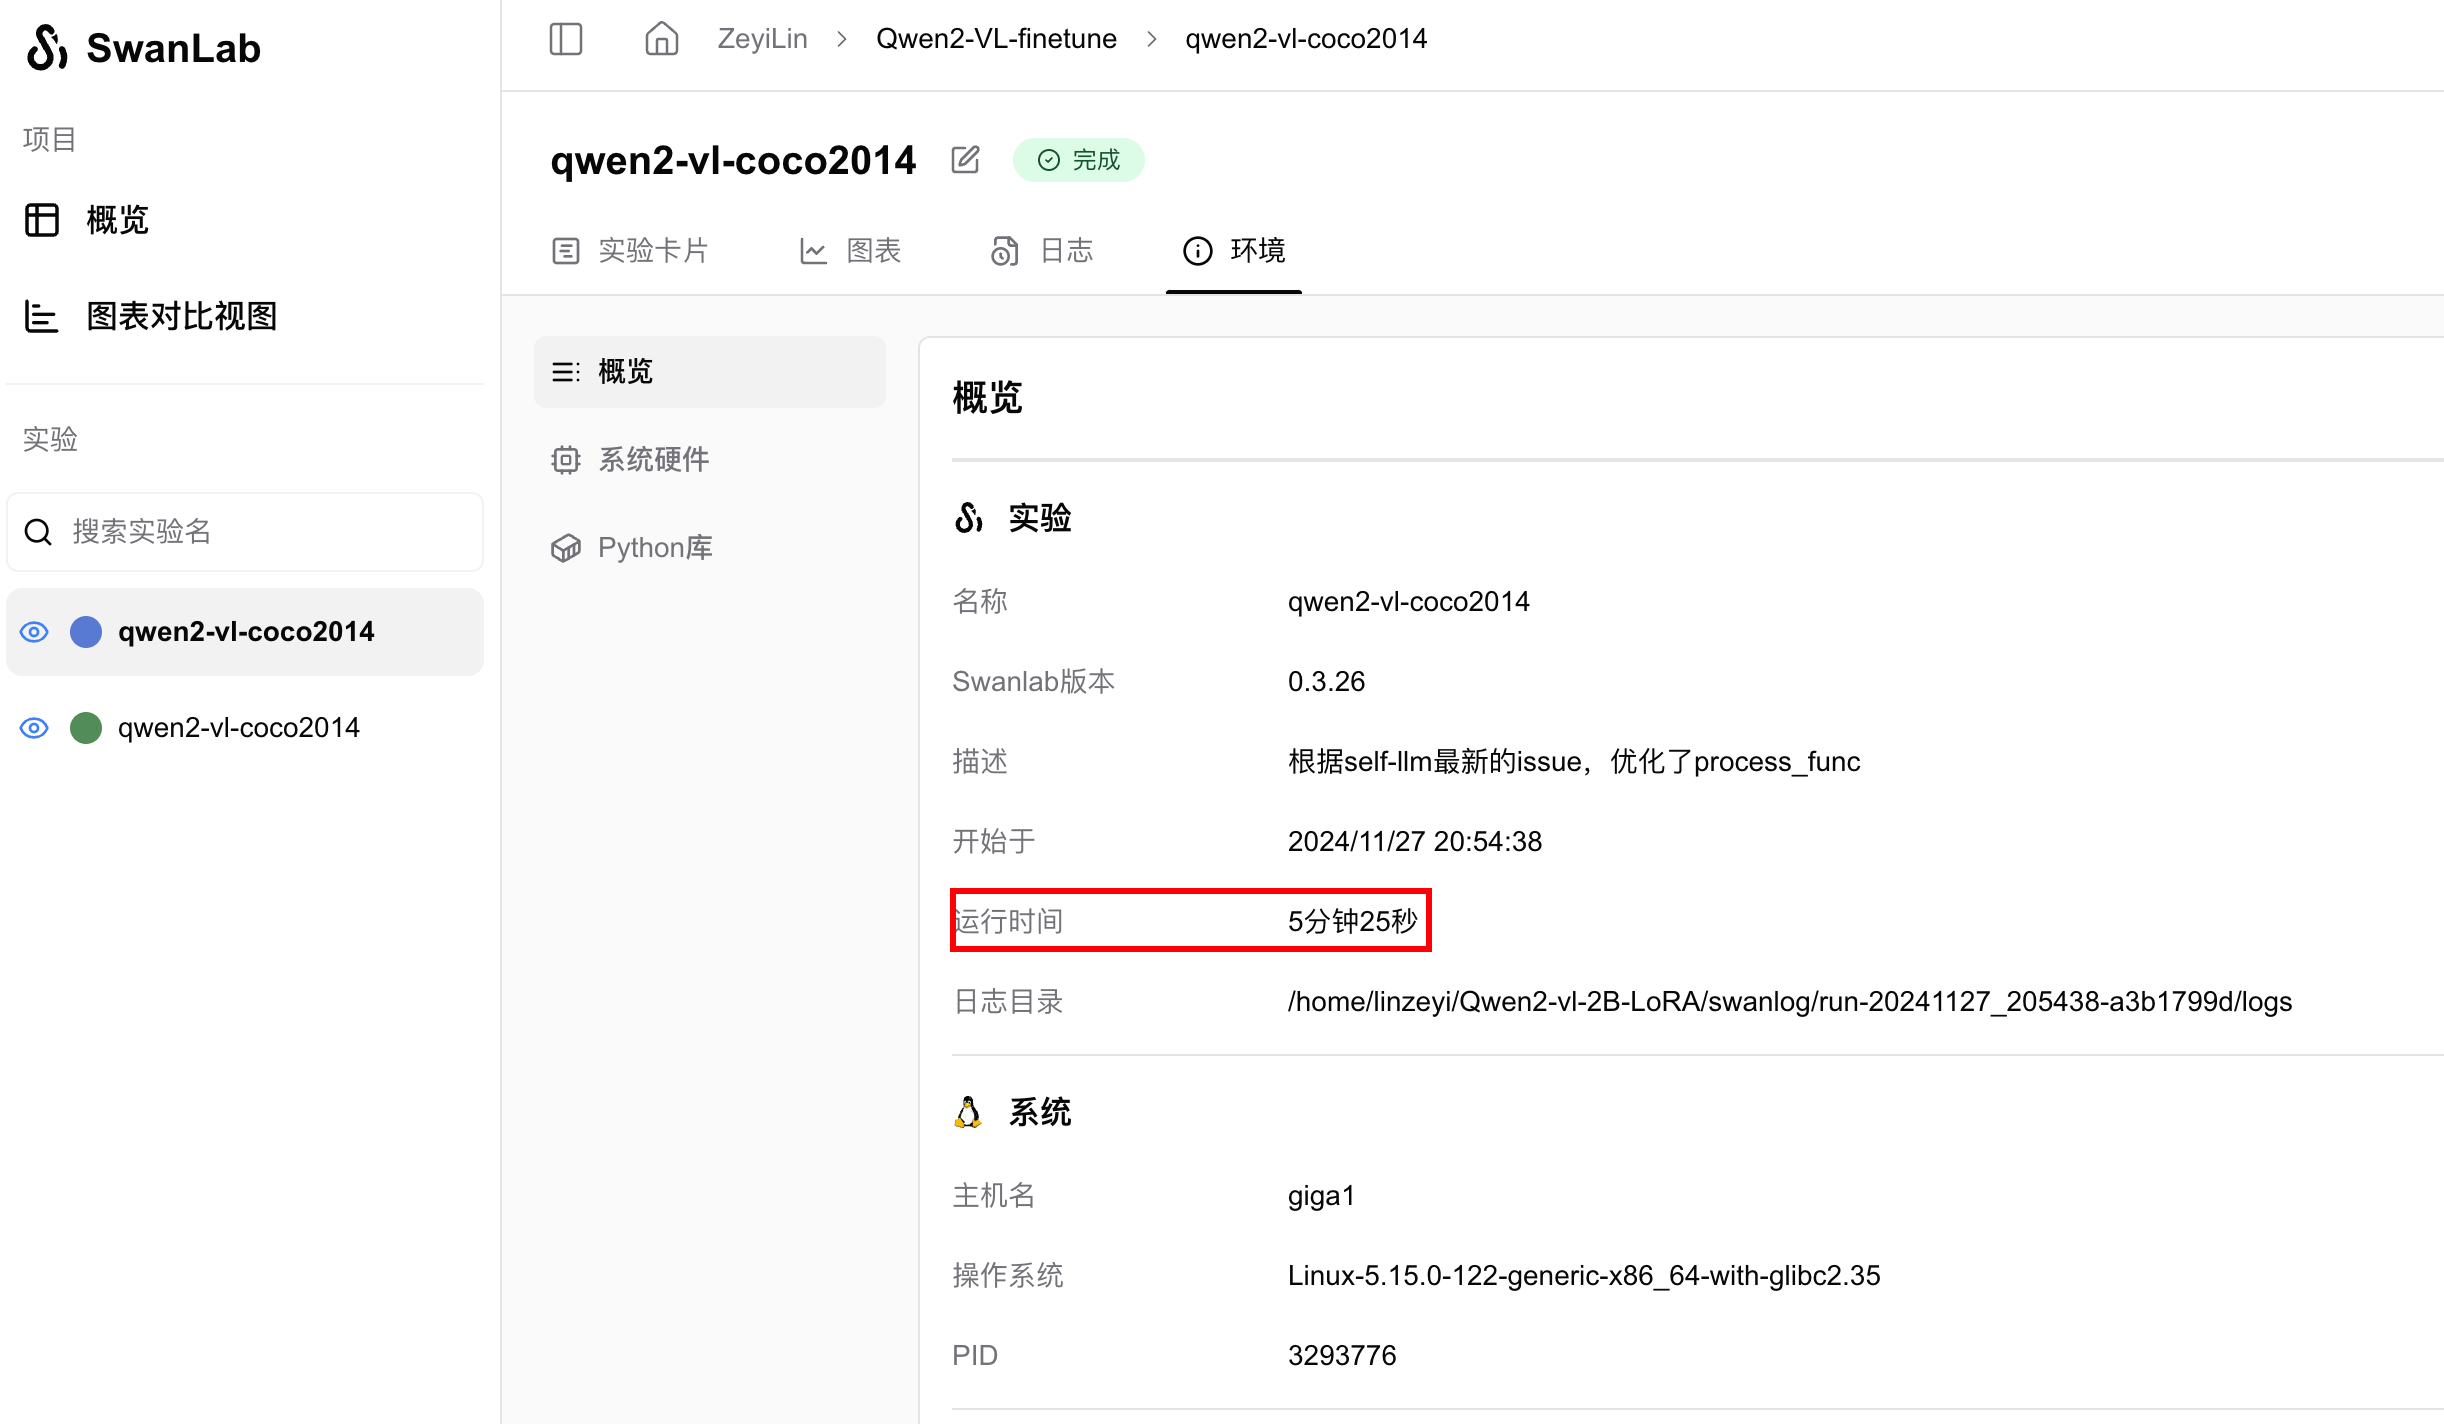
使用4张A100 40GB显卡,batch size为4,gradient accumulation steps为4,训练2个epoch的用时为1分钟57秒。
注意
在微调脚本中,val_peft_model加载的是一共固定的checkpoint文件,如果你添加了数据或超参数,请根据实际情况修改checkpoint文件路径。
Qwen2-VL-2B-Instruct Lora 微调案例 - LaTexOCR
以Qwen2-VL作为基座多模态大模型,通过指令微调的方式实现特定场景下的OCR,是学习多模态LLM微调的入门任务。
本文我们将简要介绍基于 transformers、peft 等框架,使用 Qwen2-VL-2B-Instruct 模型在LaTeX_OCR 上进行Lora微调训练,同时使用 SwanLab 监控训练过程与评估模型效果。
训练过程:ZeyiLin/Qwen2-VL-ft-latexocr
代码:见此文档同目录下文件夹06-Qwen2-VL-2B-Instruct Lora微调案例LaTexOCR 参考代码
数据集:LaTeX_OCR
模型:Qwen2-VL-2B-Instruct
在线LaTex公式预览网站:latexlive
显存占用:约20GB,如显存不足,请调低per_device_train_batch_size
目录
视觉大模型是指能够支持图片/视频输入的大语言模型,能够极大丰富与LLM的交互方式。
对视觉大模型做微调的一个典型场景,是让它特化成一个更强大、更智能的计算机视觉模型,执行图像分类、目标检测、语义分割、OCR、图像描述任务等等。
并且由于视觉大模型强大的基础能力,所以训练流程变得非常统一——无论是分类、检测还是分割,只需要构建好数据对(图像 -> 文本),都可以用同一套代码完成,相比以往针对不同任务就要构建迥异的训练代码而言,视觉大模型微调要简单粗暴得多,而且效果还更好。
当然,硬币的另一面是要承担更高的计算开销,但在大模型逐渐轻量化的趋势下,可以预想这种训练范式将逐渐成为主流。
👋 SwanLab简介

SwanLab 是一个开源的模型训练记录工具,常被称为"中国版 Weights&Biases + Tensorboard"。SwanLab面向AI研究者,提供了训练可视化、自动日志记录、超参数记录、实验对比、多人协同等功能。在SwanLab上,研究者能基于直观的可视化图表发现训练问题,对比多个实验找到研究灵感,并通过在线链接的分享与基于组织的多人协同训练,打破团队沟通的壁垒。
为什么要记录训练?
相较于软件开发,模型训练更像一个实验科学。一个品质优秀的模型背后,往往是成千上万次实验。研究者需要不断尝试、记录、对比,积累经验,才能找到最佳的模型结构、超参数与数据配比。在这之中,如何高效进行记录与对比,对于研究效率的提升至关重要。
可视化的价值在哪里?
机器学习模型训练往往伴随着大量的超参数、指标、日志等数据,很多关键信息往往存在于实验的中间而非结尾,如果不对连续的指标通过图表进行可视化,往往会错失发现问题的最佳时机,甚至错过关键信息。同时不进行可视化,也难以对比多个实验之间的差异。 可视化也为AI研究者提供了良好的交流基础,研究者们可以基于图表进行沟通、分析与优化,而非以往看着枯燥的终端打印。这打破了团队沟通的壁垒,提高了整体的研发效率。
🌍 环境配置
环境配置分为三步:
确保你的电脑上至少有一张英伟达显卡,并已安装好了CUDA环境。
安装Python(版本>=3.8)以及能够调用CUDA加速的PyTorch。
安装与Qwen2-VL微调相关的第三方库,可以使用以下命令:
python -m pip install --upgrade pip
# 更换 pypi 源,加速库的安装
pip config set global.index-url https://pypi.tuna.tsinghua.edu.cn/simple

pip install modelscope==1.18.0
pip install transformers==4.46.2
pip install sentencepiece==0.2.0
pip install accelerate==1.1.1
pip install datasets==2.18.0
pip install peft==0.13.2
pip install swanlab==0.3.27
pip install qwen-vl-utils==0.0.8
pip install pandas==2.2.2📚 准备数据集
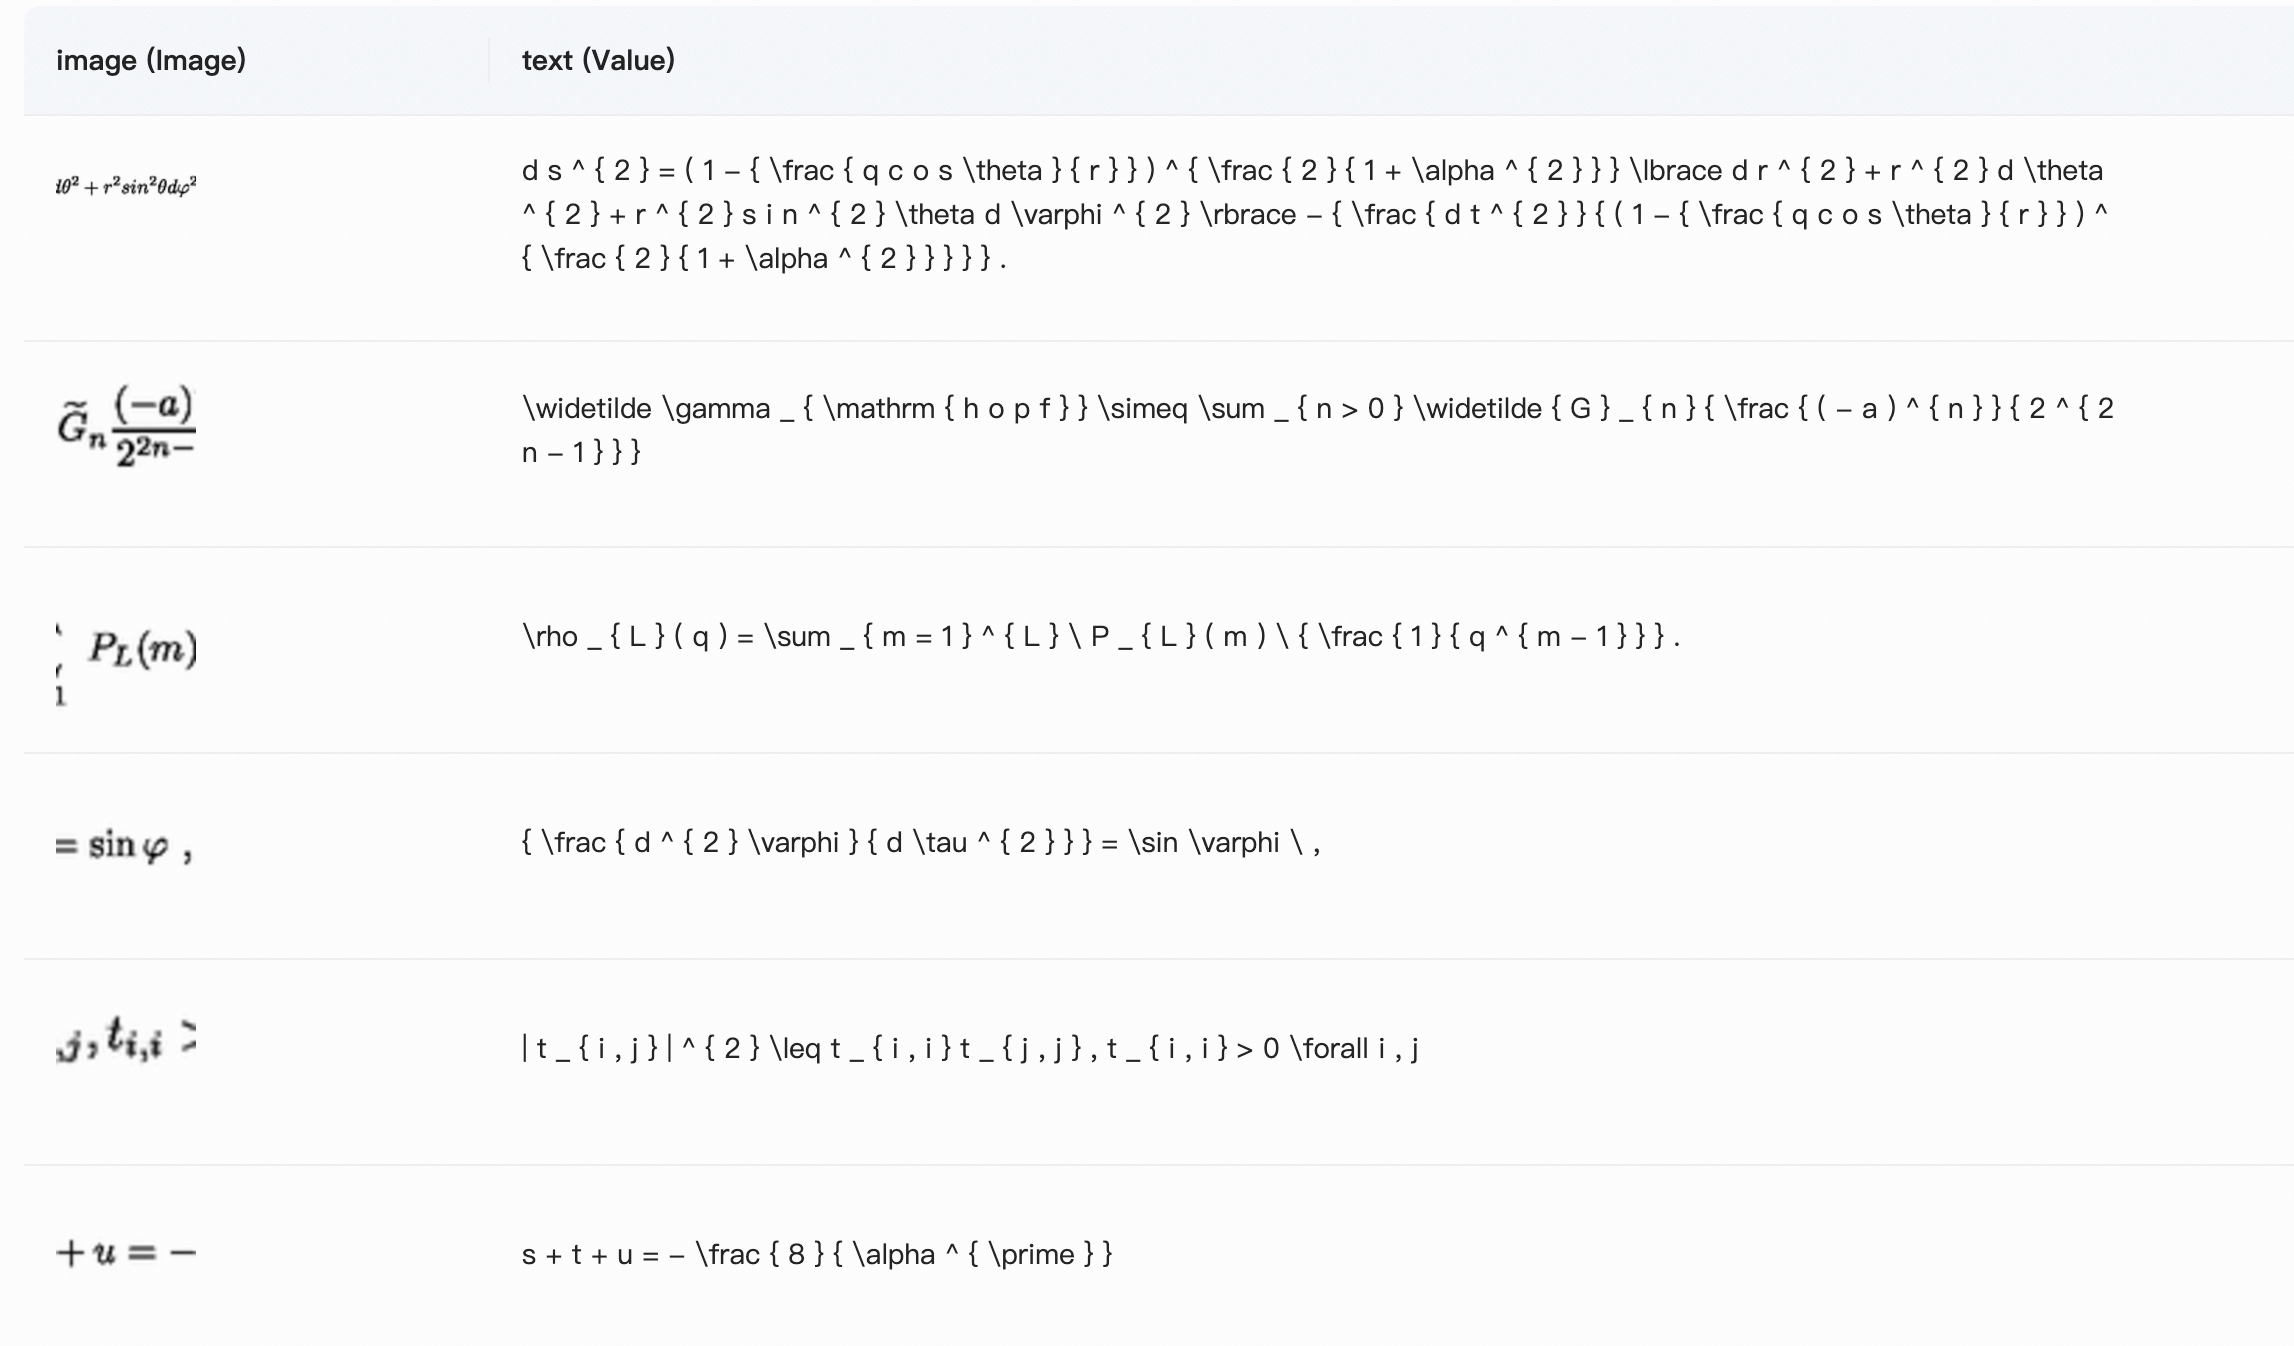
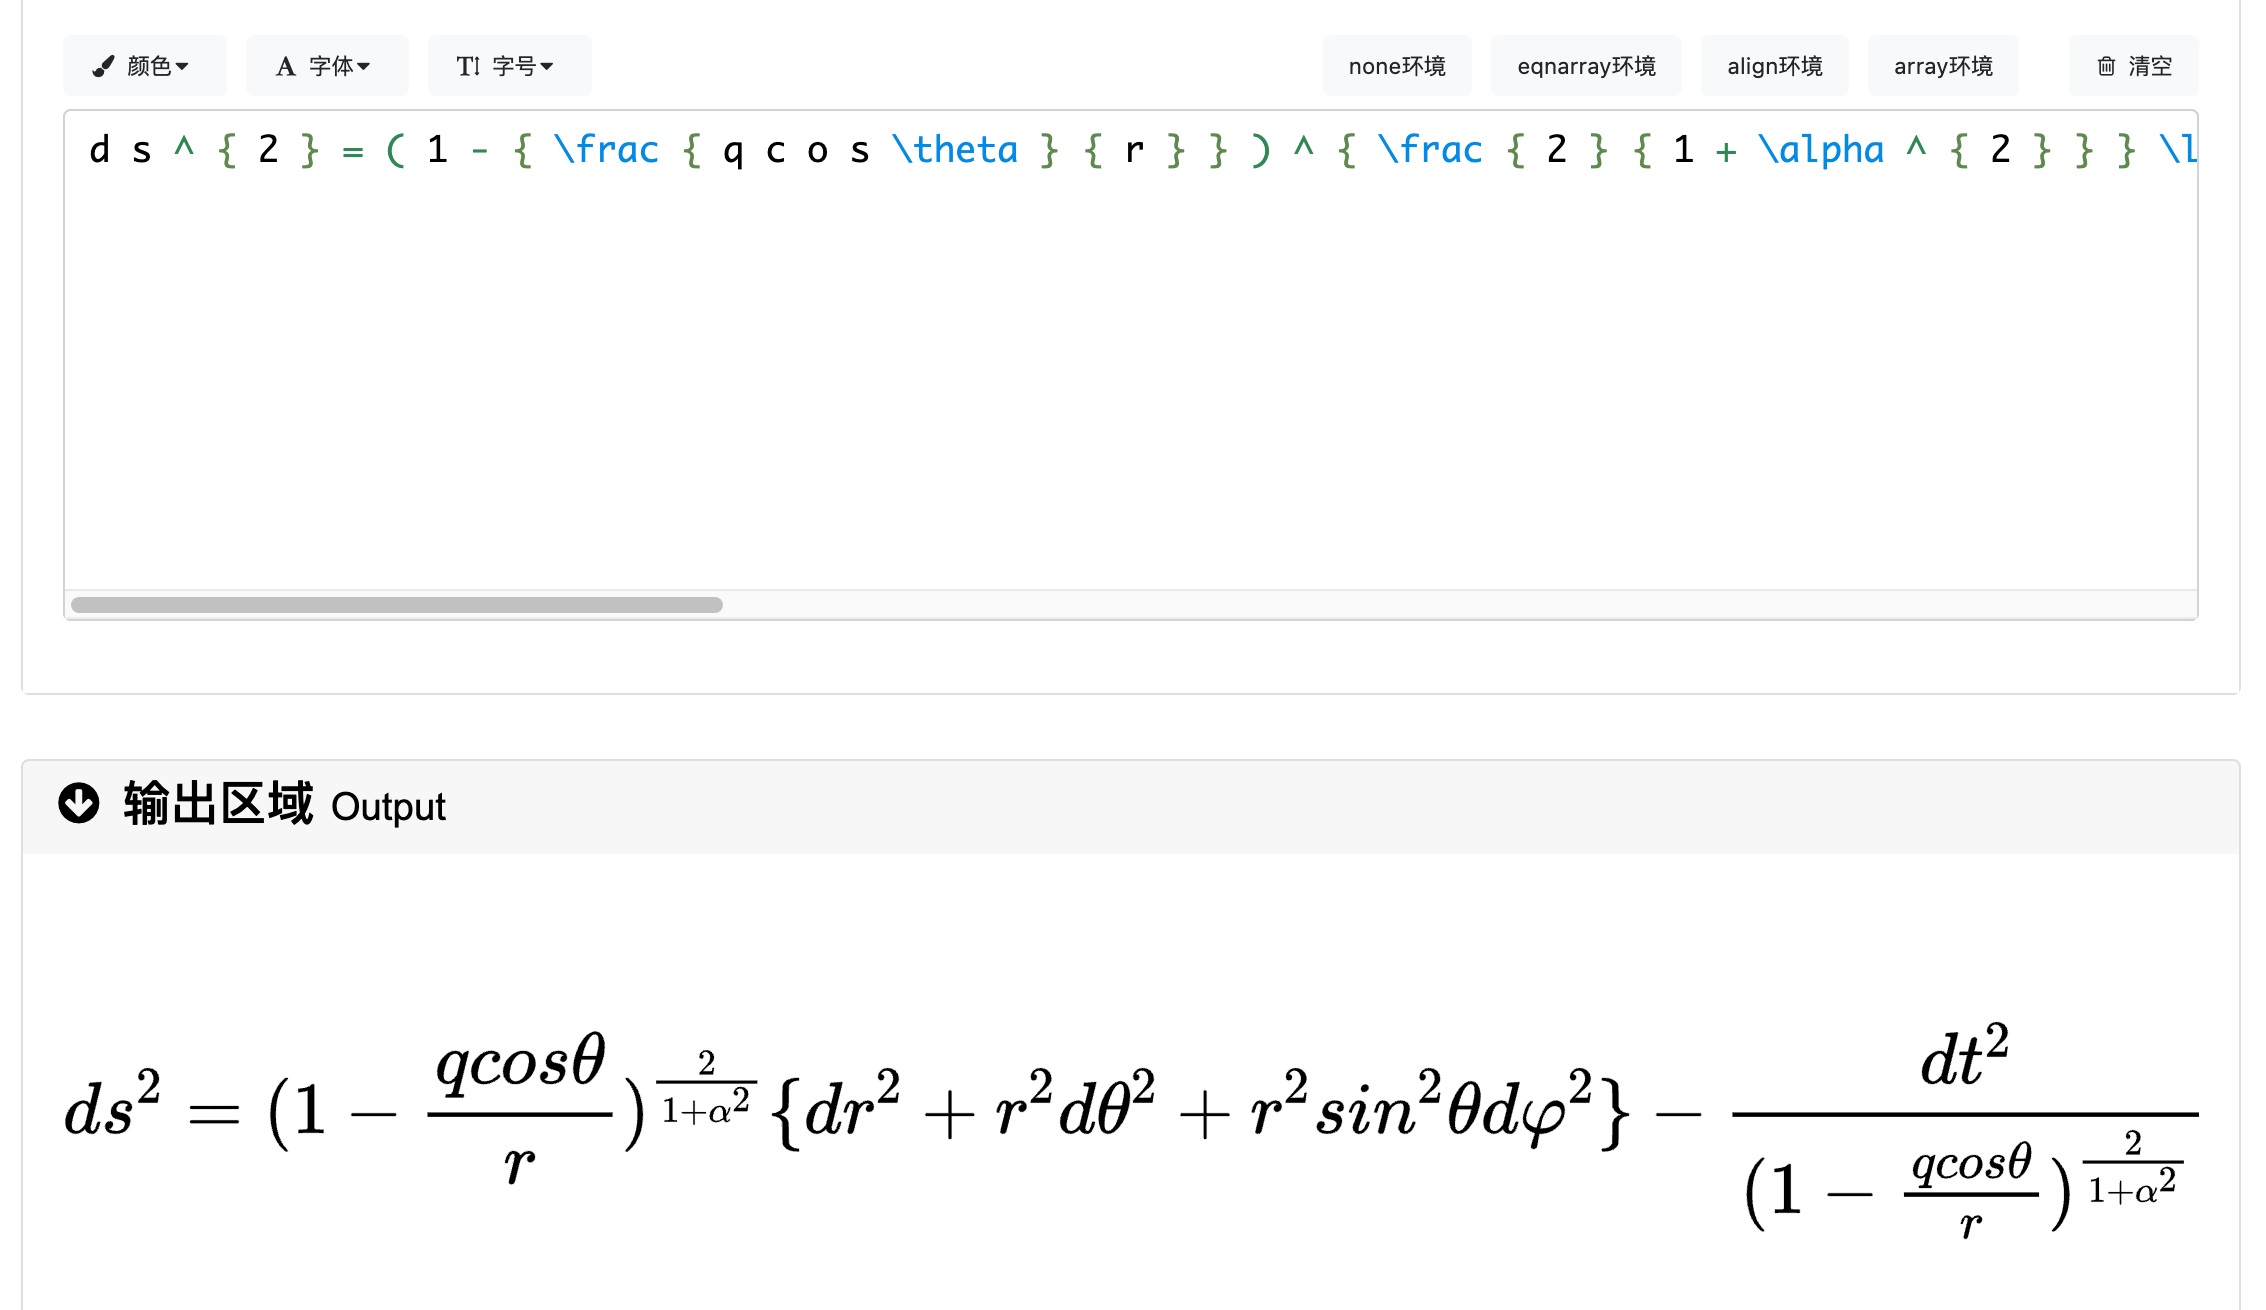
了解了数据集结构之后,我们需要做的是将这些数据整理成Qwen2-VL需要的json格式,下面是目标的格式:
[
  {
    "id": "identity_1",
    "conversations": [
      {
        "role": "user",
        "value": "图片路径"
      },
      {
        "role": "assistant",
        "value": "LaTex公式"
      }
    ]
  },
...
]我们来解读一下这个json:
id:数据对的编号
conversations:人类与LLM的对话,类型是列表
role:角色,user代表人类,assistant代表模型
content:聊天发送的内容,其中user的value是图片路径,assistant的回复是LaTex公式
接下来让我们下载数据集并进行处理:
我们需要做四件事情:
通过Modelscope下载LaTex_OCR数据集
加载数据集,将图像保存到本地
将图像路径和描述文本转换为一个csv文件
将csv文件转换为json文件,包含1个训练集和验证集
使用下面的代码完成从数据下载到生成csv的过程:
data2csv.py:
# 导入所需的库
from modelscope.msdatasets import MsDataset
import os
import pandas as pd

MAX_DATA_NUMBER = 1000
dataset_id = 'AI-ModelScope/LaTeX_OCR'
subset_name = 'default'
split = 'train'

dataset_dir = 'LaTeX_OCR'
csv_path = './latex_ocr_train.csv'


# 检查目录是否已存在
if not os.path.exists(dataset_dir):
    # 从modelscope下载COCO 2014图像描述数据集
    ds =  MsDataset.load(dataset_id, subset_name=subset_name, split=split)
    print(len(ds))
    # 设置处理的图片数量上限
    total = min(MAX_DATA_NUMBER, len(ds))

    # 创建保存图片的目录
    os.makedirs(dataset_dir, exist_ok=True)

    # 初始化存储图片路径和描述的列表
    image_paths = []
    texts = []

    for i in range(total):
        # 获取每个样本的信息
        item = ds[i]
        text = item['text']
        image = item['image']

        # 保存图片并记录路径
        image_path = os.path.abspath(f'{dataset_dir}/{i}.jpg')
        image.save(image_path)

        # 将路径和描述添加到列表中
        image_paths.append(image_path)
        texts.append(text)

        # 每处理50张图片打印一次进度
        if (i + 1) % 50 == 0:
            print(f'Processing {i+1}/{total} images ({(i+1)/total*100:.1f}%)')

    # 将图片路径和描述保存为CSV文件
    df = pd.DataFrame({
        'image_path': image_paths,
        'text': texts,
    })

    # 将数据保存为CSV文件
    df.to_csv(csv_path, index=False)

    print(f'数据处理完成,共处理了{total}张图片')

else:
print(f'{dataset_dir}目录已存在,跳过数据处理步骤')3. 在同一目录下,用以下代码,将csv文件转换为json文件(训练集+验证集):
csv2json.py:
import pandas as pd
import json

csv_path = './latex_ocr_train.csv'
train_json_path = './latex_ocr_train.json'
val_json_path = './latex_ocr_val.json'
df = pd.read_csv(csv_path)
# Create conversation format
conversations = []

# Add image conversations
for i in range(len(df)):
    conversations.append({
        "id": f"identity_{i+1}",
        "conversations": [
            {
                "role": "user",
                "value": f"{df.iloc[i]['image_path']}"
            },
            {
                "role": "assistant",
                "value": str(df.iloc[i]['text'])
            }
        ]
    })

# print(conversations)
# Save to JSON
# Split into train and validation sets
train_conversations = conversations[:-4]
val_conversations = conversations[-4:]

# Save train set
with open(train_json_path, 'w', encoding='utf-8') as f:
    json.dump(train_conversations, f, ensure_ascii=False, indent=2)

# Save validation set
with open(val_json_path, 'w', encoding='utf-8') as f:
json.dump(val_conversations, f, ensure_ascii=False, indent=2)此时目录下会多出3个文件:
latex_ocr_train.csv
latex_ocr_train.json
latex_ocr_val.json
至此,我们完成了数据集的准备。
🤖 模型下载与加载
这里我们使用modelscope下载Qwen2-VL-2B-Instruct模型,然后把它加载到Transformers中进行训练:
from modelscope import snapshot_download, AutoTokenizer
from transformers import TrainingArguments, Trainer, DataCollatorForSeq2Seq, Qwen2VLForConditionalGeneration, AutoProcessor
import torch

# 在modelscope上下载Qwen2-VL模型到本地目录下
model_dir = snapshot_download("Qwen/Qwen2-VL-2B-Instruct", cache_dir="./", revision="master")

# 使用Transformers加载模型权重
tokenizer = AutoTokenizer.from_pretrained("./Qwen/Qwen2-VL-2B-Instruct/", use_fast=False, trust_remote_code=True)
# 特别的,Qwen2-VL-2B-Instruct模型需要使用Qwen2VLForConditionalGeneration来加载
model = Qwen2VLForConditionalGeneration.from_pretrained("./Qwen/Qwen2-VL-2B-Instruct/", device_map="auto", torch_dtype=torch.bfloat16, trust_remote_code=True,)
model.enable_input_require_grads() # 开启梯度检查点时,要执行该方法模型大小为 4.5GB,下载模型大概需要 5 分钟。
🐦 集成SwanLab
SwanLab与Transformers已经做好了集成,用法是在Trainer的callbacks参数中添加SwanLabCallback实例,就可以自动记录超参数和训练指标,简化代码如下:
from swanlab.integration.transformers import SwanLabCallback
from transformers import Trainer

swanlab_callback = SwanLabCallback()

trainer = Trainer(
    ...
    callbacks=[swanlab_callback],
)
🚀 开始微调(完整代码)
本节代码做了以下几件事:
下载并加载Qwen2-VL-2B-Instruct模型
加载数据集,取前996条数据参与训练,4条数据进行主观评测
配置Lora,参数为r=64, lora_alpha=16, lora_dropout=0.05
使用SwanLab记录训练过程,包括超参数、指标和最终的模型输出结果
训练2个epoch
开始执行代码时的目录结构应该是:
|———— train.py
|———— data2csv.py
|———— csv2json.py
|———— latex_ocr_train.csv
|———— latex_ocr_train.json
|———— latex_ocr_val.json完整代码如下
train.py:
import torch
from datasets import Dataset
from modelscope import snapshot_download, AutoTokenizer
from swanlab.integration.transformers import SwanLabCallback
from qwen_vl_utils import process_vision_info
from peft import LoraConfig, TaskType, get_peft_model, PeftModel
from transformers import (
    TrainingArguments,
    Trainer,
    DataCollatorForSeq2Seq,
    Qwen2VLForConditionalGeneration,
    AutoProcessor,
)
import swanlab
import json
import os


prompt = "你是一个LaText OCR助手,目标是读取用户输入的照片,转换成LaTex公式。"
model_id = "Qwen/Qwen2-VL-2B-Instruct"
local_model_path = "./Qwen/Qwen2-VL-2B-Instruct"
train_dataset_json_path = "latex_ocr_train.json"
val_dataset_json_path = "latex_ocr_val.json"
output_dir = "./output/Qwen2-VL-2B-LatexOCR"
MAX_LENGTH = 8192

def process_func(example):
    """
    将数据集进行预处理
    """
    input_ids, attention_mask, labels = [], [], []
    conversation = example["conversations"]
    image_file_path = conversation[0]["value"]
    output_content = conversation[1]["value"]

    messages = [
        {
            "role": "user",
            "content": [
                {
                    "type": "image",
                    "image": f"{image_file_path}",
                    "resized_height": 500,
                    "resized_width": 100,
                },
                {"type": "text", "text": prompt},
            ],
        }
    ]
    text = processor.apply_chat_template(
        messages, tokenize=False, add_generation_prompt=True
    )  # 获取文本
    image_inputs, video_inputs = process_vision_info(messages)  # 获取数据数据(预处理过)
    inputs = processor(
        text=[text],
        images=image_inputs,
        videos=video_inputs,
        padding=True,
        return_tensors="pt",
    )
    inputs = {key: value.tolist() for key, value in inputs.items()} #tensor -> list,为了方便拼接
    instruction = inputs

    response = tokenizer(f"{output_content}", add_special_tokens=False)


    input_ids = (
            instruction["input_ids"][0] + response["input_ids"] + [tokenizer.pad_token_id]
    )

    attention_mask = instruction["attention_mask"][0] + response["attention_mask"] + [1]
    labels = (
            [-100] * len(instruction["input_ids"][0])
            + response["input_ids"]
            + [tokenizer.pad_token_id]
    )
    if len(input_ids) > MAX_LENGTH:  # 做一个截断
        input_ids = input_ids[:MAX_LENGTH]
        attention_mask = attention_mask[:MAX_LENGTH]
        labels = labels[:MAX_LENGTH]

    input_ids = torch.tensor(input_ids)
    attention_mask = torch.tensor(attention_mask)
    labels = torch.tensor(labels)
    inputs['pixel_values'] = torch.tensor(inputs['pixel_values'])
    inputs['image_grid_thw'] = torch.tensor(inputs['image_grid_thw']).squeeze(0)  #由(1,h,w)变换为(h,w)
    return {"input_ids": input_ids, "attention_mask": attention_mask, "labels": labels,
            "pixel_values": inputs['pixel_values'], "image_grid_thw": inputs['image_grid_thw']}


def predict(messages, model):
    # 准备推理
    text = processor.apply_chat_template(
        messages, tokenize=False, add_generation_prompt=True
    )
    image_inputs, video_inputs = process_vision_info(messages)
    inputs = processor(
        text=[text],
        images=image_inputs,
        videos=video_inputs,
        padding=True,
        return_tensors="pt",
    )
    inputs = inputs.to("cuda")

    # 生成输出
    generated_ids = model.generate(**inputs, max_new_tokens=MAX_LENGTH)
    generated_ids_trimmed = [
        out_ids[len(in_ids) :] for in_ids, out_ids in zip(inputs.input_ids, generated_ids)
    ]
    output_text = processor.batch_decode(
        generated_ids_trimmed, skip_special_tokens=True, clean_up_tokenization_spaces=False
    )

    return output_text[0]


# 在modelscope上下载Qwen2-VL模型到本地目录下
model_dir = snapshot_download(model_id, cache_dir="./", revision="master")

# 使用Transformers加载模型权重
tokenizer = AutoTokenizer.from_pretrained(local_model_path, use_fast=False, trust_remote_code=True)
processor = AutoProcessor.from_pretrained(local_model_path)

origin_model = Qwen2VLForConditionalGeneration.from_pretrained(local_model_path, device_map="auto", torch_dtype=torch.bfloat16, trust_remote_code=True,)
origin_model.enable_input_require_grads()  # 开启梯度检查点时,要执行该方法

# 处理数据集:读取json文件
train_ds = Dataset.from_json(train_dataset_json_path)
train_dataset = train_ds.map(process_func)

# 配置LoRA
config = LoraConfig(
    task_type=TaskType.CAUSAL_LM,
    target_modules=["q_proj", "k_proj", "v_proj", "o_proj", "gate_proj", "up_proj", "down_proj"],
    inference_mode=False,  # 训练模式
    r=64,  # Lora 秩
    lora_alpha=16,  # Lora alaph,具体作用参见 Lora 原理
    lora_dropout=0.05,  # Dropout 比例
    bias="none",
)

# 获取LoRA模型
train_peft_model = get_peft_model(origin_model, config)

# 配置训练参数
args = TrainingArguments(
    output_dir=output_dir,
    per_device_train_batch_size=4,
    gradient_accumulation_steps=4,
    logging_steps=10,
    logging_first_step=10,
    num_train_epochs=2,
    save_steps=100,
    learning_rate=1e-4,
    save_on_each_node=True,
    gradient_checkpointing=True,
    report_to="none",
)

# 设置SwanLab回调
swanlab_callback = SwanLabCallback(
    project="Qwen2-VL-ft-latexocr",
    experiment_name="7B-1kdata",
    config={
        "model": "https://modelscope.cn/models/Qwen/Qwen2-VL-7B-Instruct",
        "dataset": "https://modelscope.cn/datasets/AI-ModelScope/LaTeX_OCR/summary",
        # "github": "https://github.com/datawhalechina/self-llm",
        "model_id": model_id,
        "train_dataset_json_path": train_dataset_json_path,
        "val_dataset_json_path": val_dataset_json_path,
        "output_dir": output_dir,
        "prompt": prompt,
        "train_data_number": len(train_ds),
        "token_max_length": MAX_LENGTH,
        "lora_rank": 64,
        "lora_alpha": 16,
        "lora_dropout": 0.1,
    },
)

# 配置Trainer
trainer = Trainer(
    model=train_peft_model,
    args=args,
    train_dataset=train_dataset,
    data_collator=DataCollatorForSeq2Seq(tokenizer=tokenizer, padding=True),
    callbacks=[swanlab_callback],
)

# 开启模型训练
trainer.train()

# ====================测试===================
# 配置测试参数
val_config = LoraConfig(
    task_type=TaskType.CAUSAL_LM,
    target_modules=["q_proj", "k_proj", "v_proj", "o_proj", "gate_proj", "up_proj", "down_proj"],
    inference_mode=True,  # 训练模式
    r=64,  # Lora 秩
    lora_alpha=16,  # Lora alaph,具体作用参见 Lora 原理
    lora_dropout=0.05,  # Dropout 比例
    bias="none",
)

# 获取测试模型,从output_dir中获取最新的checkpoint
load_model_path = f"{output_dir}/checkpoint-{max([int(d.split('-')[-1]) for d in os.listdir(output_dir) if d.startswith('checkpoint-')])}"
print(f"load_model_path: {load_model_path}")
val_peft_model = PeftModel.from_pretrained(origin_model, model_id=load_model_path, config=val_config)

# 读取测试数据
with open(val_dataset_json_path, "r") as f:
    test_dataset = json.load(f)

test_image_list = []
for item in test_dataset:
    image_file_path = item["conversations"][0]["value"]
    label = item["conversations"][1]["value"]

    messages = [{
        "role": "user",
        "content": [
            {
            "type": "image",
            "image": image_file_path,
            "resized_height": 100,
            "resized_width": 500,
            },
            {
            "type": "text",
            "text": prompt,
            }
        ]}]

    response = predict(messages, val_peft_model)

    print(f"predict:{response}")
    print(f"gt:{label}\n")

    test_image_list.append(swanlab.Image(image_file_path, caption=response))

swanlab.log({"Prediction": test_image_list})

# 在Jupyter Notebook中运行时要停止SwanLab记录,需要调用swanlab.finish()
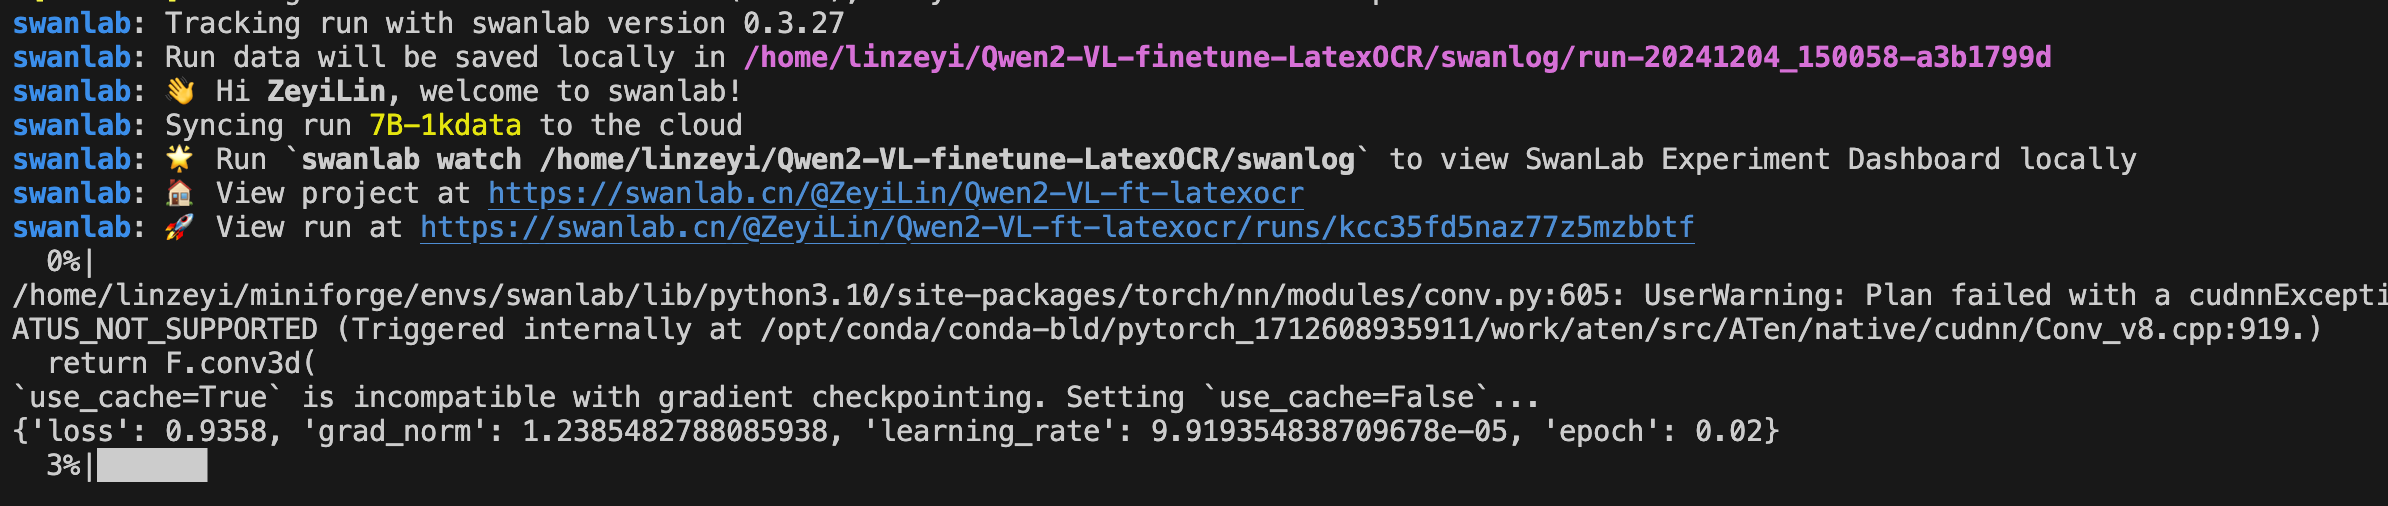
swanlab.finish()看到下面的进度条即代表训练开始:
💻 训练结果演示
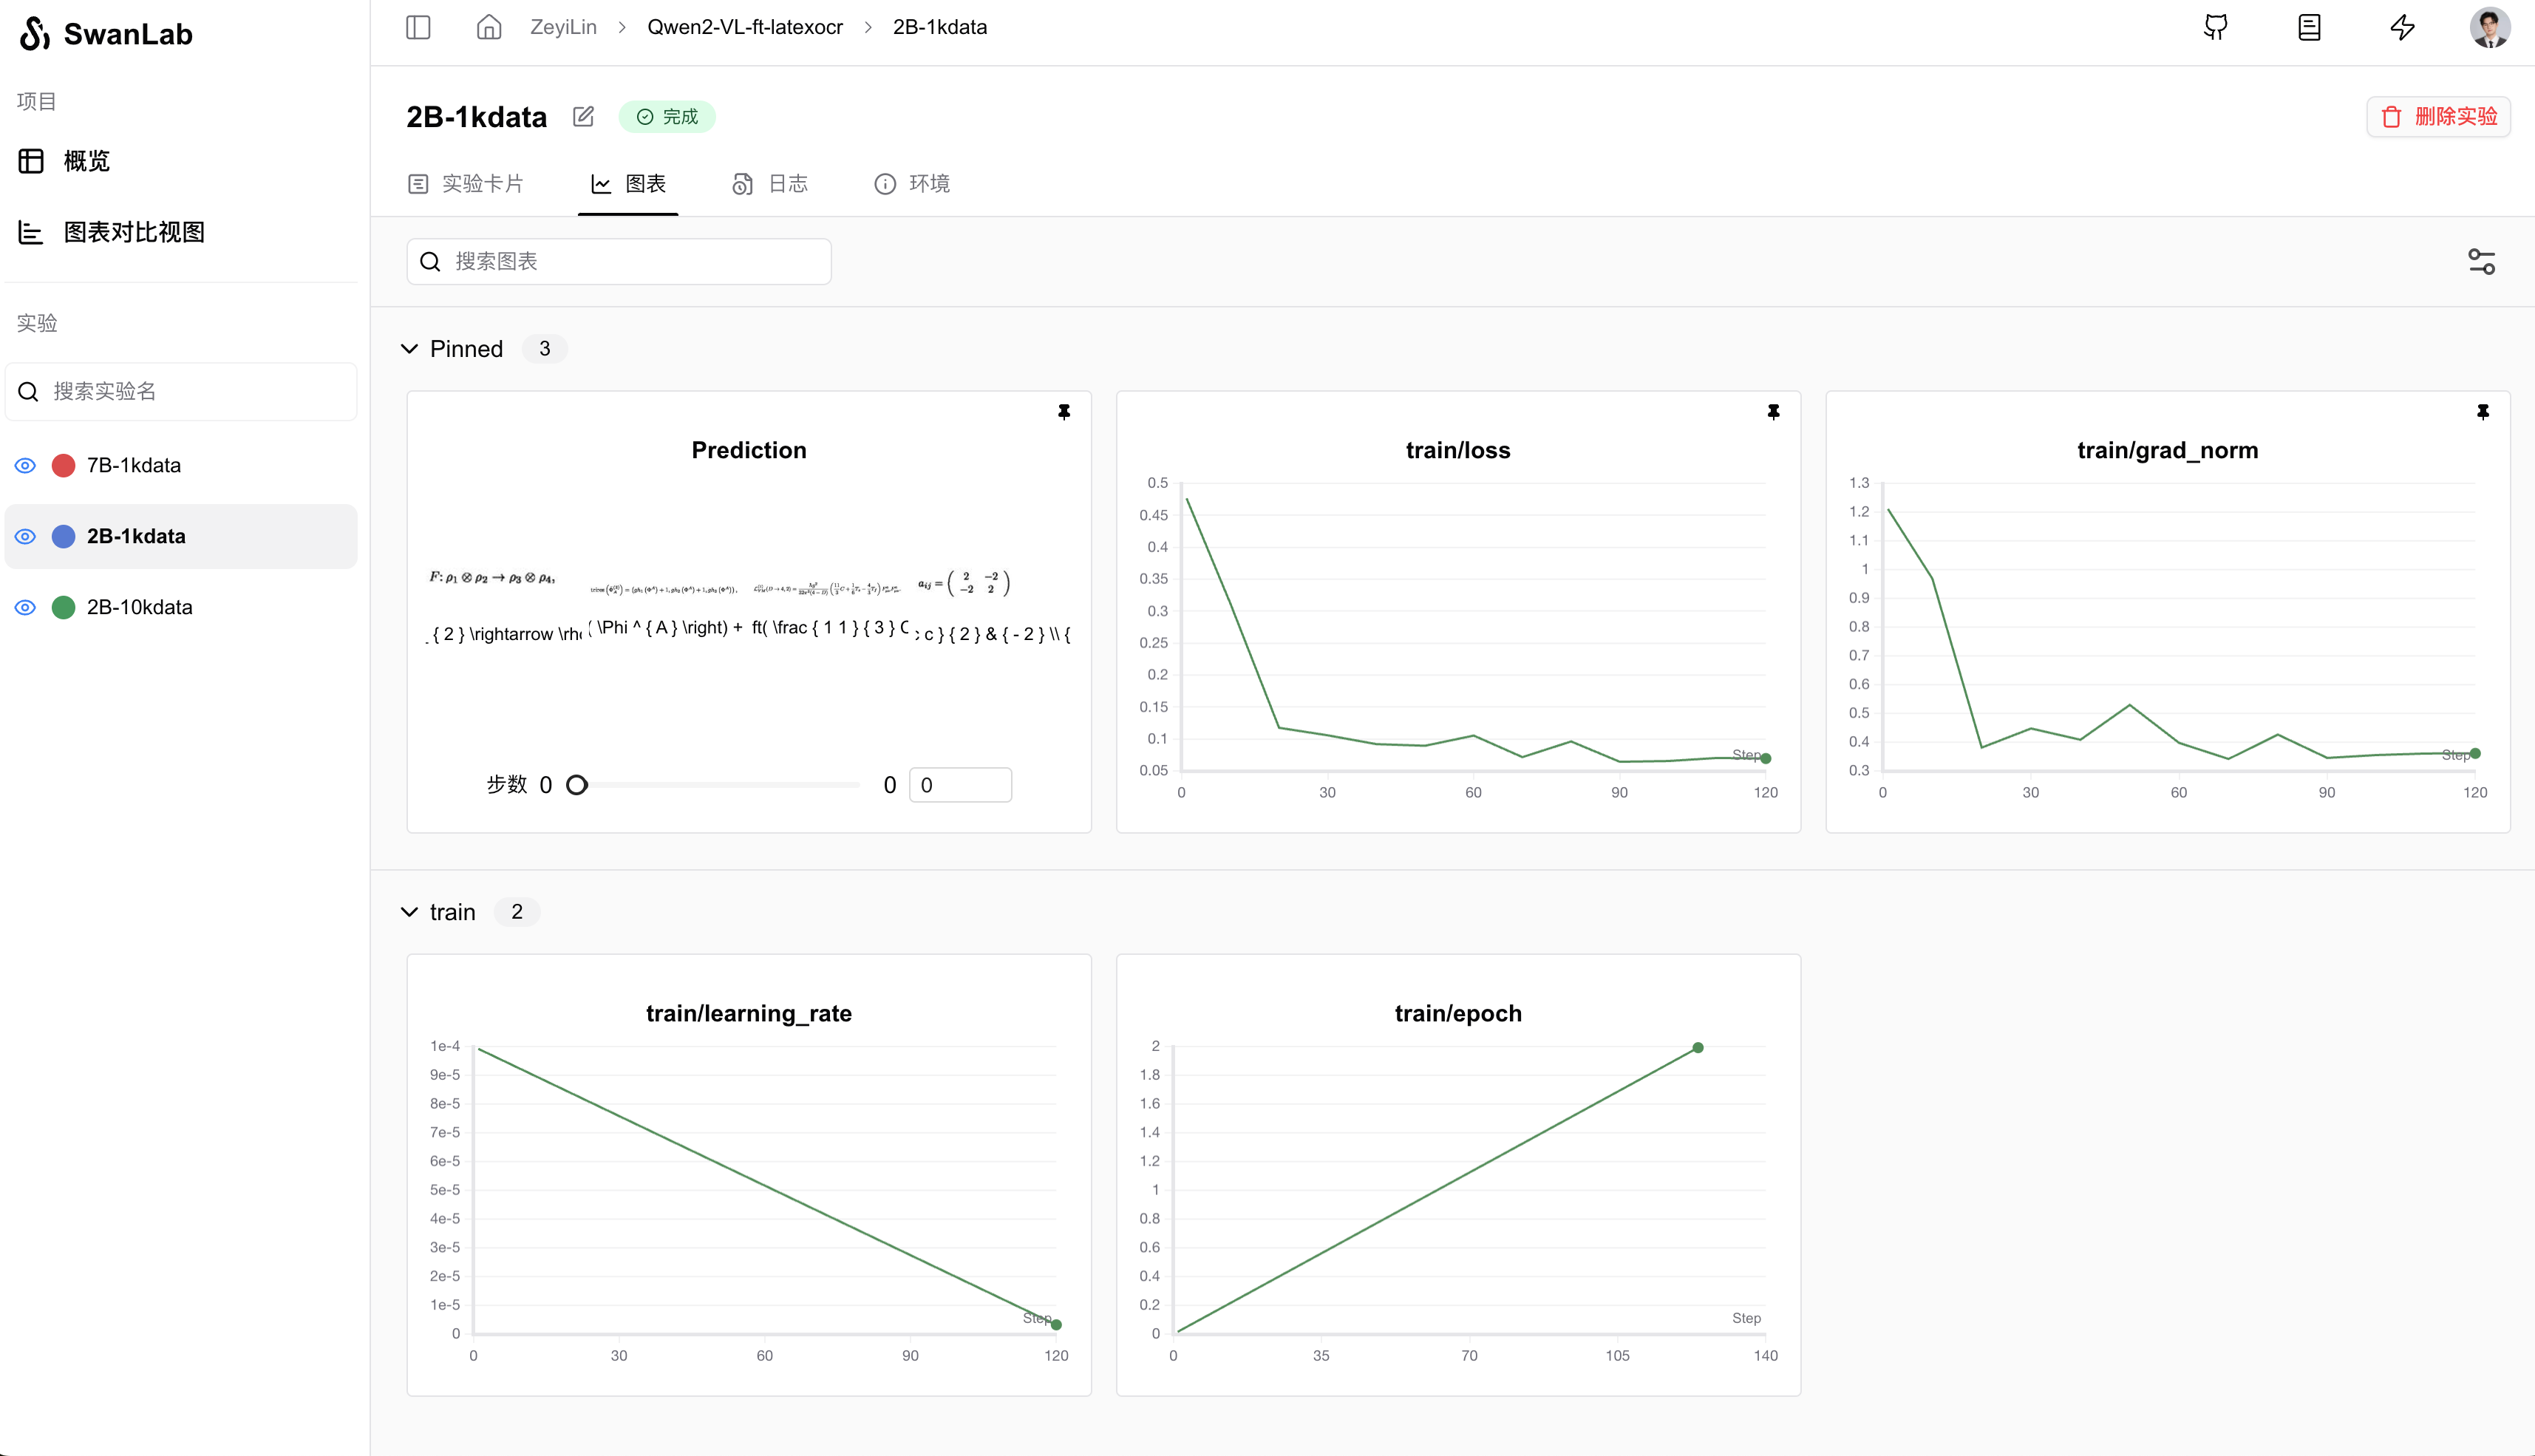
从SwanLab图表中我们可以看到,学习率的下降策略是线性下降,loss随epoch呈现下降趋势,同时grad_norm也呈现下降趋势。这种形态反映了模型的训练效果是符合预期的。
在Prediction图表中记录着模型最终的输出结果,可以看到模型在回答的风格已经是标准的LaTex语法。
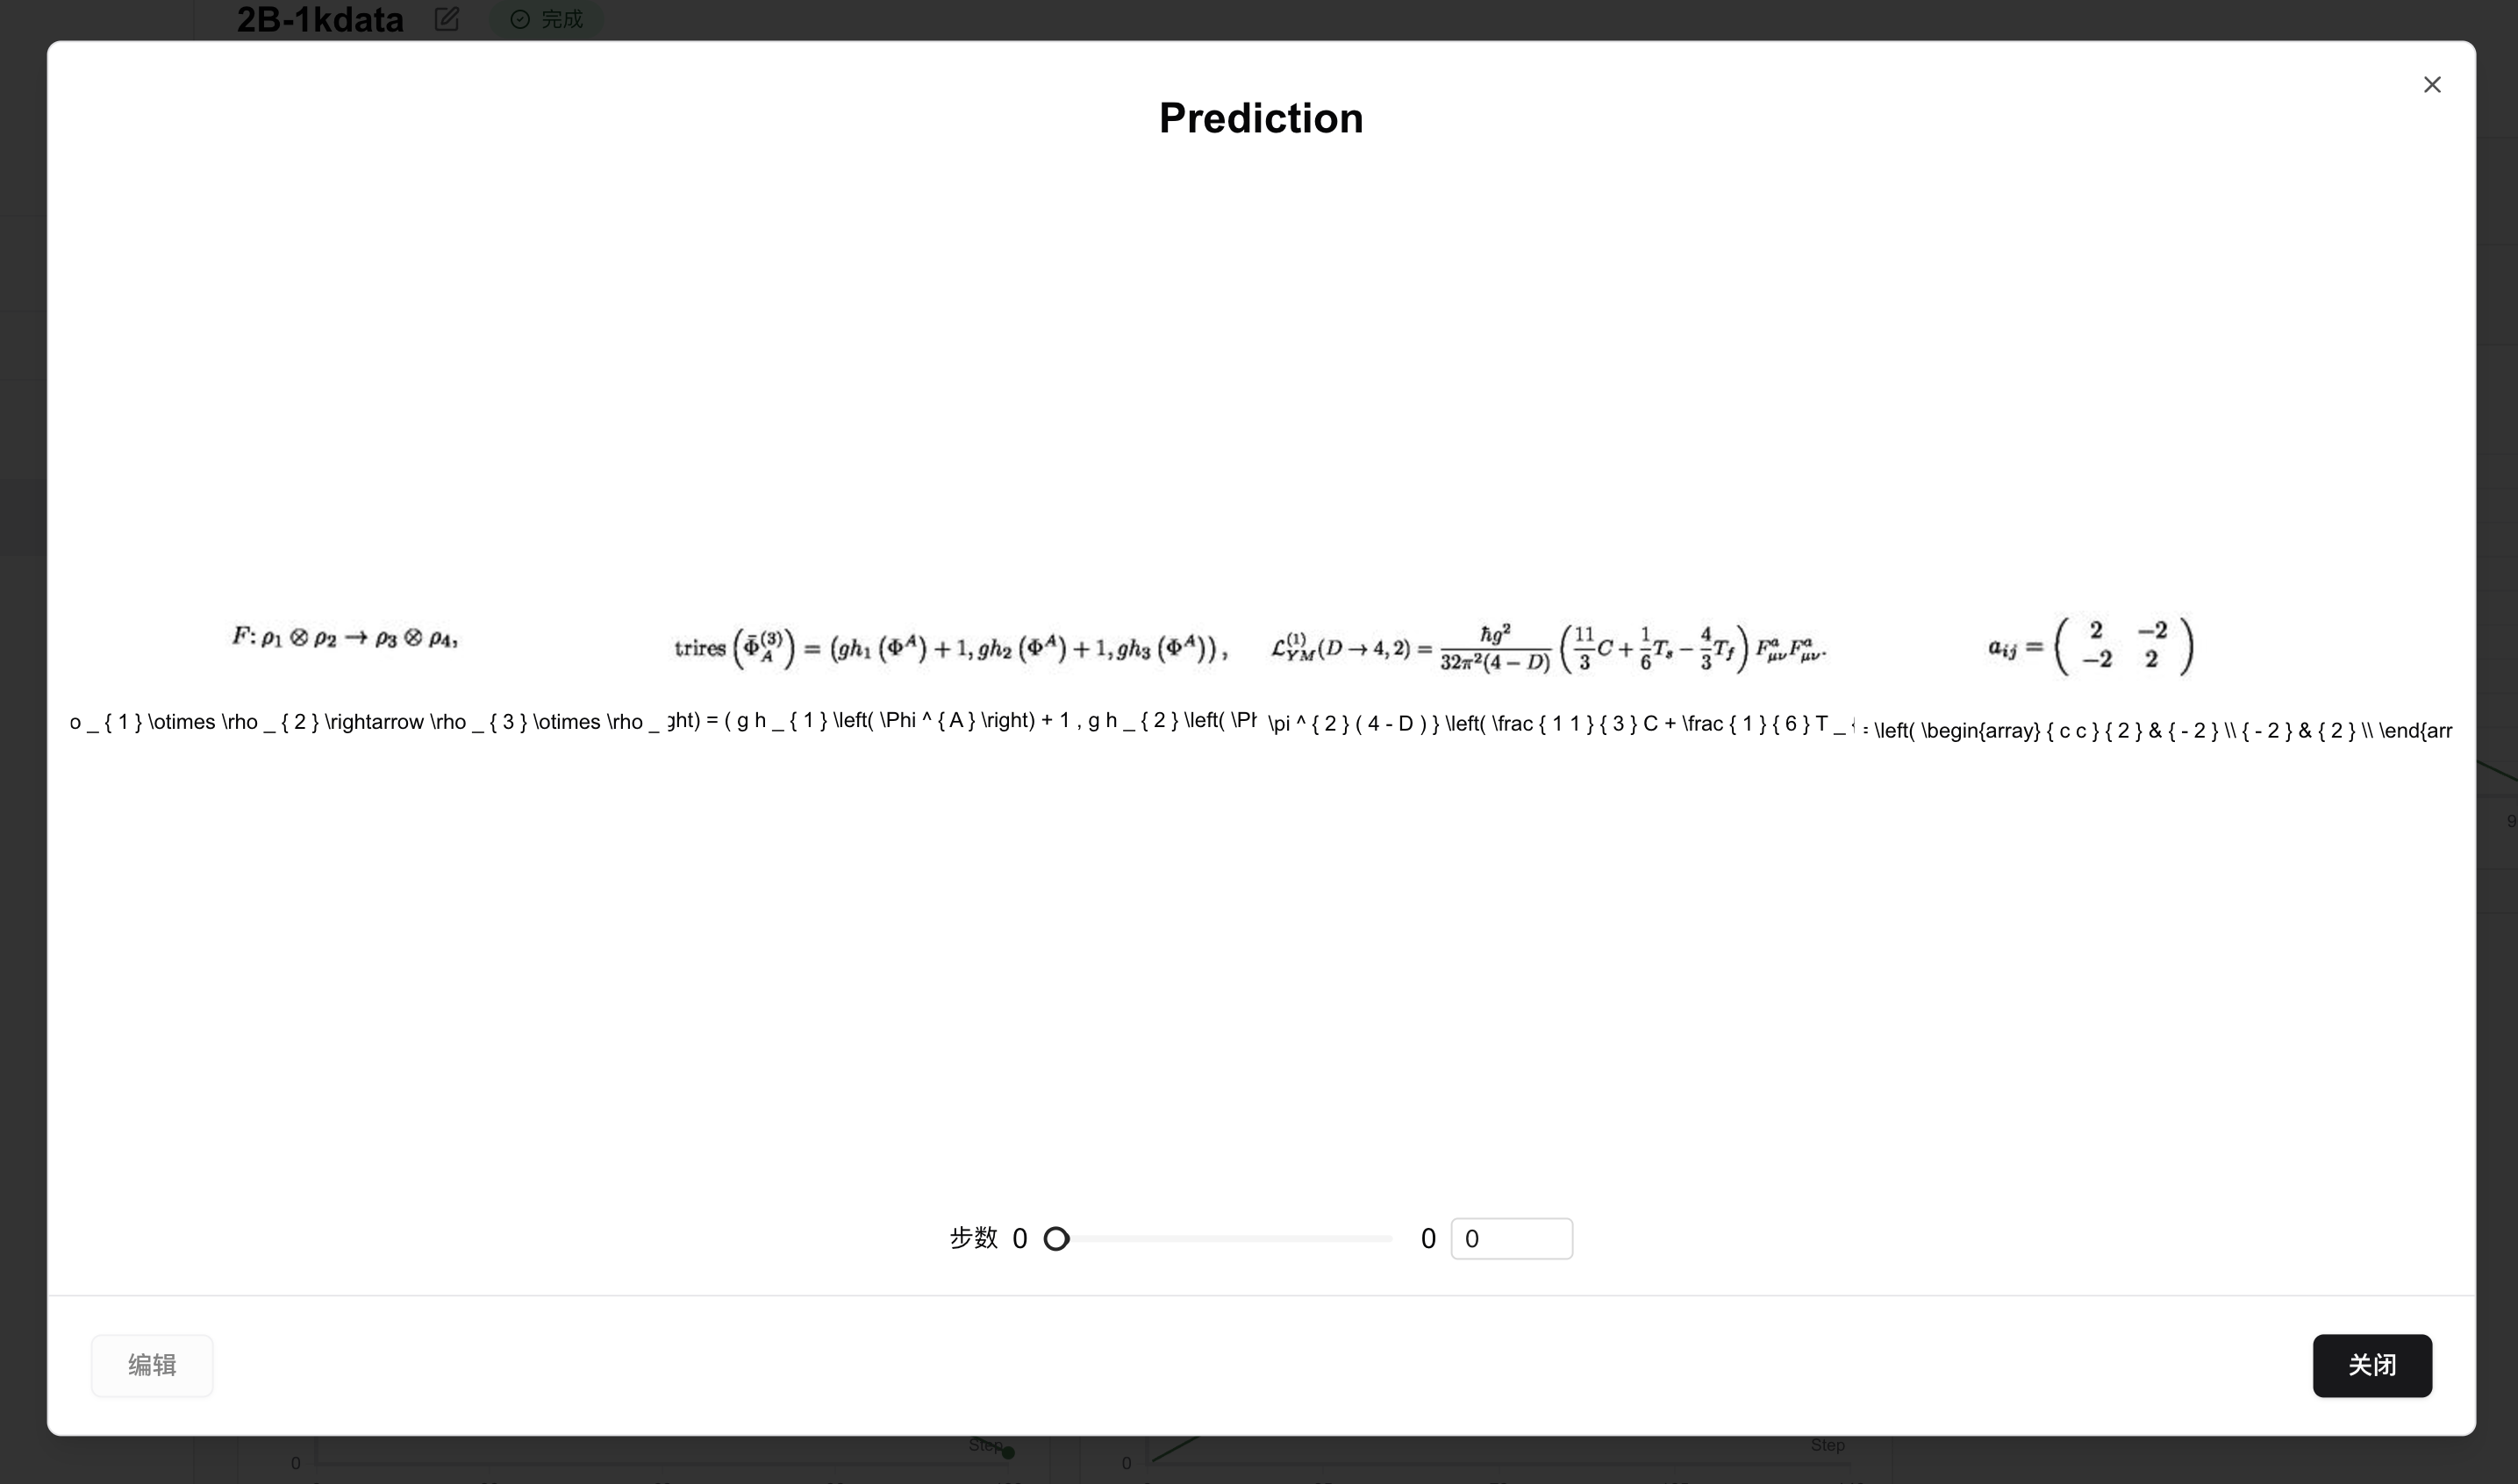
对这四个结果进行验证,跟输入图像完成一致。

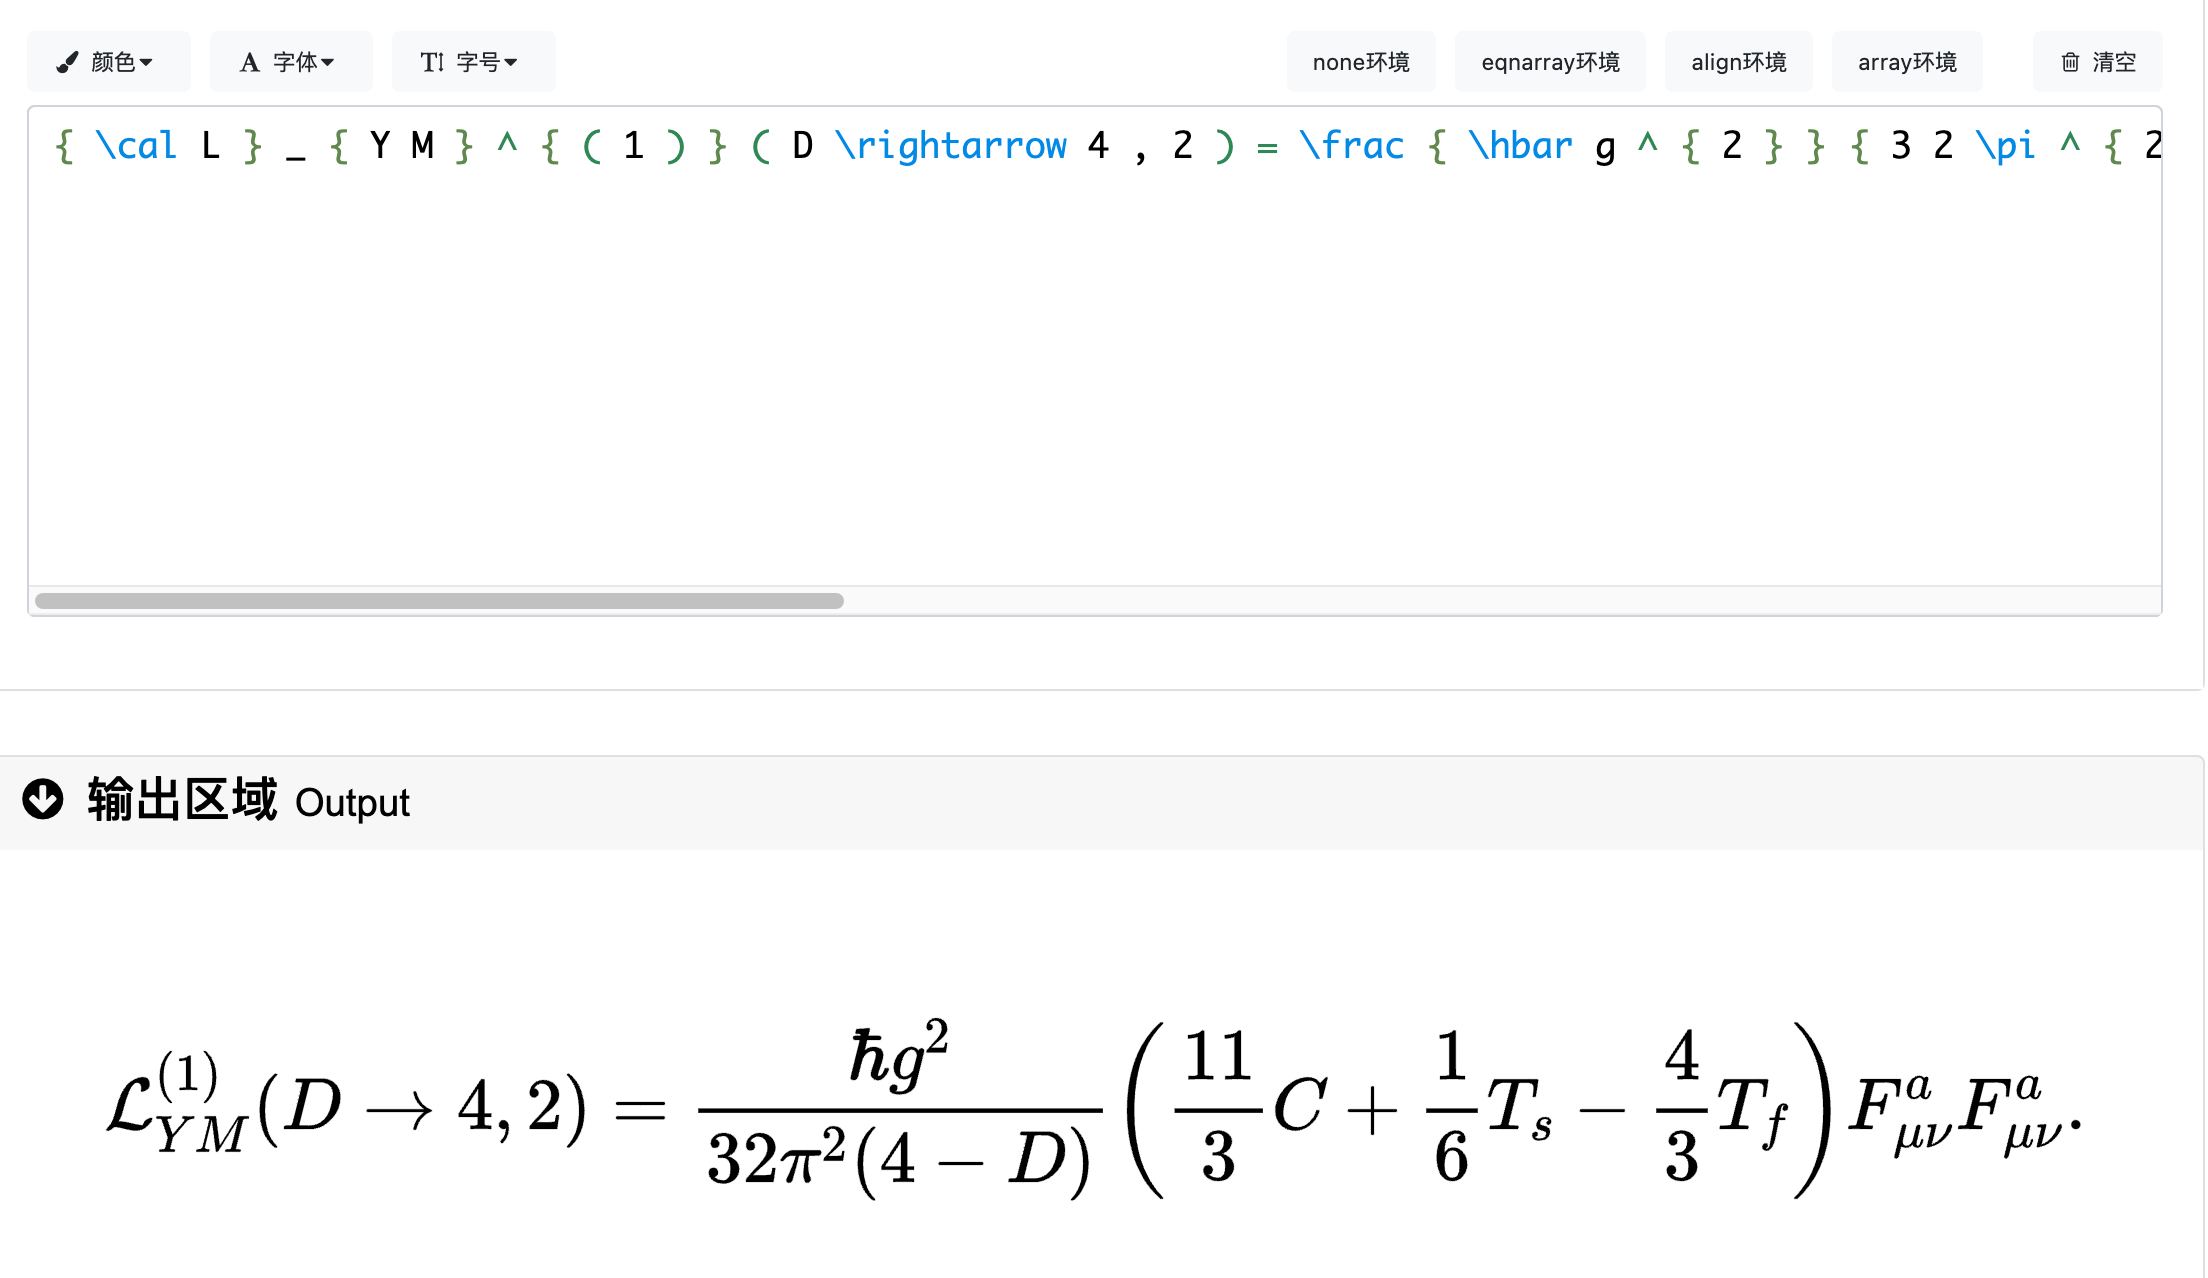
那么与没有微调的模型进行效果对比,我们选择997.jpg:

没有微调:(10,10),(989,989)
微调后:\mathrm { t r i e s } \left( \vec { \Phi } _ { A } ^ { ( 3 ) } \right) = ( g h _ { 1 } \left( \Phi ^ { A } \right) + 1 , g h _ { 2 } \left( \Phi ^ { A } \right) + 1 , g h _ { 3 } \left( \Phi ^ { A } \right) )可以看到没有微调的模型,对于这张图片的输出明显是错误的;
而微调后的模型,有着非常完美表现:
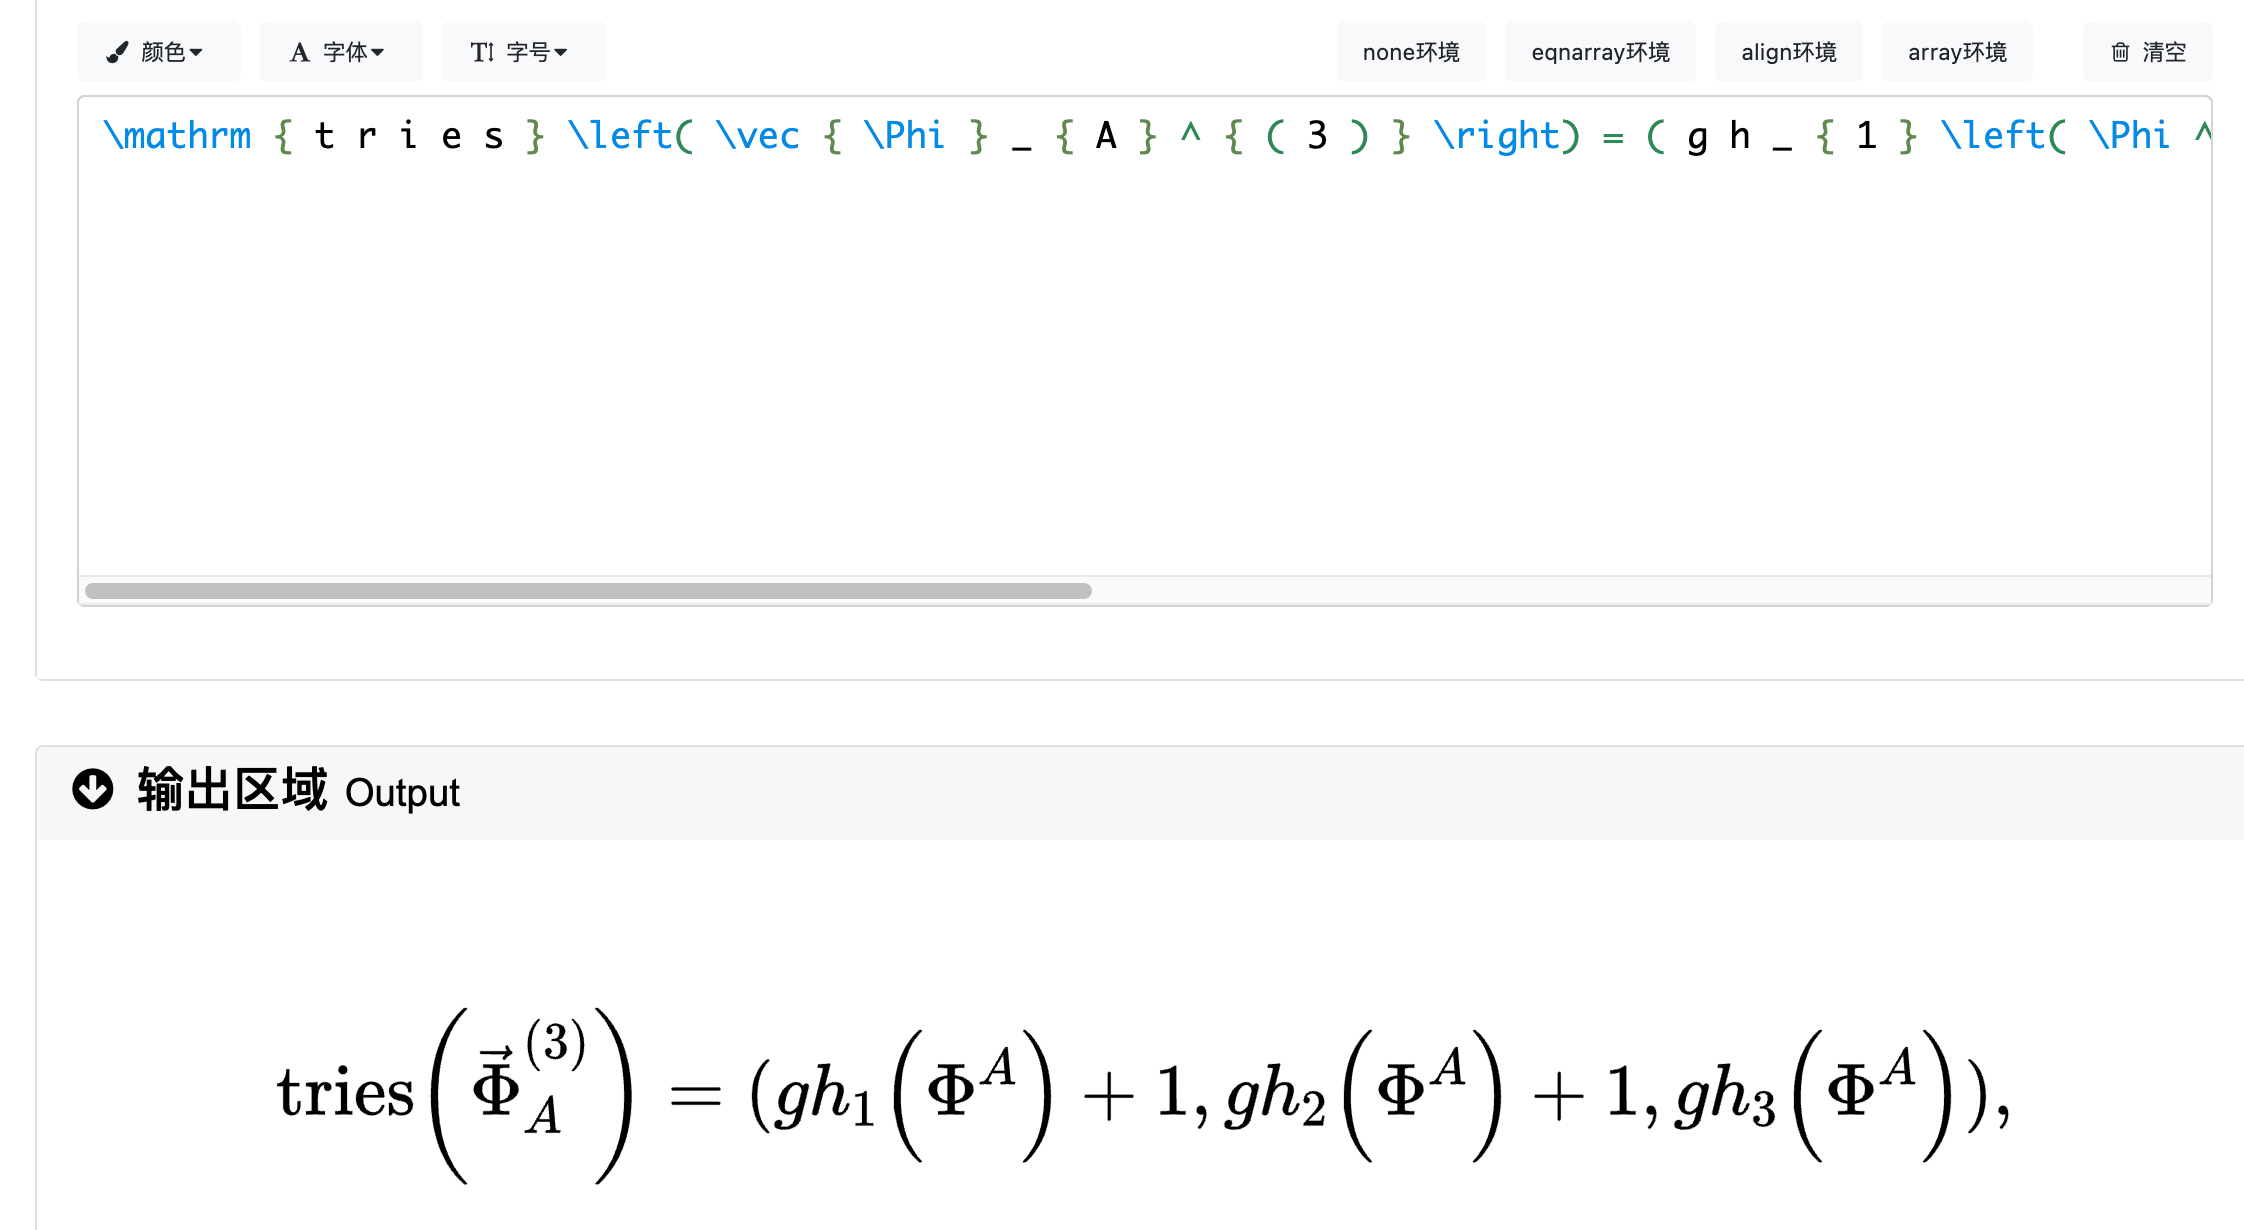
🧐 推理LoRA微调后的模型
加载lora微调后的模型,并进行推理:
from transformers import Qwen2VLForConditionalGeneration, AutoProcessor
from qwen_vl_utils import process_vision_info
from peft import PeftModel, LoraConfig, TaskType

prompt = "你是一个LaText OCR助手,目标是读取用户输入的照片,转换成LaTex公式。"
local_model_path = "./Qwen/Qwen2-VL-2B-Instruct"
lora_model_path = "./output/Qwen2-VL-2B-LatexOCR/checkpoint-124"
test_image_path = "./LaTeX_OCR/997.jpg"

config = LoraConfig(
    task_type=TaskType.CAUSAL_LM,
    target_modules=["q_proj", "k_proj", "v_proj", "o_proj", "gate_proj", "up_proj", "down_proj"],
    inference_mode=True,
    r=64,  # Lora 秩
    lora_alpha=16,  # Lora alaph,具体作用参见 Lora 原理
    lora_dropout=0.05,  # Dropout 比例
    bias="none",
)

# default: Load the model on the available device(s)
model = Qwen2VLForConditionalGeneration.from_pretrained(
    local_model_path, torch_dtype="auto", device_map="auto"
)

model = PeftModel.from_pretrained(model, model_id=f"{lora_model_path}", config=config)
processor = AutoProcessor.from_pretrained(local_model_path)

messages = [
    {
        "role": "user",
        "content": [
            {
                "type": "image",
                "image": test_image_path,
                "resized_height": 100,
                "resized_width": 500,
            },
            {"type": "text", "text": f"{prompt}"},
        ],
    }
]

# Preparation for inference
text = processor.apply_chat_template(
    messages, tokenize=False, add_generation_prompt=True
)
image_inputs, video_inputs = process_vision_info(messages)
inputs = processor(
    text=[text],
    images=image_inputs,
    videos=video_inputs,
    padding=True,
    return_tensors="pt",
)
inputs = inputs.to("cuda")

# Inference: Generation of the output
generated_ids = model.generate(**inputs, max_new_tokens=8192)
generated_ids_trimmed = [
    out_ids[len(in_ids) :] for in_ids, out_ids in zip(inputs.input_ids, generated_ids)
]
output_text = processor.batch_decode(
    generated_ids_trimmed, skip_special_tokens=True, clean_up_tokenization_spaces=False
)

print(output_text[0])补充
详细硬件配置和参数说明
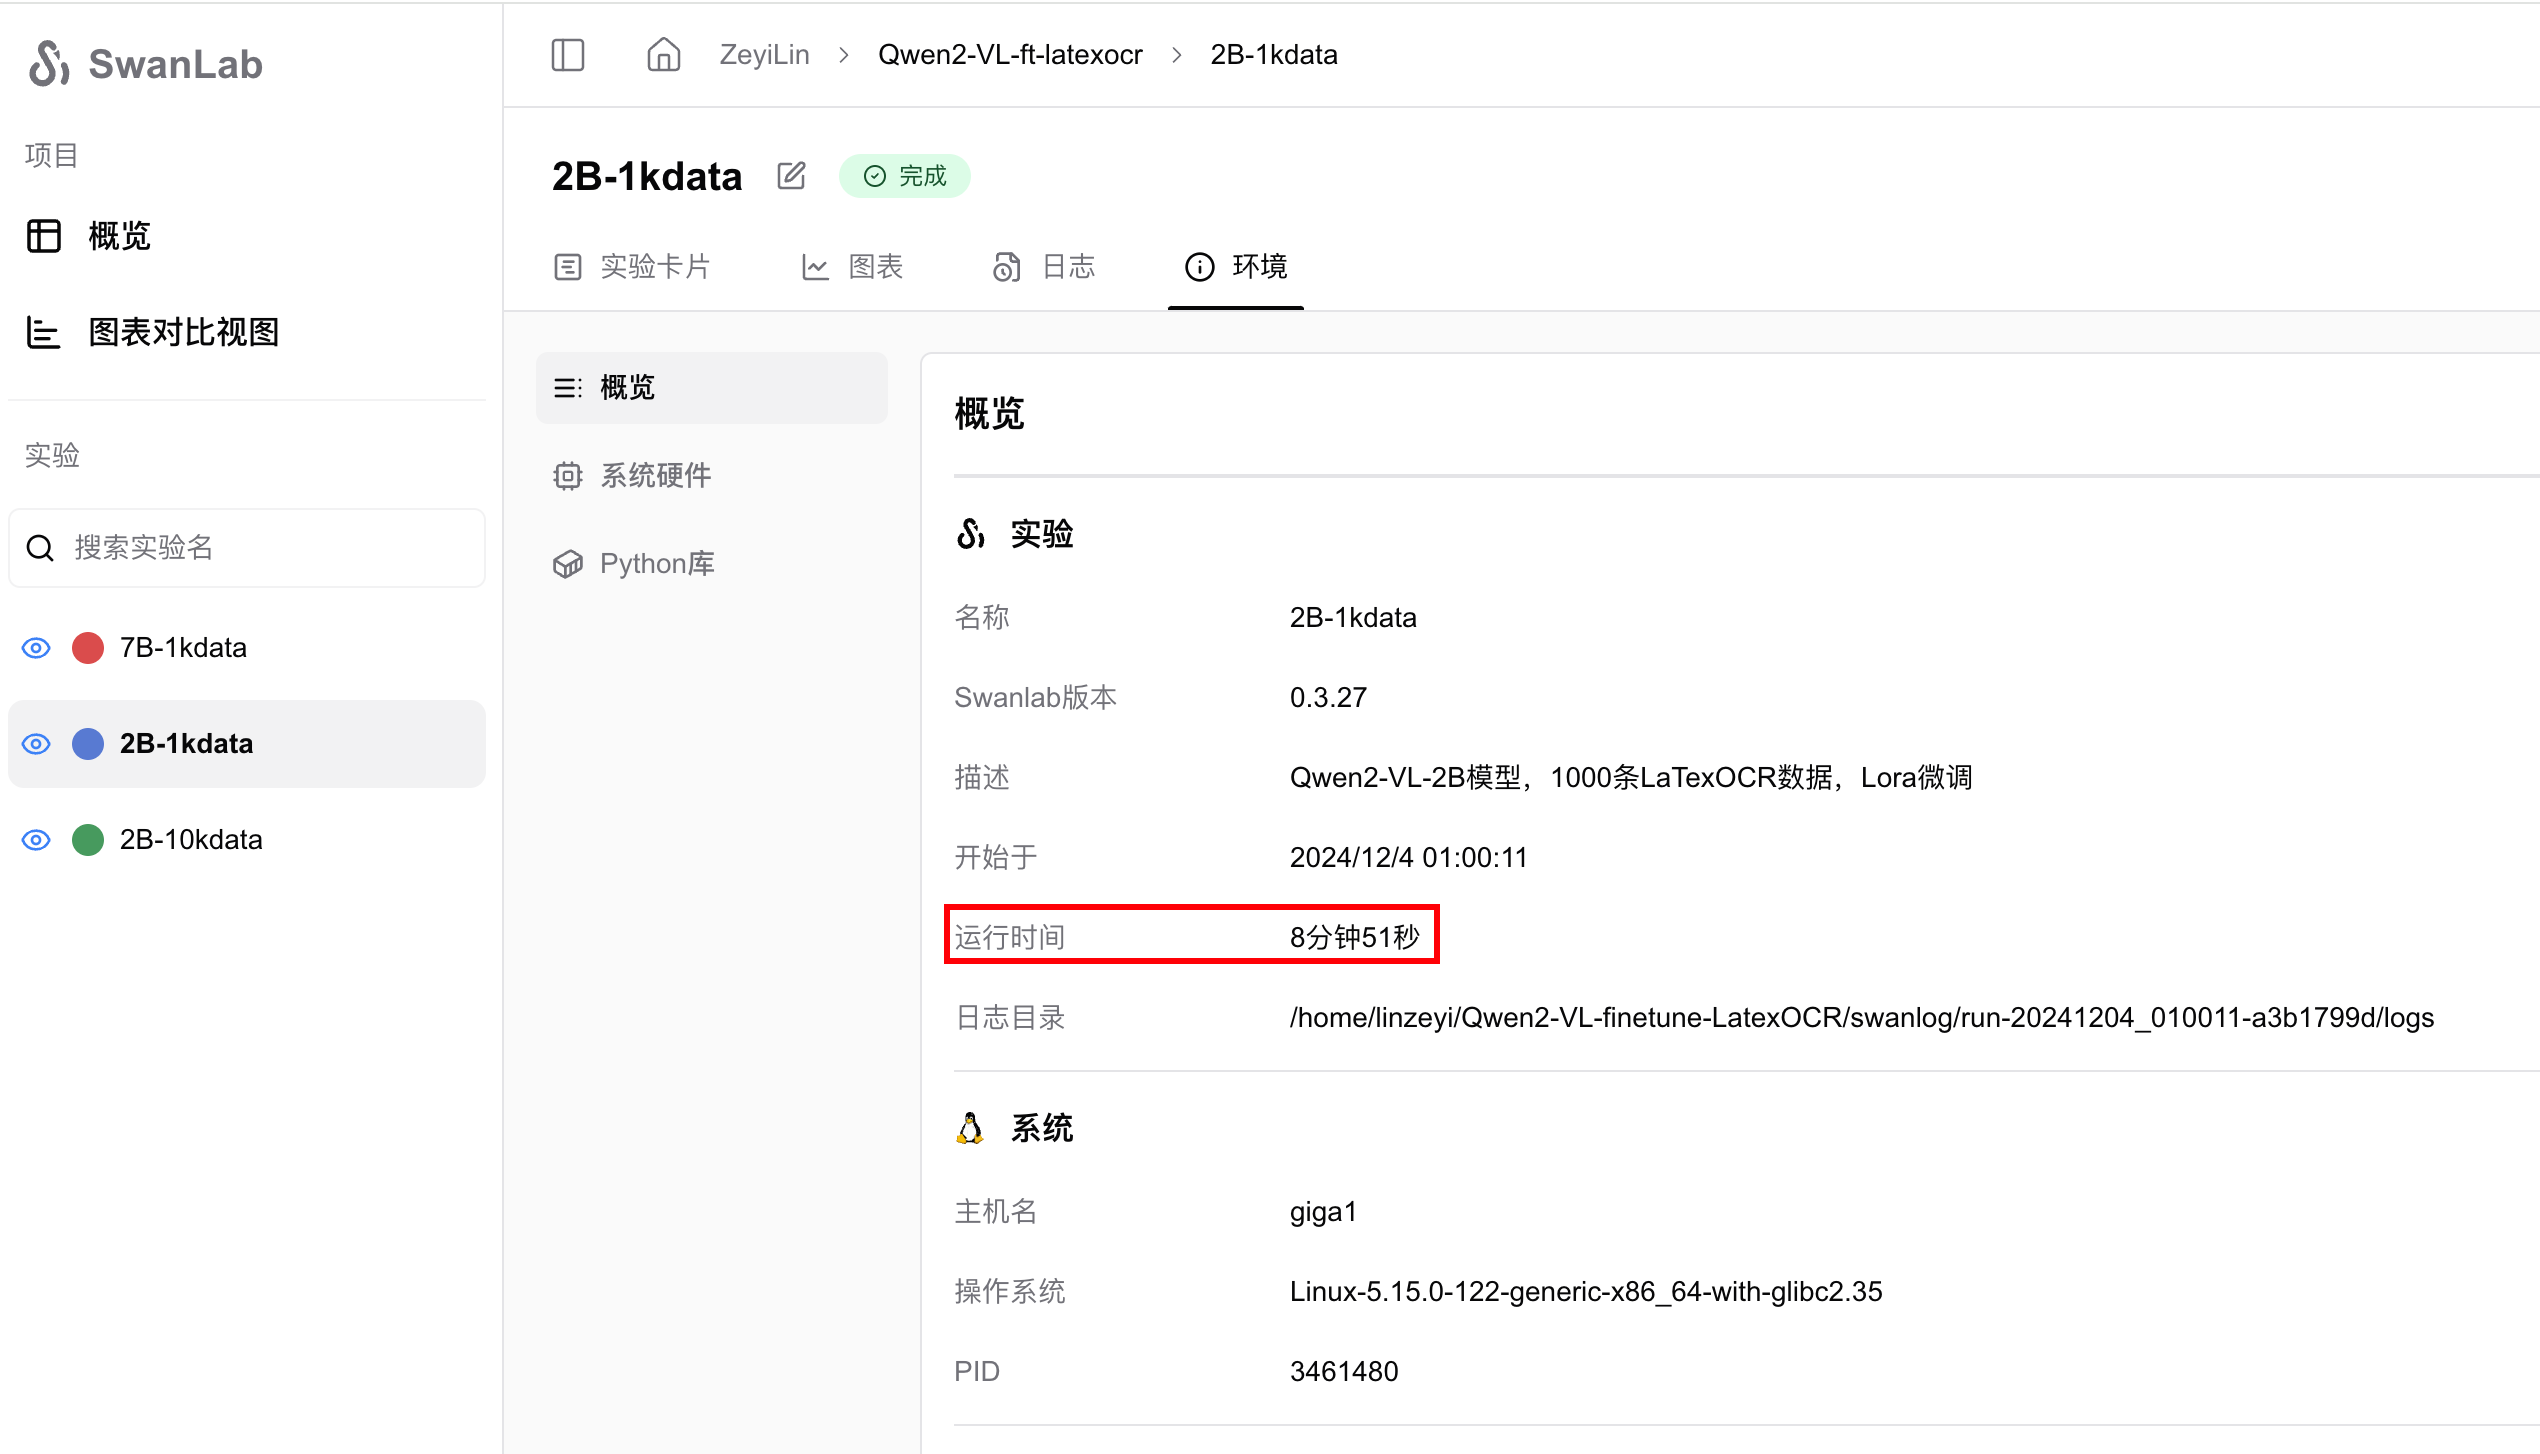
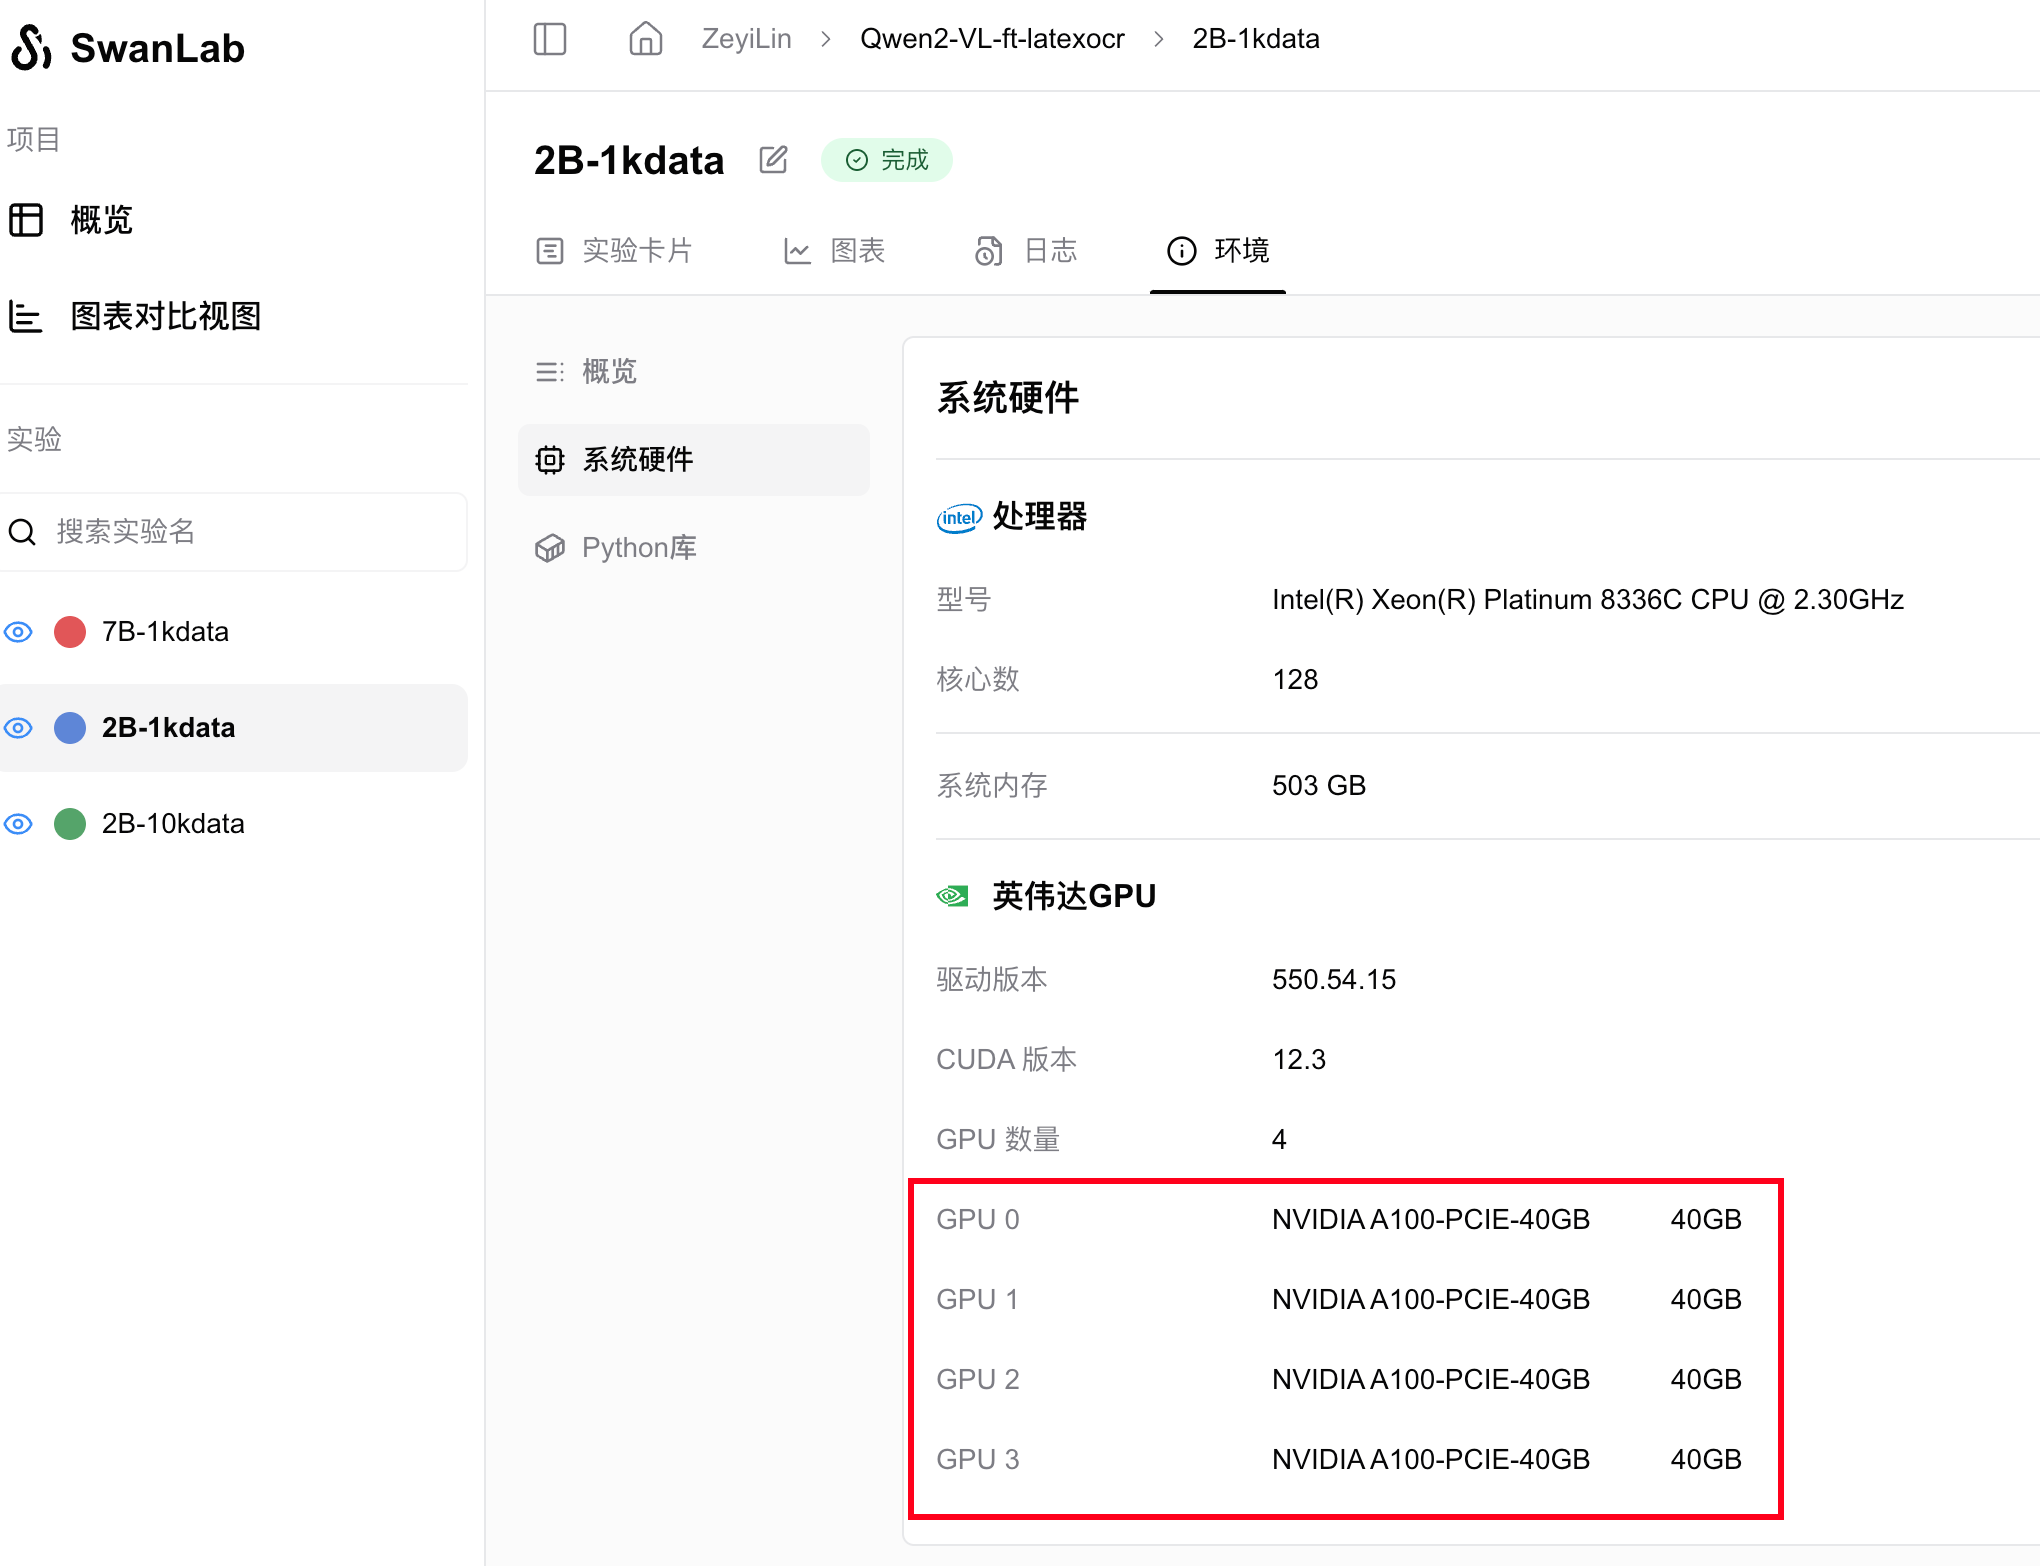
使用4张A100 40GB显卡(总显存占用大约),batch size为4,gradient accumulation steps为4,训练2个epoch的用时为8分钟51秒。
注意
在微调脚本中,val_peft_model加载的是一共固定的checkpoint文件,如果你添加了数据或超参数,请根据实际情况修改checkpoint文件路径。